
Mini Pumpkin & Mini Squash Care Guide
Mini Pumpkins and Mini Squash are a joy to grow, but they're a little trickier than some fruiting plants! Use this guide for key care tips and you'll be enjoying the delightful fruits of your labor soon enough.

Thinning
Be sure to thin Mini Pumpkins and Mini Squash to 1 plant per yCube to ensure the plant has sufficient access to water, nutrients, air, light, and room for growth.
Ideal Growing Environment
Mini Pumpkins and Mini Squash do best in the center (maximum light intensity zone) of your Gardyn, but they can also grow in moderate light intensity zones as well. Alternatively, you can plant them in a low light intensity spot as long as you use the Trellis or Plant Belts to direct the vine into a moderate or higher intensity zone as it grows.
Both varieties do well with temperatures around 65-75°F. Due to their size and fruit weight, they require support as they mature. Once the plant reaches 6 inches tall, ensure it’s in its final spot on your Gardyn so that as you add the Trellis or Plant Belts, you will not have to move them later.
For healthy Mini Pumpkins and Mini Squash, the environment inside your Gardyn matters just as much as the room environment where your Gardyn is located. Both varieties are nutrient-intensive and sensitive to nutrient availability, especially during flowering. They also have large root systems. To avoid root rot and ensure sufficient access to water and nutrients, it’s important to add the Blooming & Fruiting dosage of plant food (1 teaspoon per gallon of water in the tank) and stay on top of twice-monthly root pruning along with weekly doses of HydroBoost. In addition, we recommend only growing two Mini Pumpkin or Mini Squash yCubes on your Gardyn at a time.
Pollination
Follow the video whether you're growing a Mini Pumpkin or a Mini Squash!
Mini Pumpkins and Mini Squash require pollination. These varieties are monecious, meaning they grow both male and female flowers on the same plant.
TIP: To increase pollination timing success, try growing 2 Mini Pumpkins or Mini Squash simultaneously, allowing you to cross-pollinate the plants. You can also try to pick and save a male flower by removing its petals and placing it in a dry, airtight container in the refrigerator for 1-2 days before using it.
Male flowers grow and open first. They have thin, straight stems, and once open, you can also identify a male flower by its stamen, where the male reproductive parts are located.
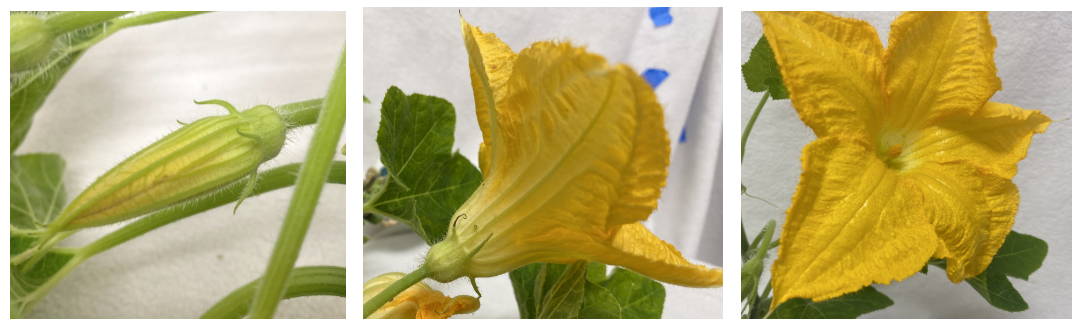
Male flower from left to right: unopened, from the side with a straight stem leading up to the flower's base, and looking at the stamen covered in pollen inside the flower's center
Female flowers have round, swollen stems (like a baby fruit), and once open, you can also identify a female flower by its stigma, where pollination must occur to produce a fruit. Female flowers grow and open later than male flowers, so be patient before pollinating!
Note: If your plant is stressed due to either inadequate nutrient availability or other environmental stressors, its female flowers will shrivel up, die, and drop off the plant almost immediately.
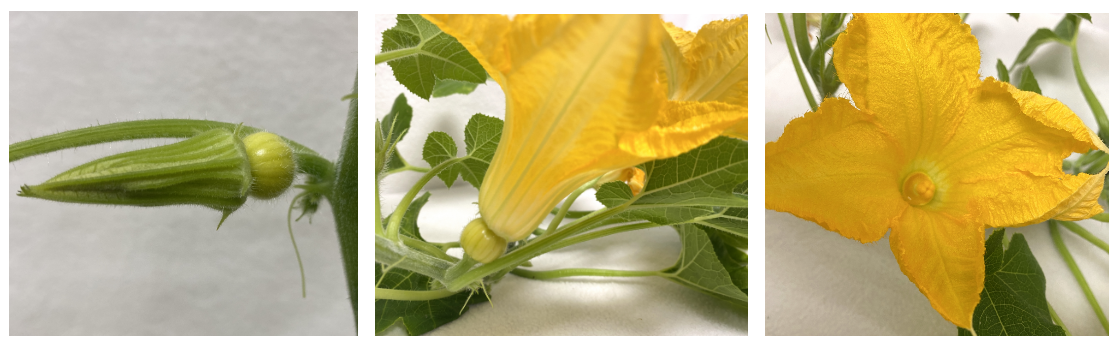
Female flower from left to right: unopened, from the side with a round baby fruit shape leading up to the flower's base, and looking at the 4-lobed stigma inside the flower's center
Mini Squash female flower with fruit visible
Both male and female flowers must be present to pollinate and make fruit. Once you have both male and female flowers blooming, begin by plucking off a male flower. Remove all of its petals so only the stamen is left along with a bit of the flower’s stem for easy holding.
Use this flower to pollinate the female flowers by touching the stamen to the stigma and transferring pollen from one to the other. Be gentle yet thorough, ensuring you touch the outer edges, inside, and tops of each stigma. You can use the same male flower to pollinate multiple female flowers at once.
It’s best to first pollinate a few female flowers to ensure a higher probability of fruit forming. Then, once fruit begins to grow, it’s best to pinch off extra flowers and only keep 2-3 fruit per plant.
Pruning
While they are compact plants, these varietietues can still grow to be 2+ feet long. Keep these tips in mind when thinking about pruning the leaves, flowers, or main stem.
Pruning Leaves
Only remove leaves if they look unhealthy (yellow/brown/black) or are shading other plants on your Gardyn. Never prune more than ⅓ of the total number of leaves at a time, or your plant may struggle to produce flowers and fruit.
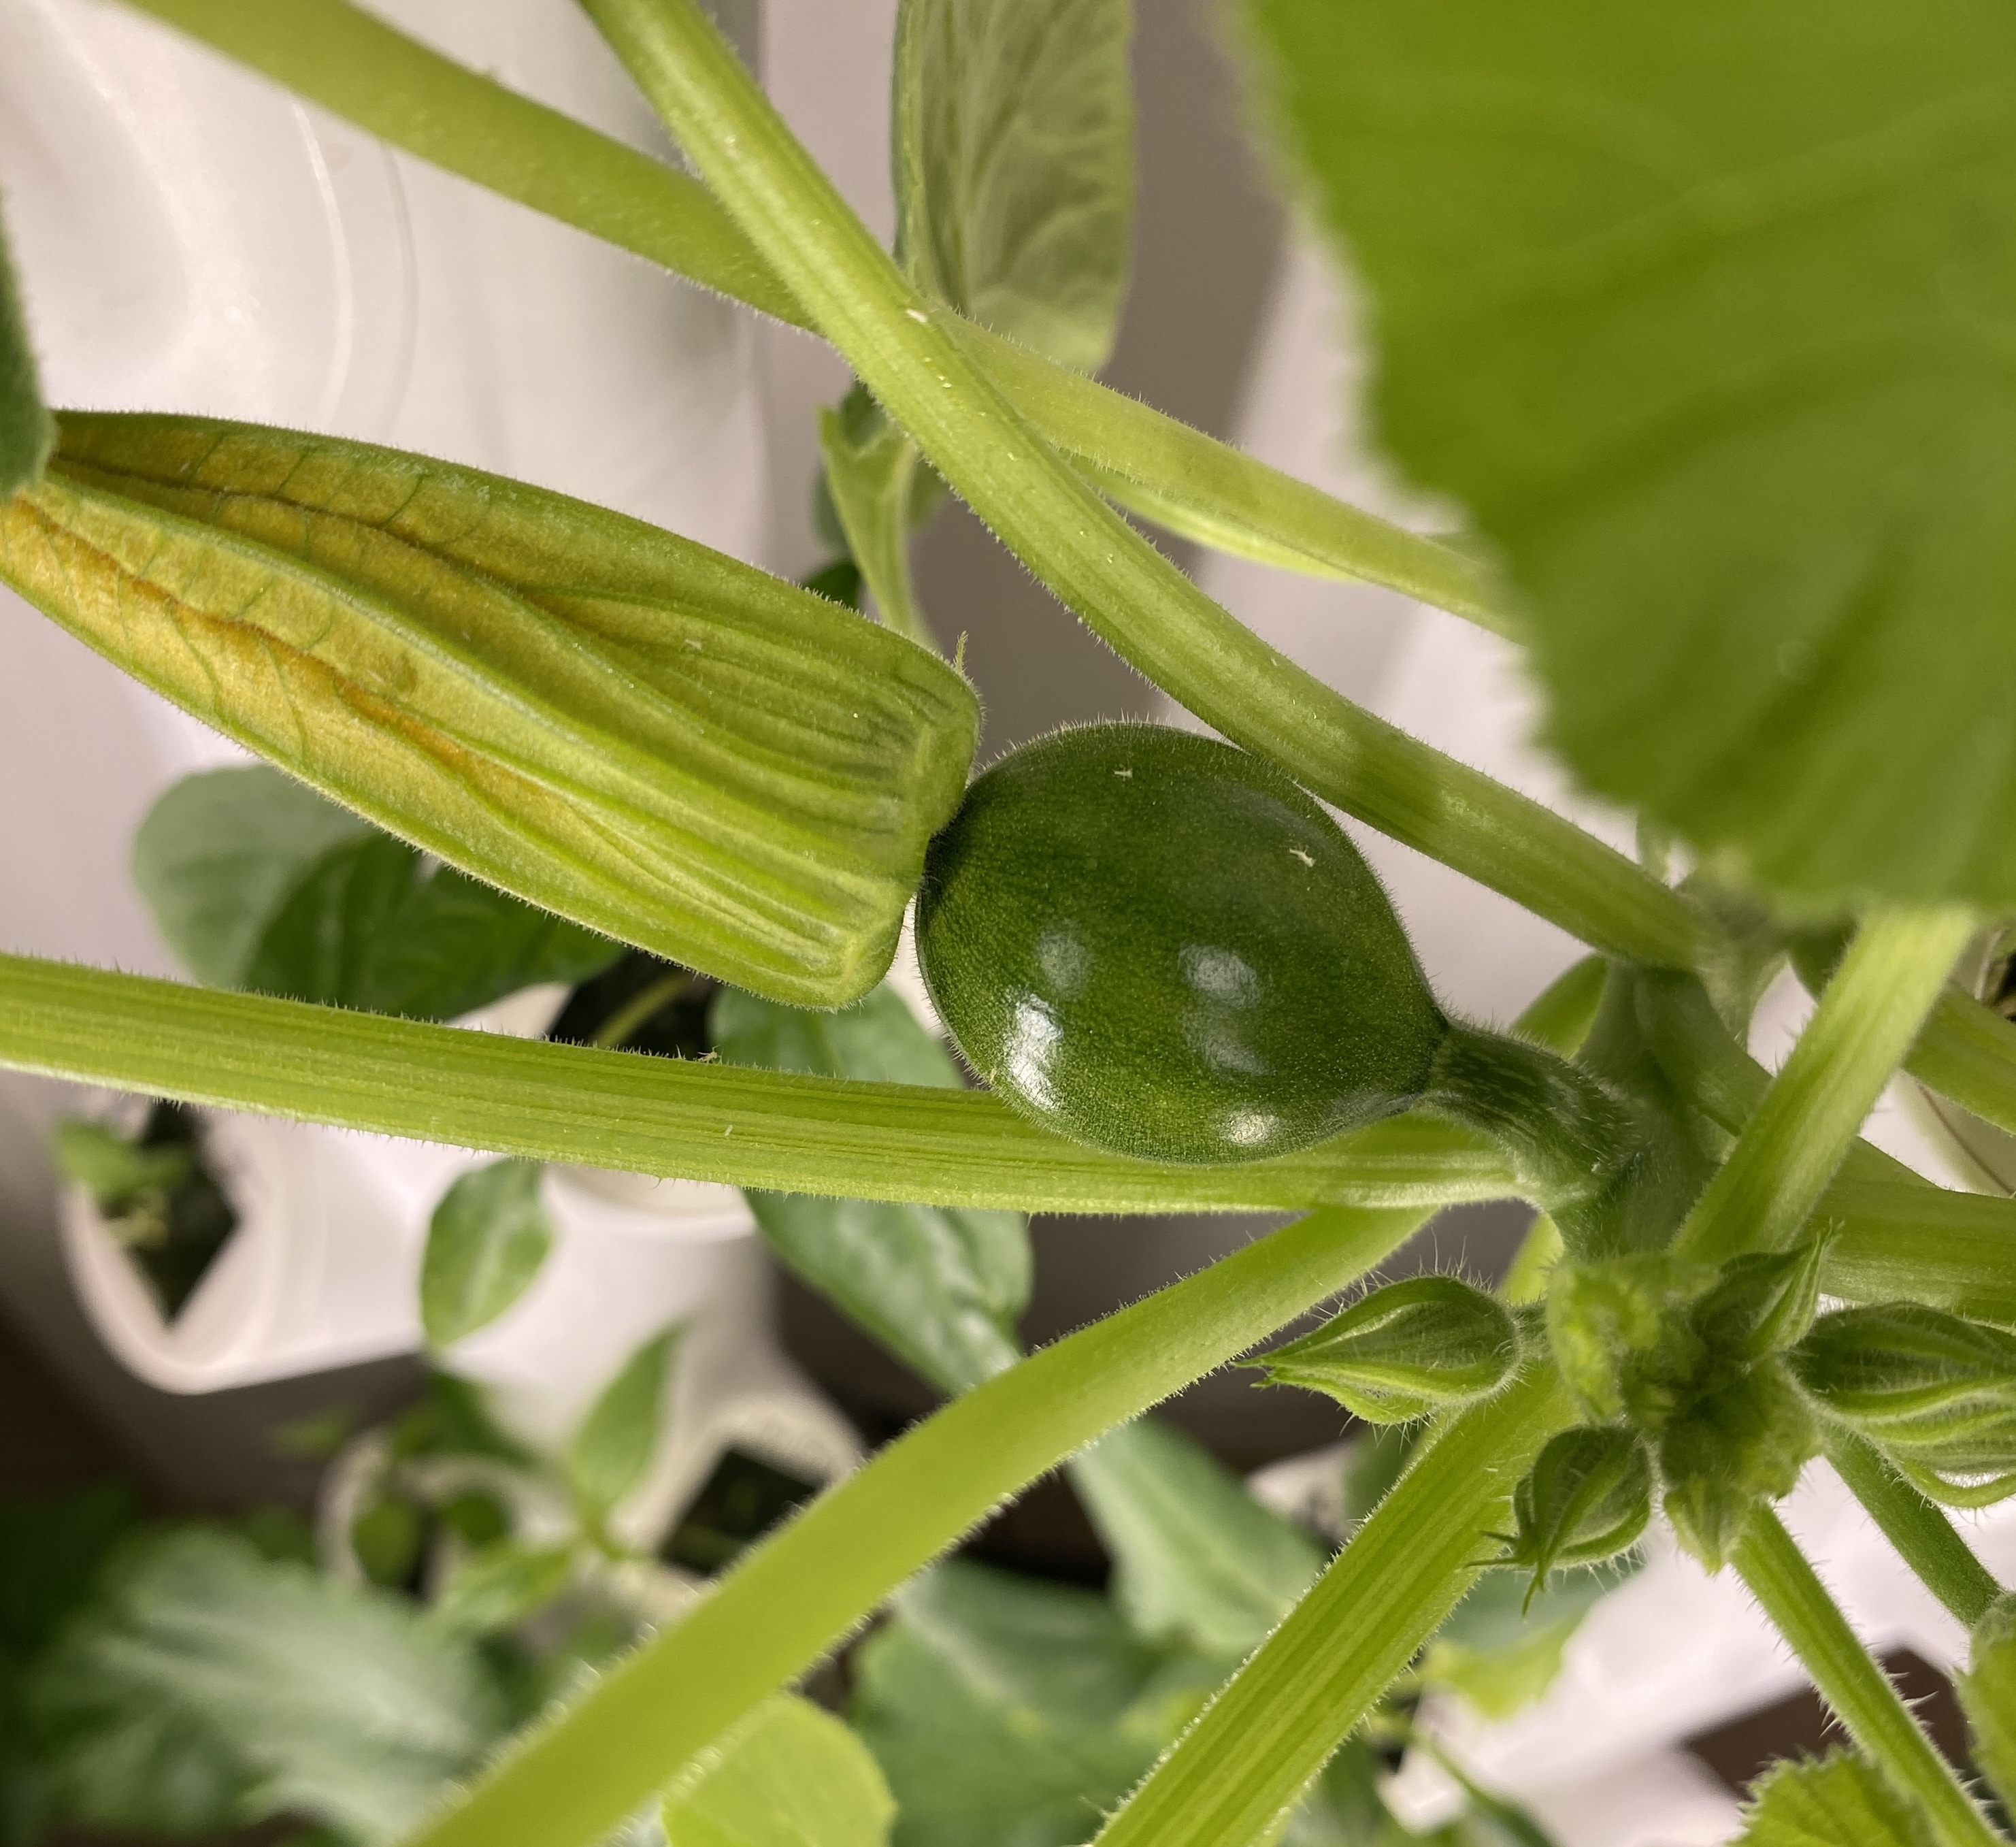
TIP: Mini Pumpkin and Mini Squash stems and leaves have small, prickly hairs which are used as a natural defense mechanism. When handled with bare hands, these hairs can create an itchy reaction, so we suggest using gloves when pruning or handling your vine.
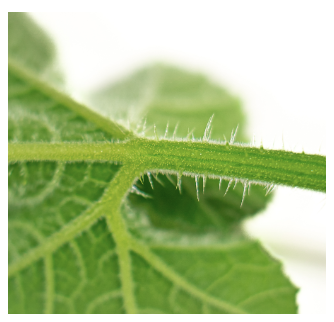
Prickly hairs on a Mini Pumpkin leaf stem
Pruning Flowers
Follow the video whether you're growing a Mini Pumpkin or a Mini Squash!
Snip off any flowers that appear until either the plant has at least 5 fully developed leaves, or the vine is around 6-8 inches long. Removing these early flowers encourages the plant to focus its energy on root and foliage development so it can better sustain the fruit later on.
As the vine grows, prune off any male flowers that start to shrivel after opening to send energy toward developing new flowers. After female flowers grow and you are done pollinating them, you can continue to remove male flowers as they appear. The flowers are edible (and delicious) fresh or fried!
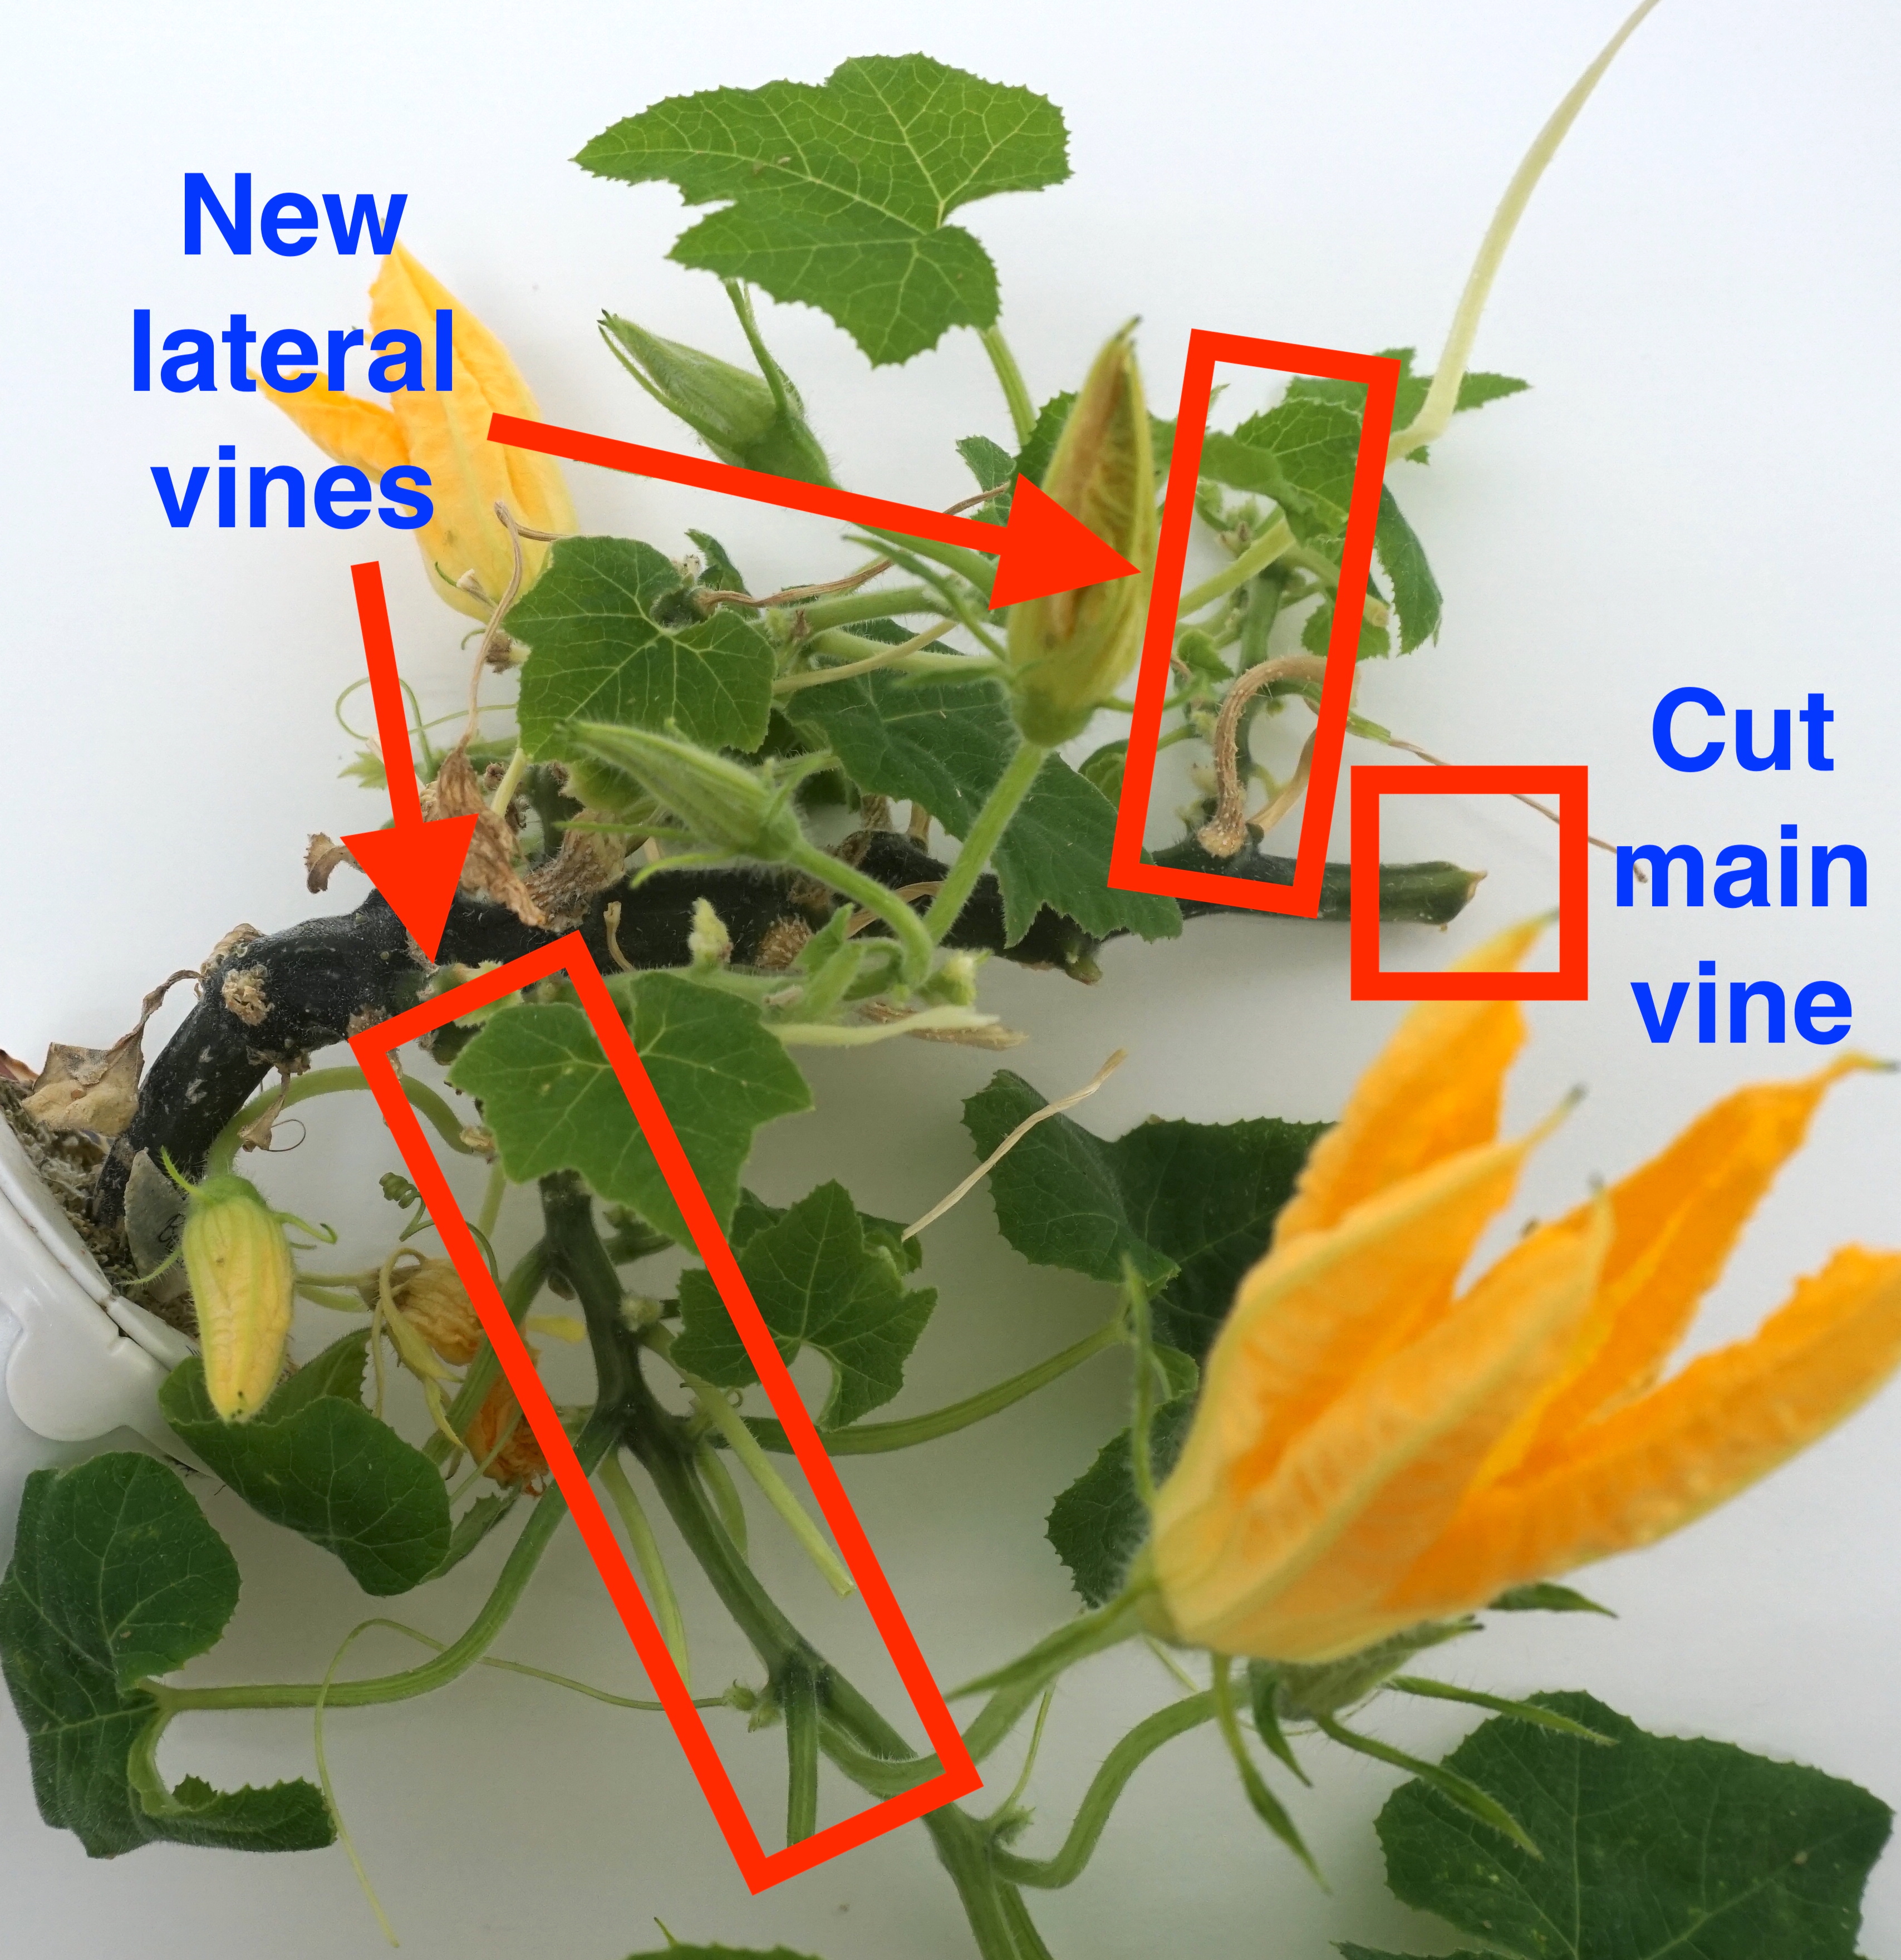
Pruning the Vine
If your vine grows too long and is outside the reach of your Gardyn’s light, you can trim the main vine back to encourage the creation of lateral vines. If you do this, note that you should never prune back more than ⅔ of the plant’s total length or height, and that patience will be key as you wait for new lateral branches to form.
Pests & Diseases
Aphids and spider mites are the most common pests of Mini Pumpkins and Mini Squashes. Your best chance of avoiding them is to maintain a healthy Gardyn through regular tank refreshes, root pruning, and all routine plant and device care. Healthy plants are resilient plants, meaning they can better deter pests in the first place!
Include our pest prevention tips (particularly beneficial insects) in your daily routine to keep issues at bay, then learn how to identify and address pests as needed with our pest-specific guides, below.
Aphids are greenish, red, black, or peach-colored sucking insects easily visible to the naked eye. They leave a sticky residue on foliage that attracts ants, and they multiply quickly, so it’s best to act fast if you think you see something unusual.
Adult spider mites are reddish brown or pale in color, oval-shaped, and very small. Affected leaves first show patterns of tiny spots, or stipplings, then may change color, curl, and fall off. Only later, more severe infestations show the webbing like that of a spider. Because spider mites are so small and easy to miss, if you think you see anything amiss, it’s best to act fast!
Harvesting
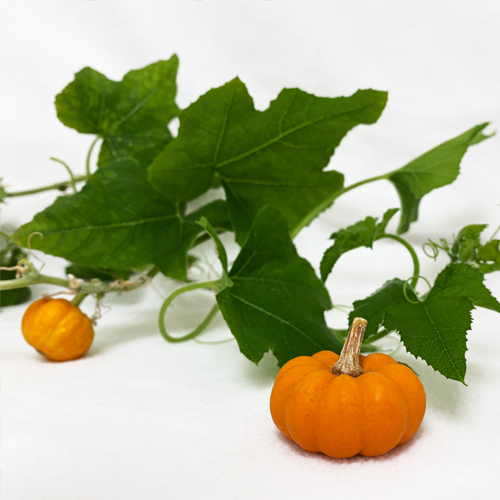
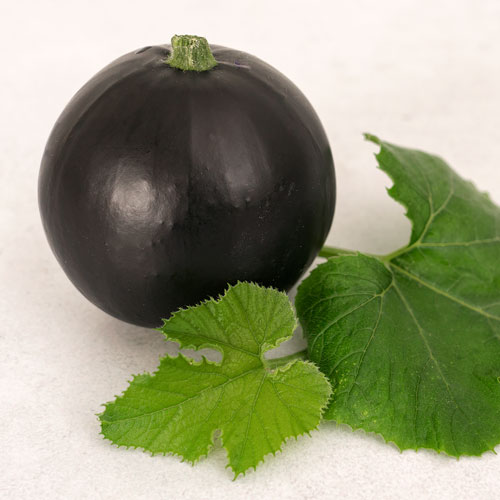
Mini Pumpkins are ready to harvest when they are about 2-3 inches in diameter, 1-2 inches tall, and are bright orange all the way around. Mini Squash are ready to harvest when they are about 2-3 inches in diameter, or the size of a pool ball, and have a deep green skin with somewhat lighter green streaks. When harvesting both varieties, use clean scissors to cut the fruit from the vine.
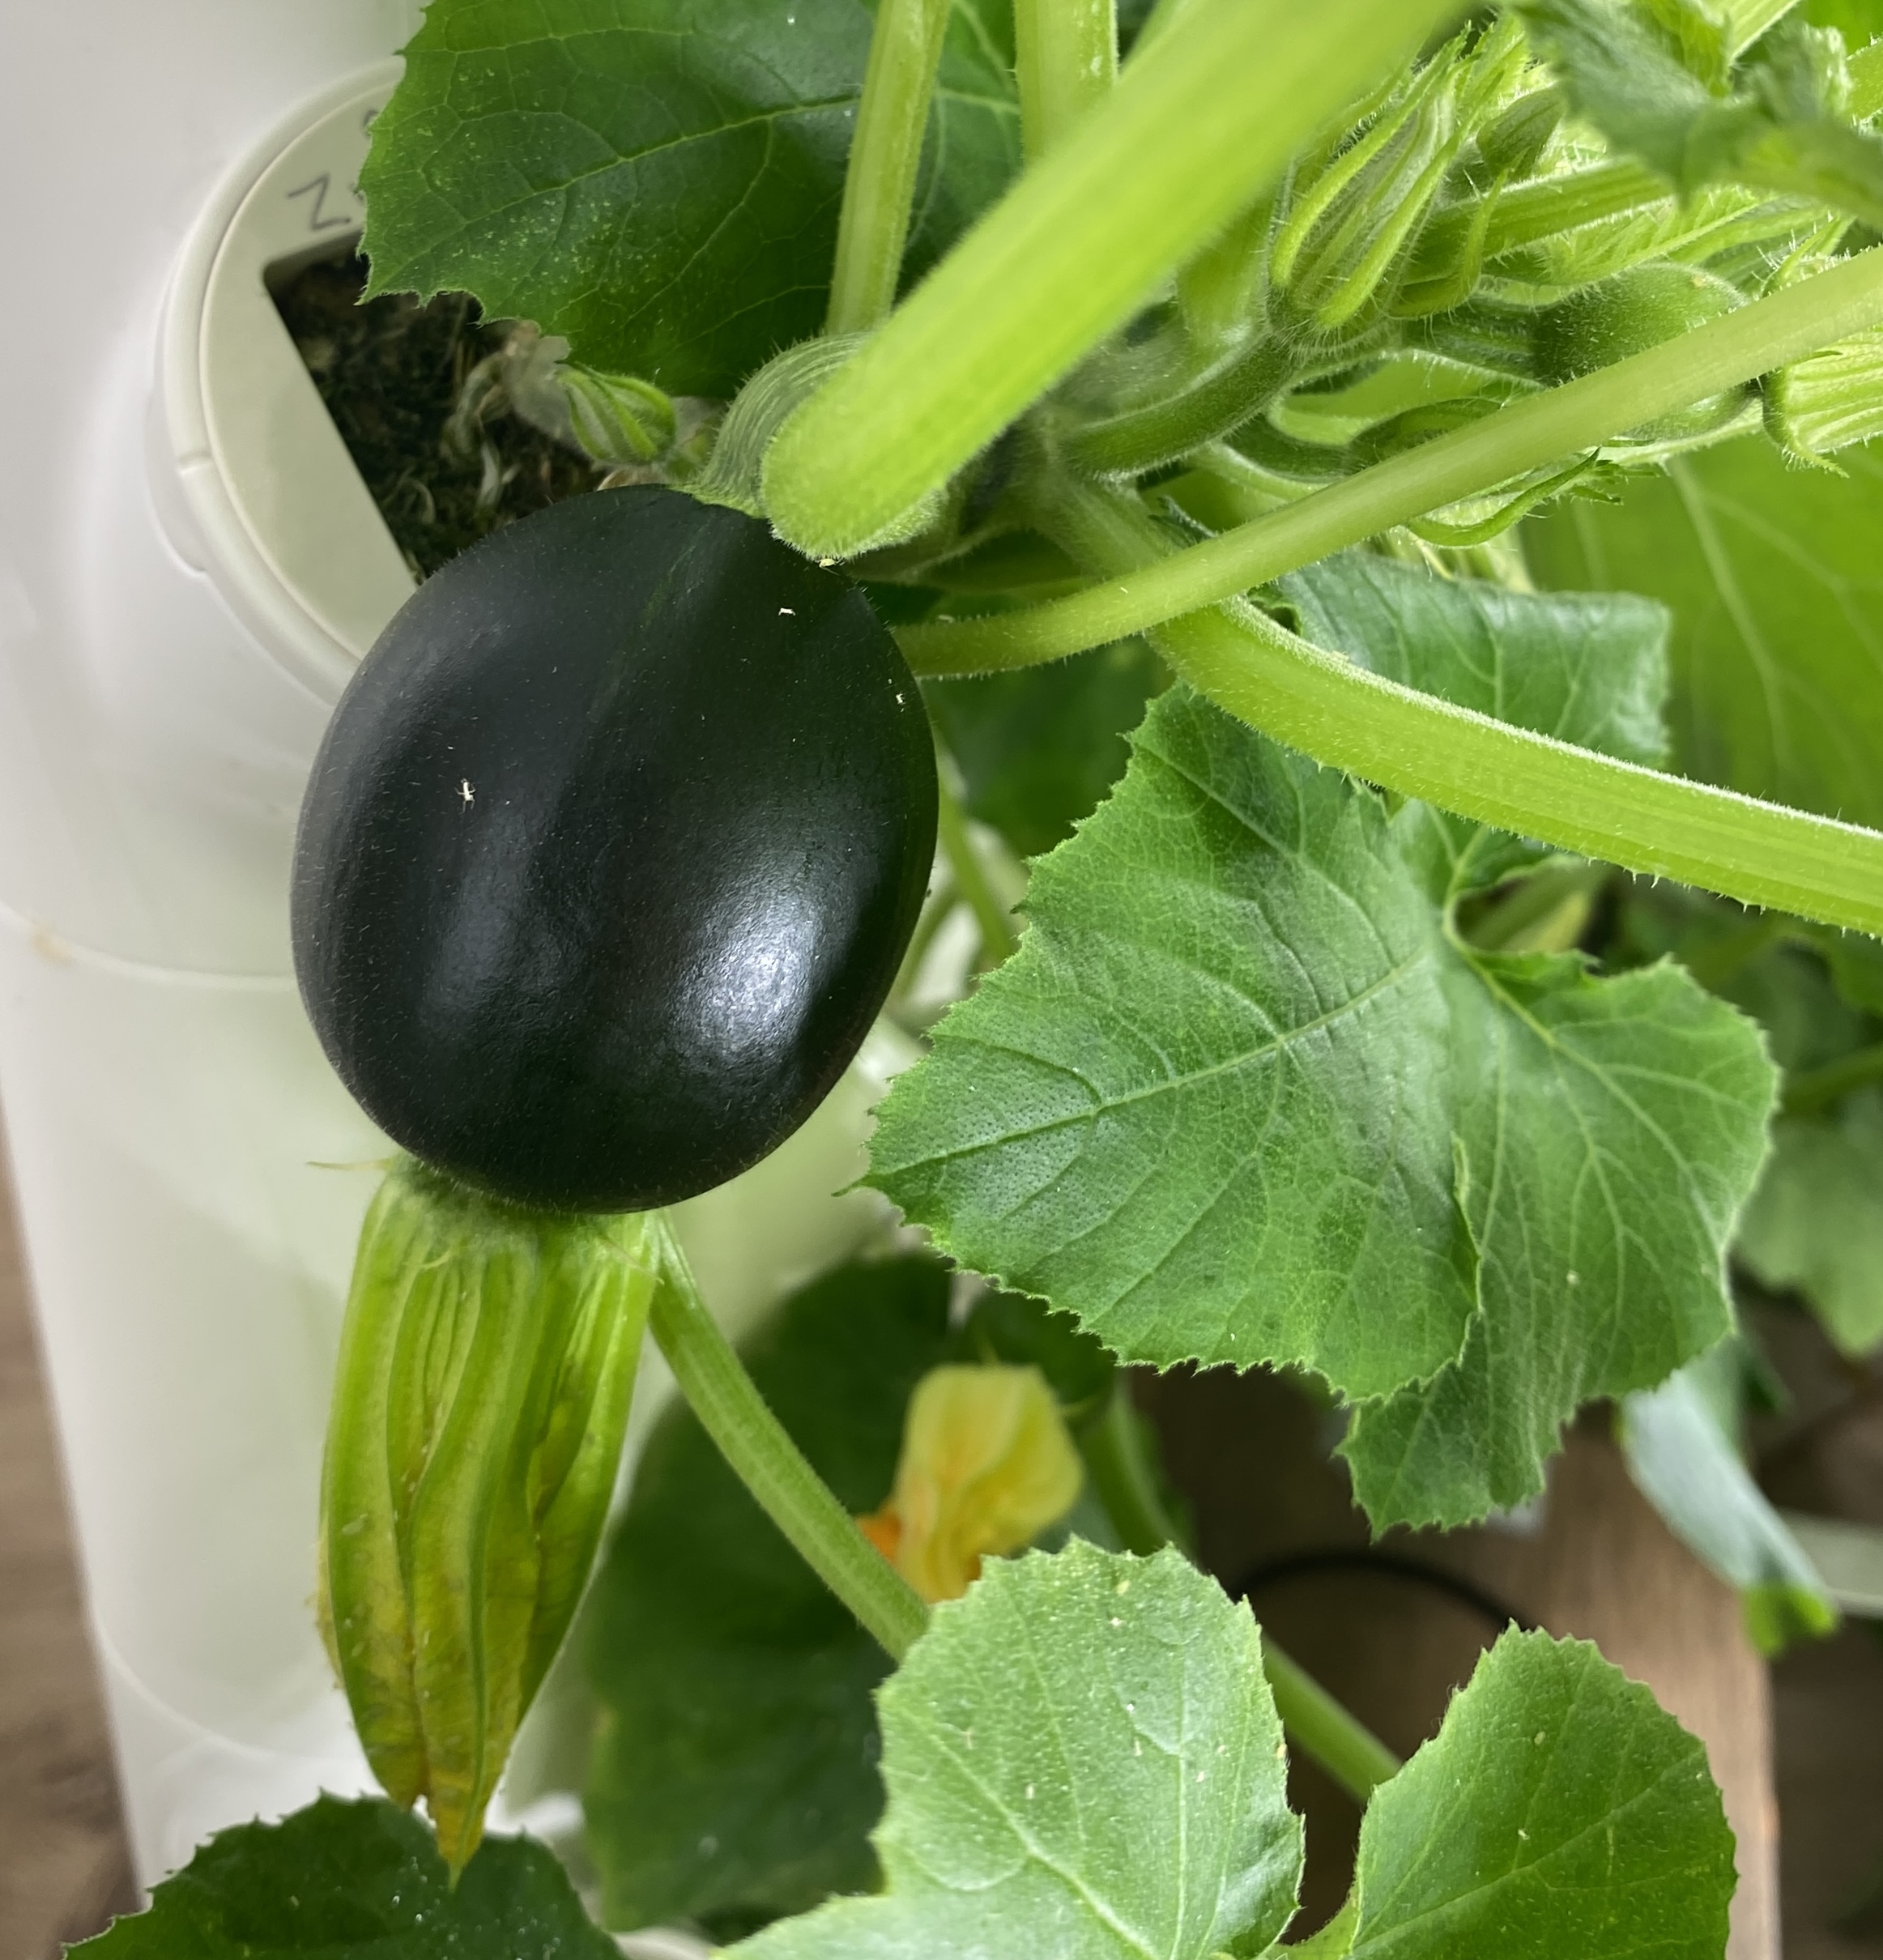
Mini Squash not yet ready for harvest (above) and fully grown with nearly black skin at harvest (below)
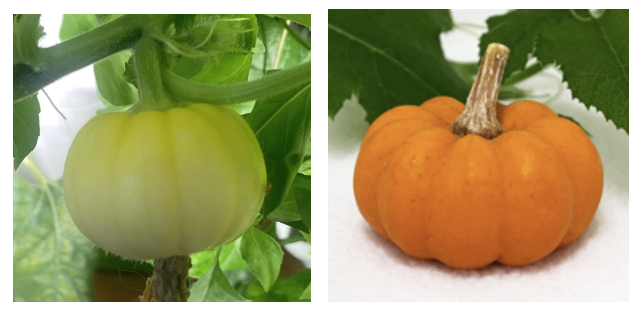
From left to right, an unripe (pale green/white) and ripe (orange) Mini Pumpkin
Each plant can produce 2-3 mini fruit, depending on care. Mini Squash make the perfect addition to any pasta, salad, or grilled meal. Try them anywhere you’d use summer squash or zucchini.
Enjoy Mini Pumpkins as a decoration both on (unharvested) or off your Gardyn, try them cooked, or have fun turning them into crafts and jack-o-lanterns. For long-lasting pumpkins, allow the fruit to cure in the sun, out of other elements, for about a week to harden the skin and then store in a cool dry place until ready for use.
Beyond the mini pumpkin fruit, the leaves are also edible (with proper preparation) in soups, stews, and curries. The blossoms from both Mini Pumpkins and Mini Squash are a more well-known treat and are delicious stuffed and fried, or simply used as an eye-popping garnish. If you also want fruit, only harvest male flowers leaving a few to pollinate the female flowers.
Questions? Reach us at support@mygardyn.com, or chat with us! We're here to help.