
Troubleshooting Pump Issues
If any of your yCubes are dry and your plants have stopped receiving water from your Gardyn's water pump, follow the troubleshooting steps in this article. You should never remove the wood top from your Gardyn's lid. This will damage the seal and void any warranty.
Make A Diagnosis: Manually Turn On The Pump & Observe
Tap the water widget on your app's home screen, then toggle Watering on (green) to manually turn on the pump. If you receive a pop-up, tap "Proceed" to continue with your test. Wait a few moments to hear the water running through the columns.
Note: The watering works by pumping the water from the tank through the pump hoses connected to the hoses at the bottom of the column. The water flows to the top of the column, trickling down to the tank. You can pull out the top yPods in each column, along with any other yPod, to check the water flowing behind them and ensure it's reaching all yPods.
If you hear the pump engaging or feel its vibrations through the white plastic pump holder or on the lid, but water is not flowing to all the yPods, click here for instructions.
If you do not hear or feel the pump engaging, continue to the next step.
Troubleshoot Your Pump Issue
Reboot and Reconnect your Device
Switch off [O] your device using the main switch at the rear of the water tank.
Wait a few seconds, then switch it back on [-].
Wait 5 minutes before using the app to allow the system to fully reboot.
Open your Gardyn App, tap the person icon in the upper left corner to access your profile, then "Reconnect" at the bottom of the screen. Follow the onscreen steps of the pairing sequence.
Once you complete the pairing sequence, test again if the pump responds to you toggling the water to on (green) from the water level tile on the app's home screen.
No response? Move the pump up and down 3-4 times using the pump holder. Sometimes, air can get inside the pump if the tank's water level gets too low, and this can help remove the air.
If the pump does not engage after 5 minutes, continue to the next step.
The next set of instructions are divided by Gardyn type (Home vs. Studio) and model, but also by whether your lid/pump contains the watertight connector feature. If you're unsure whether you have the watertight connector, choose the instructions that correspond to your Gardyn type/model. Once you can see the bottom of your lid/pump cables, you'll be able to compare it to the video/photos.
Gardyn Home - No watertight connector
Check the Connection of the Pump Under the Lid
Begin by disassembling your Gardyn so you can access the underside of your lid. To disassemble, follow the video:
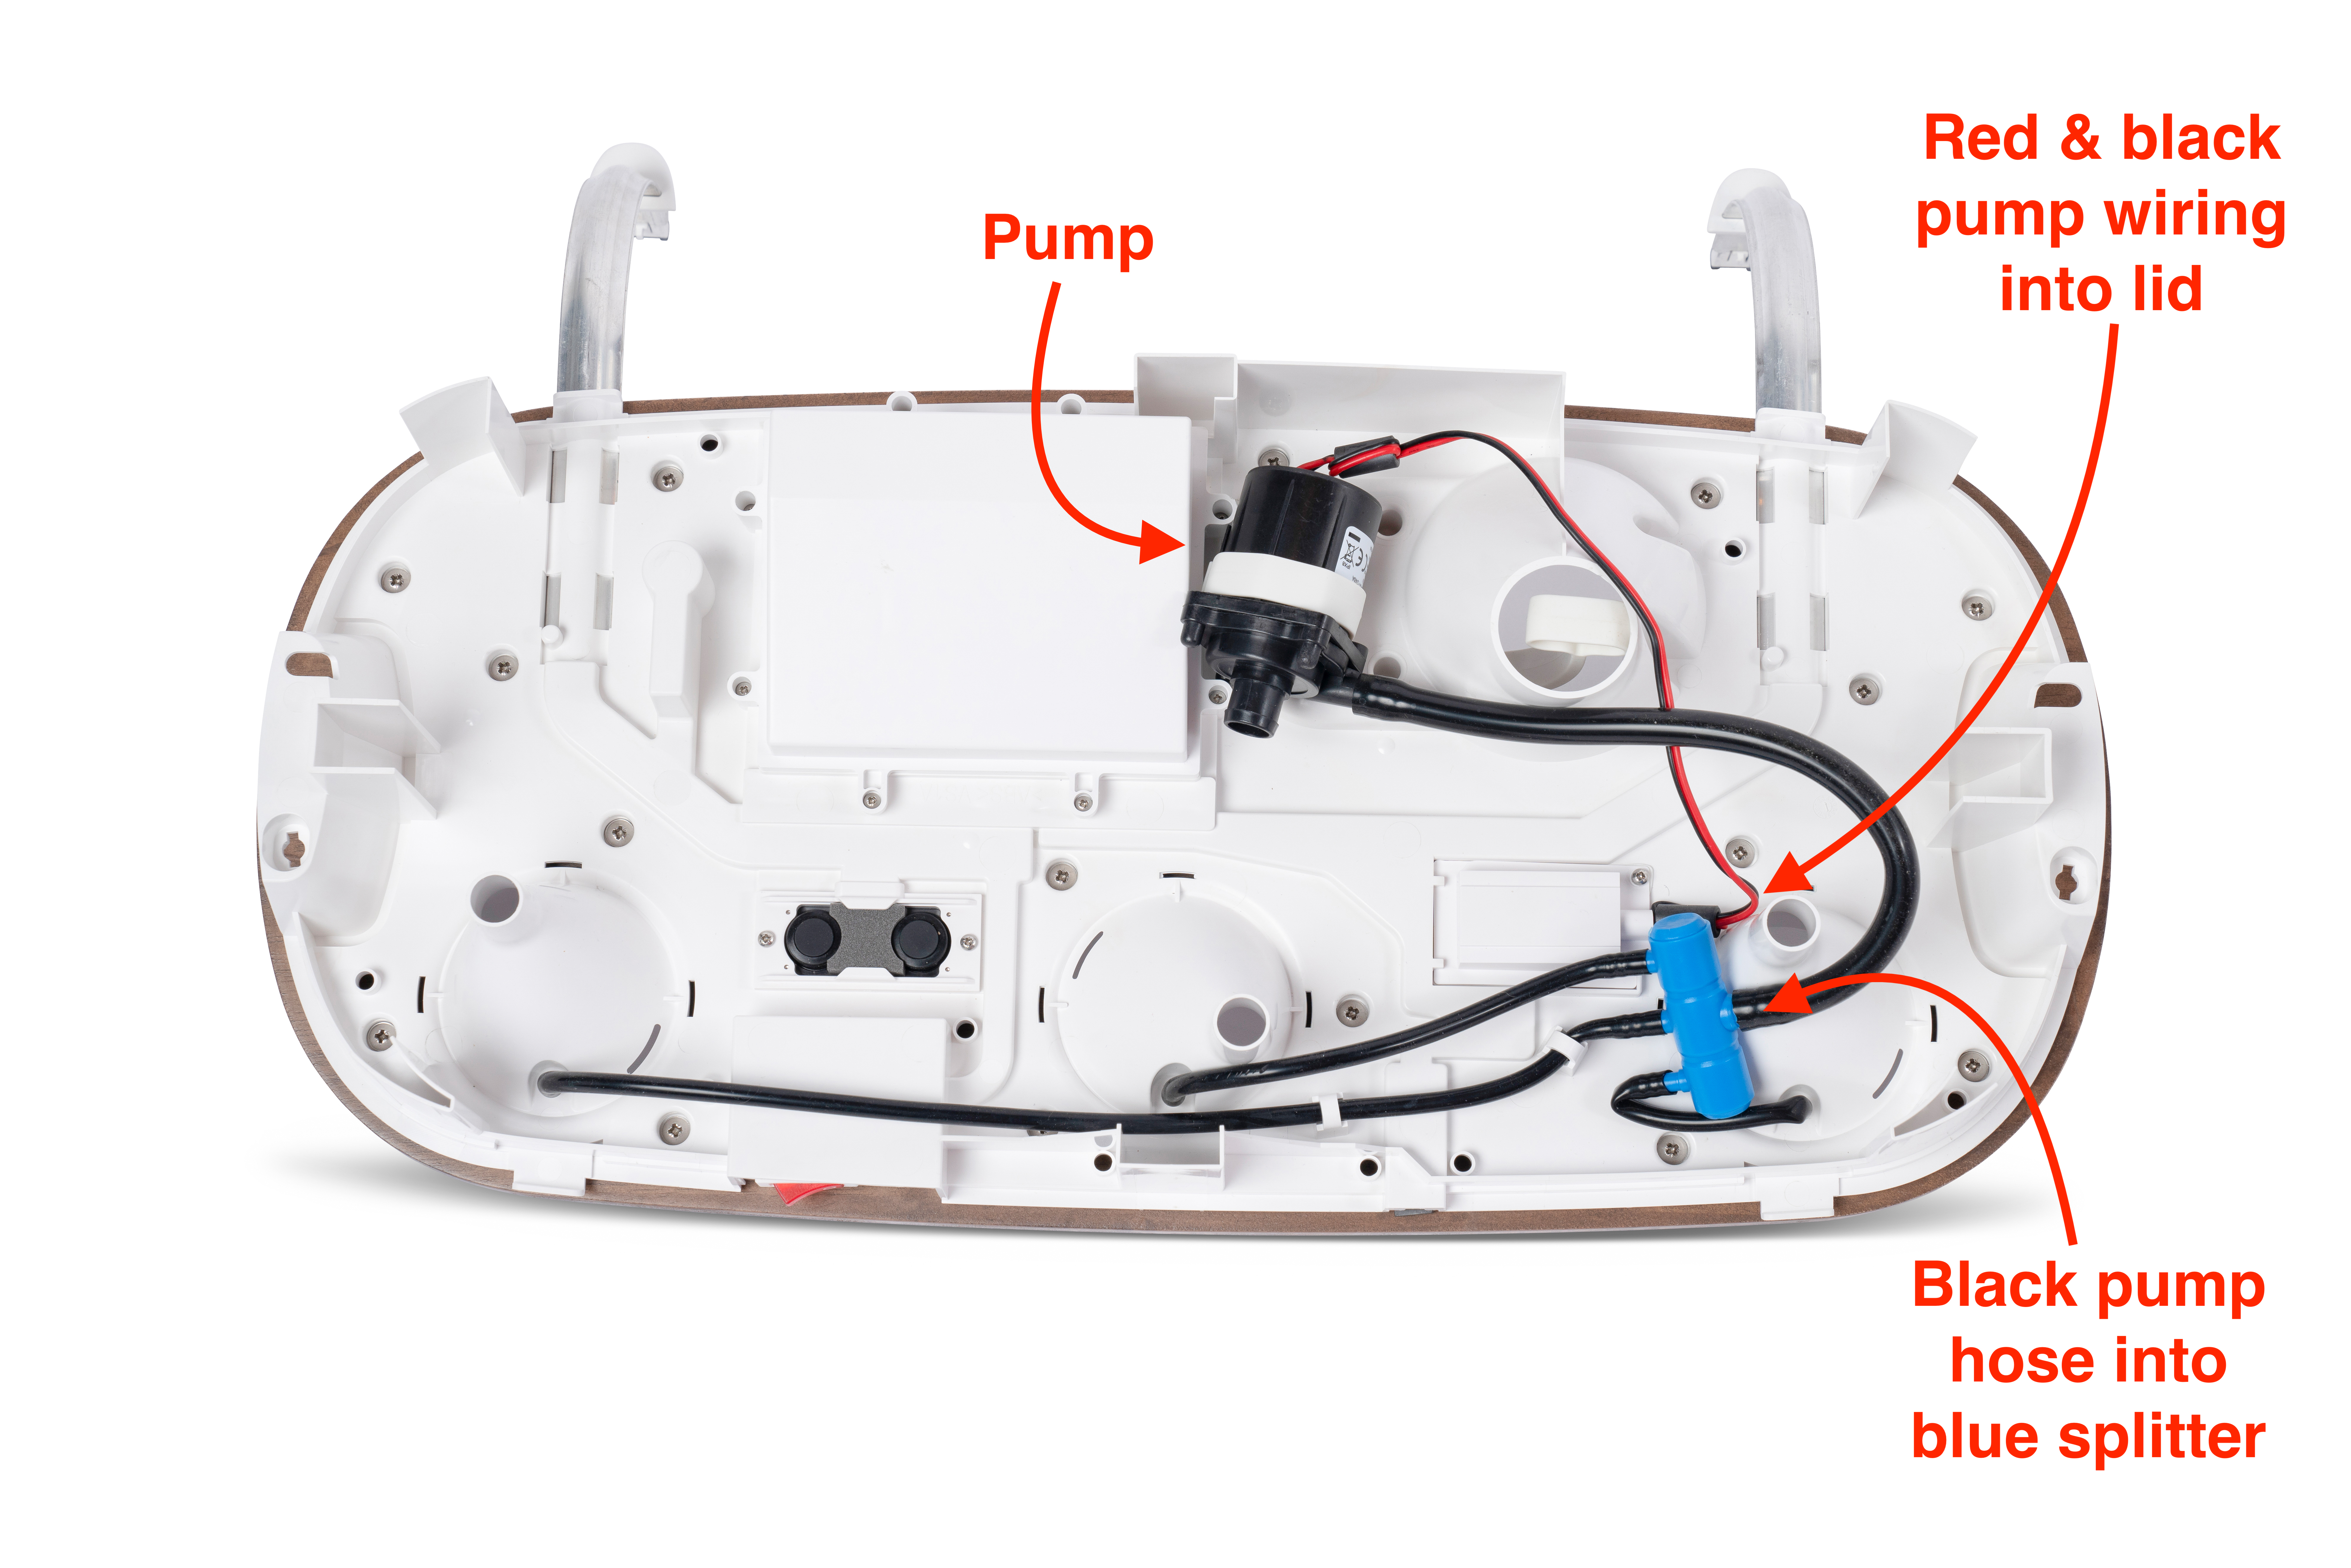
Lid underside; specific parts may vary in appearance across Gardyn Home models
If you have a Gardyn Home 1-2, use the photo below to follow the black and red wires to where they go into the lid with a white foam insert beneath them; remove the foam insert.
If you have a Gardyn Home 3-4, you can find instructions in the video below to locate these wires (starting around 00:50), but STOP before disconnecting the white pieces attached to the black and red wiring!
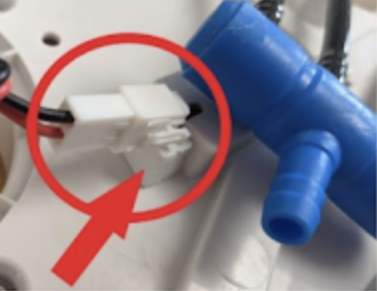
On Gardyn Home 1-2, gently pull the red and black wiring out of the plastic housing, being careful not to detach the white connectors while doing so.
For all Gardyn Home generations, once you have the white connectors in hand, gently tug on the wires from both sides of the white connectors to ensure the connectors are snug when attached.
Now you will disconnect the white connectors:
For Gardyn Home 1-2, begin by slipping the foam back into place while the connectors are out, and then pull the white connectors apart.
For Gardyn Home 3-4, press the small clip on the connectors to pull them apart.
While the parts are accessible, take photos of the following in case you complete all of the troubleshooting steps and your watering issue is still not resolved:
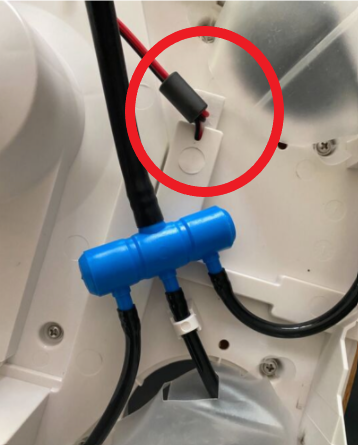
All irrigation hose connections to the blue splitter
Both sides of each of the white pump connectors while disconnected
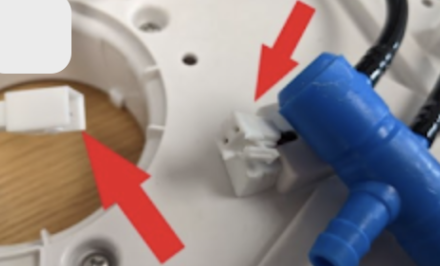
Finally, reattach the pump connectors:
Ensure the wire colors are aligned black to black, red to red, and then push them together to reconnect.
For Gardyn Home 1-2, remove the foam plug, put the white connectors back into the lid, and put back the foam insert.
For Gardyn Home 3-4, return the plastic housing with the seal and screw back into place.
All Gardyn Studio and Gardyn Home with the Watertight Connector
Check the Connection of the Pump Under the Lid
Follow the video below to remove the top half of your Gardyn and access the underside of your lid. Continue watching through 1:20 to help you identify the pump's cable and the watertight connector. Detach the watertight connector as shown in the video, then STOP the video and continue to the next written step.
Take photos of the prongs on both ends of your detached watertight connector. This means the side that is still attached to the lid, and the elbow side at the end of the pump cable. When done, reattach the connector by continuing the video above at 1:43. Push the connector back onto the lid (it only fits one way!) and turn the round base of the connector clockwise until it is hand-tight against the hexagonal nut.
Still experiencing pump issues?
Email us at support@mygardyn.com or chat with us on the app/website. Don't forget to send your photos, and please explain what you're experiencing and the steps you've already completed. Our team will get back to you as soon as possible. Contacting us through the app's Self-Service Hub is the fastest option.
While resolving your watering issue, keep your plants healthy by following these steps to water them without the automatic pump: Watering your Gardyn by Hand.