
How to Check Irrigation Hoses & Clean Your Lid
Follow these steps to learn how to inspect your Gardyn's irrigation hoses, gain access to the underside of your lid, and clean your lid. Together, this should all take about 20 minutes. You will need
1. Check the Irrigation Hoses in Your Columns
Remove the top yPod on each column, open the water level tile in your app and toggle a watering cycle to on (green). Make sure you see water coming down each column once the cycle activates, then tap again to end the test cycle.
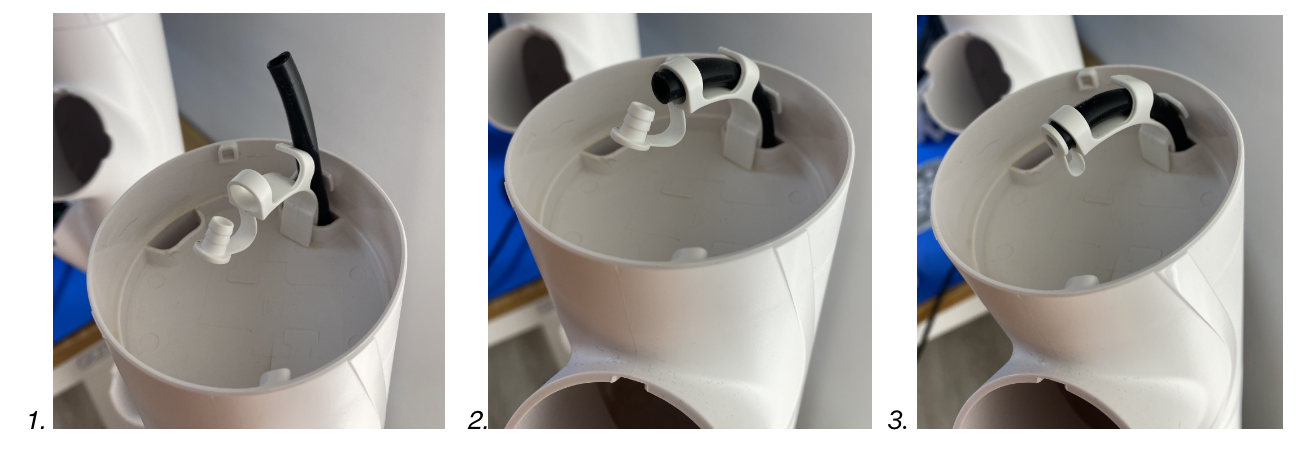
Remove the bottom yPod in each column and inspect the hose where it connects to the lid (Gardyn Home 3-4 and Gardyn Studio) or to the elbow connectors (Gardyn Home 1-2) to ensure it's still secure.
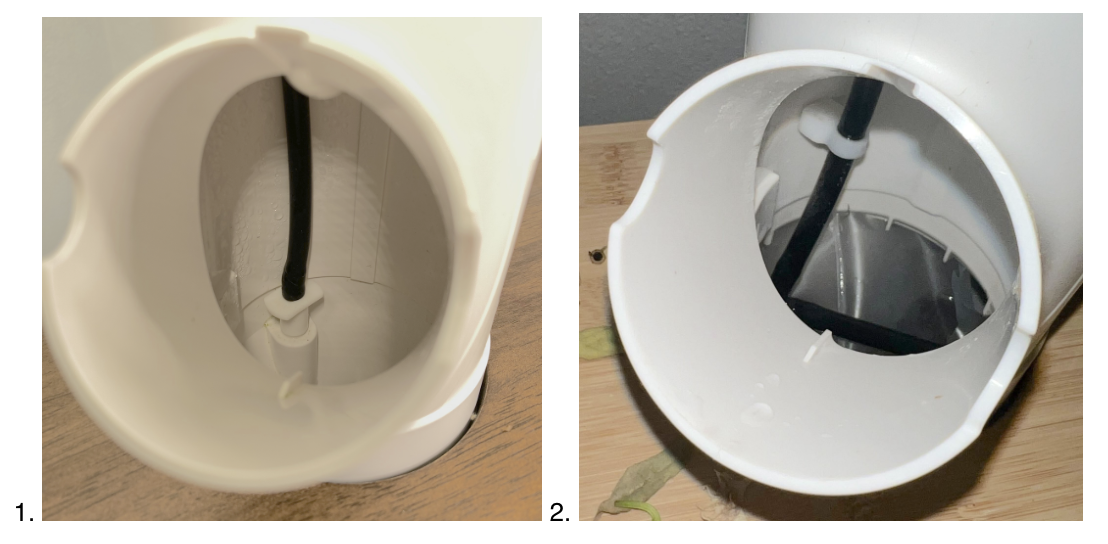
A fully inserted irrigation hose in the bottom of a Gardyn Home 3 column (1) and the elbow connector (2, the L-like bend in the hoses) visible from the inside of a Gardyn Home 2 column (Gardyn Home 1 will appear similar)
Check the hose connections in the top module of each column to ensure they are inserted correctly into the column and do not have any kinks. To do this, remove the metal bar and upper blades from the back of the columns, allowing you to twist the top module off of each column to access the inside.
Note that only the Gardyn Home 1 requires the irrigation hose to be inserted directly into/over the opening in the column module to function properly. All other Gardyn Home models, as well as the Gardyn Studio, do not require the hose to be positioned directly over the hole in the column to function correctly.
Gardyn Home 3/4/Gardyn Studio irrigation hoses in the top column module that are incorrectly (1, 2) and correctly (3) inserted.
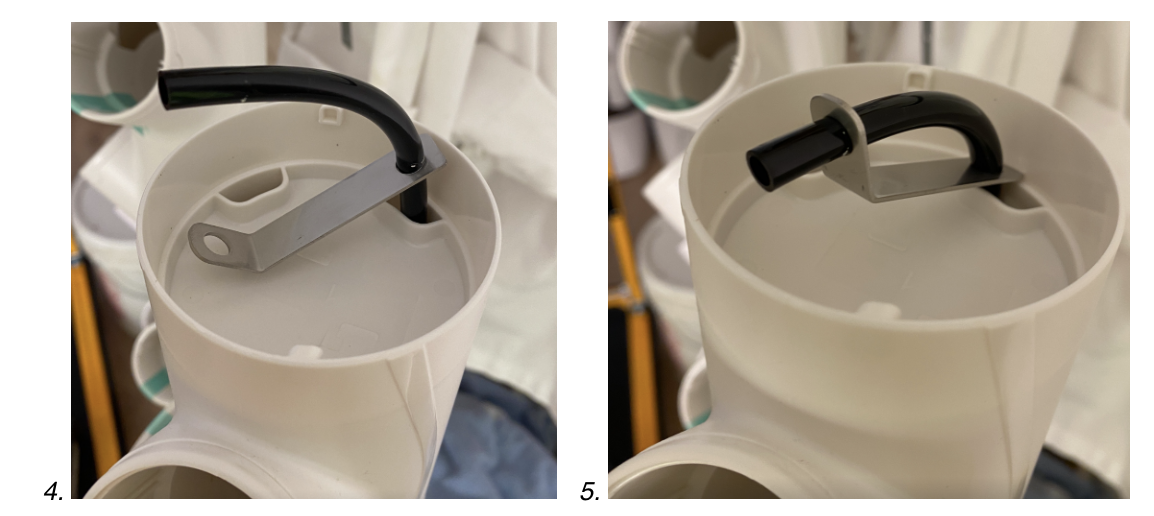
Gardyn Home 2 irrigation hoses in the top column module that are incorrectly (4) and correctly (5) inserted.
Gardyn Home 1 irrigation hoses in the top column module that are incorrectly (6) and correctly (7) inserted into the opening in the module
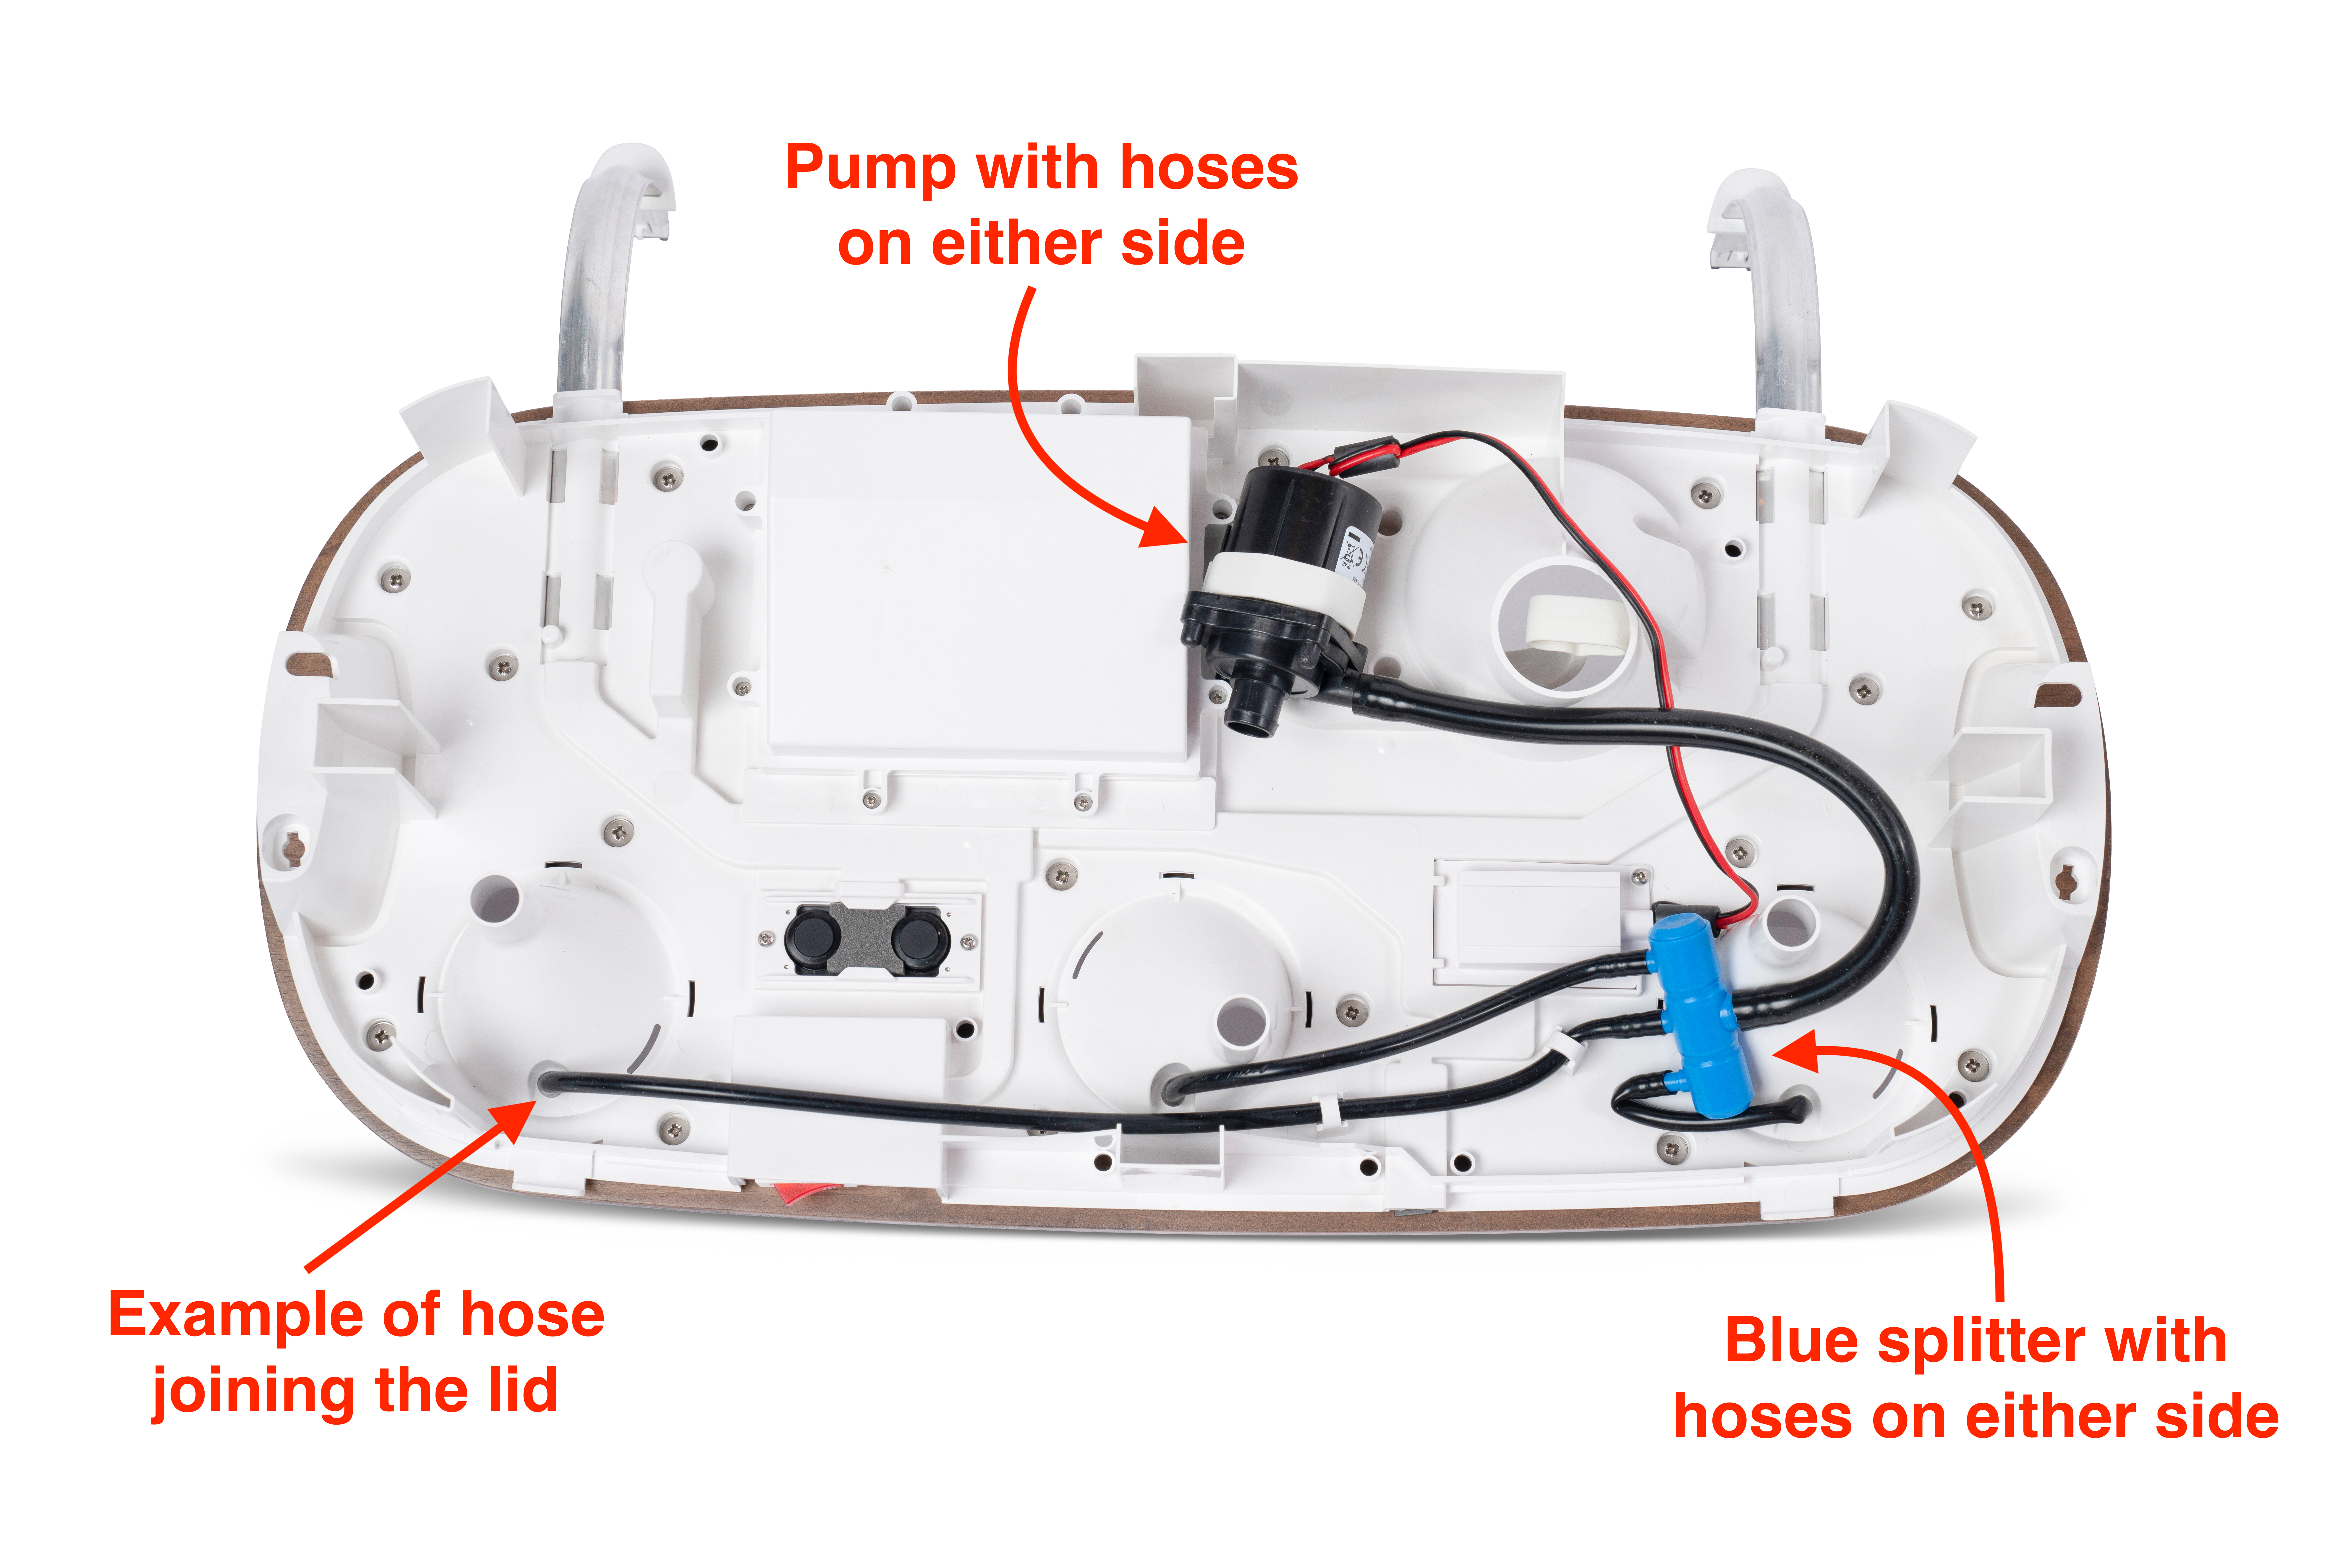
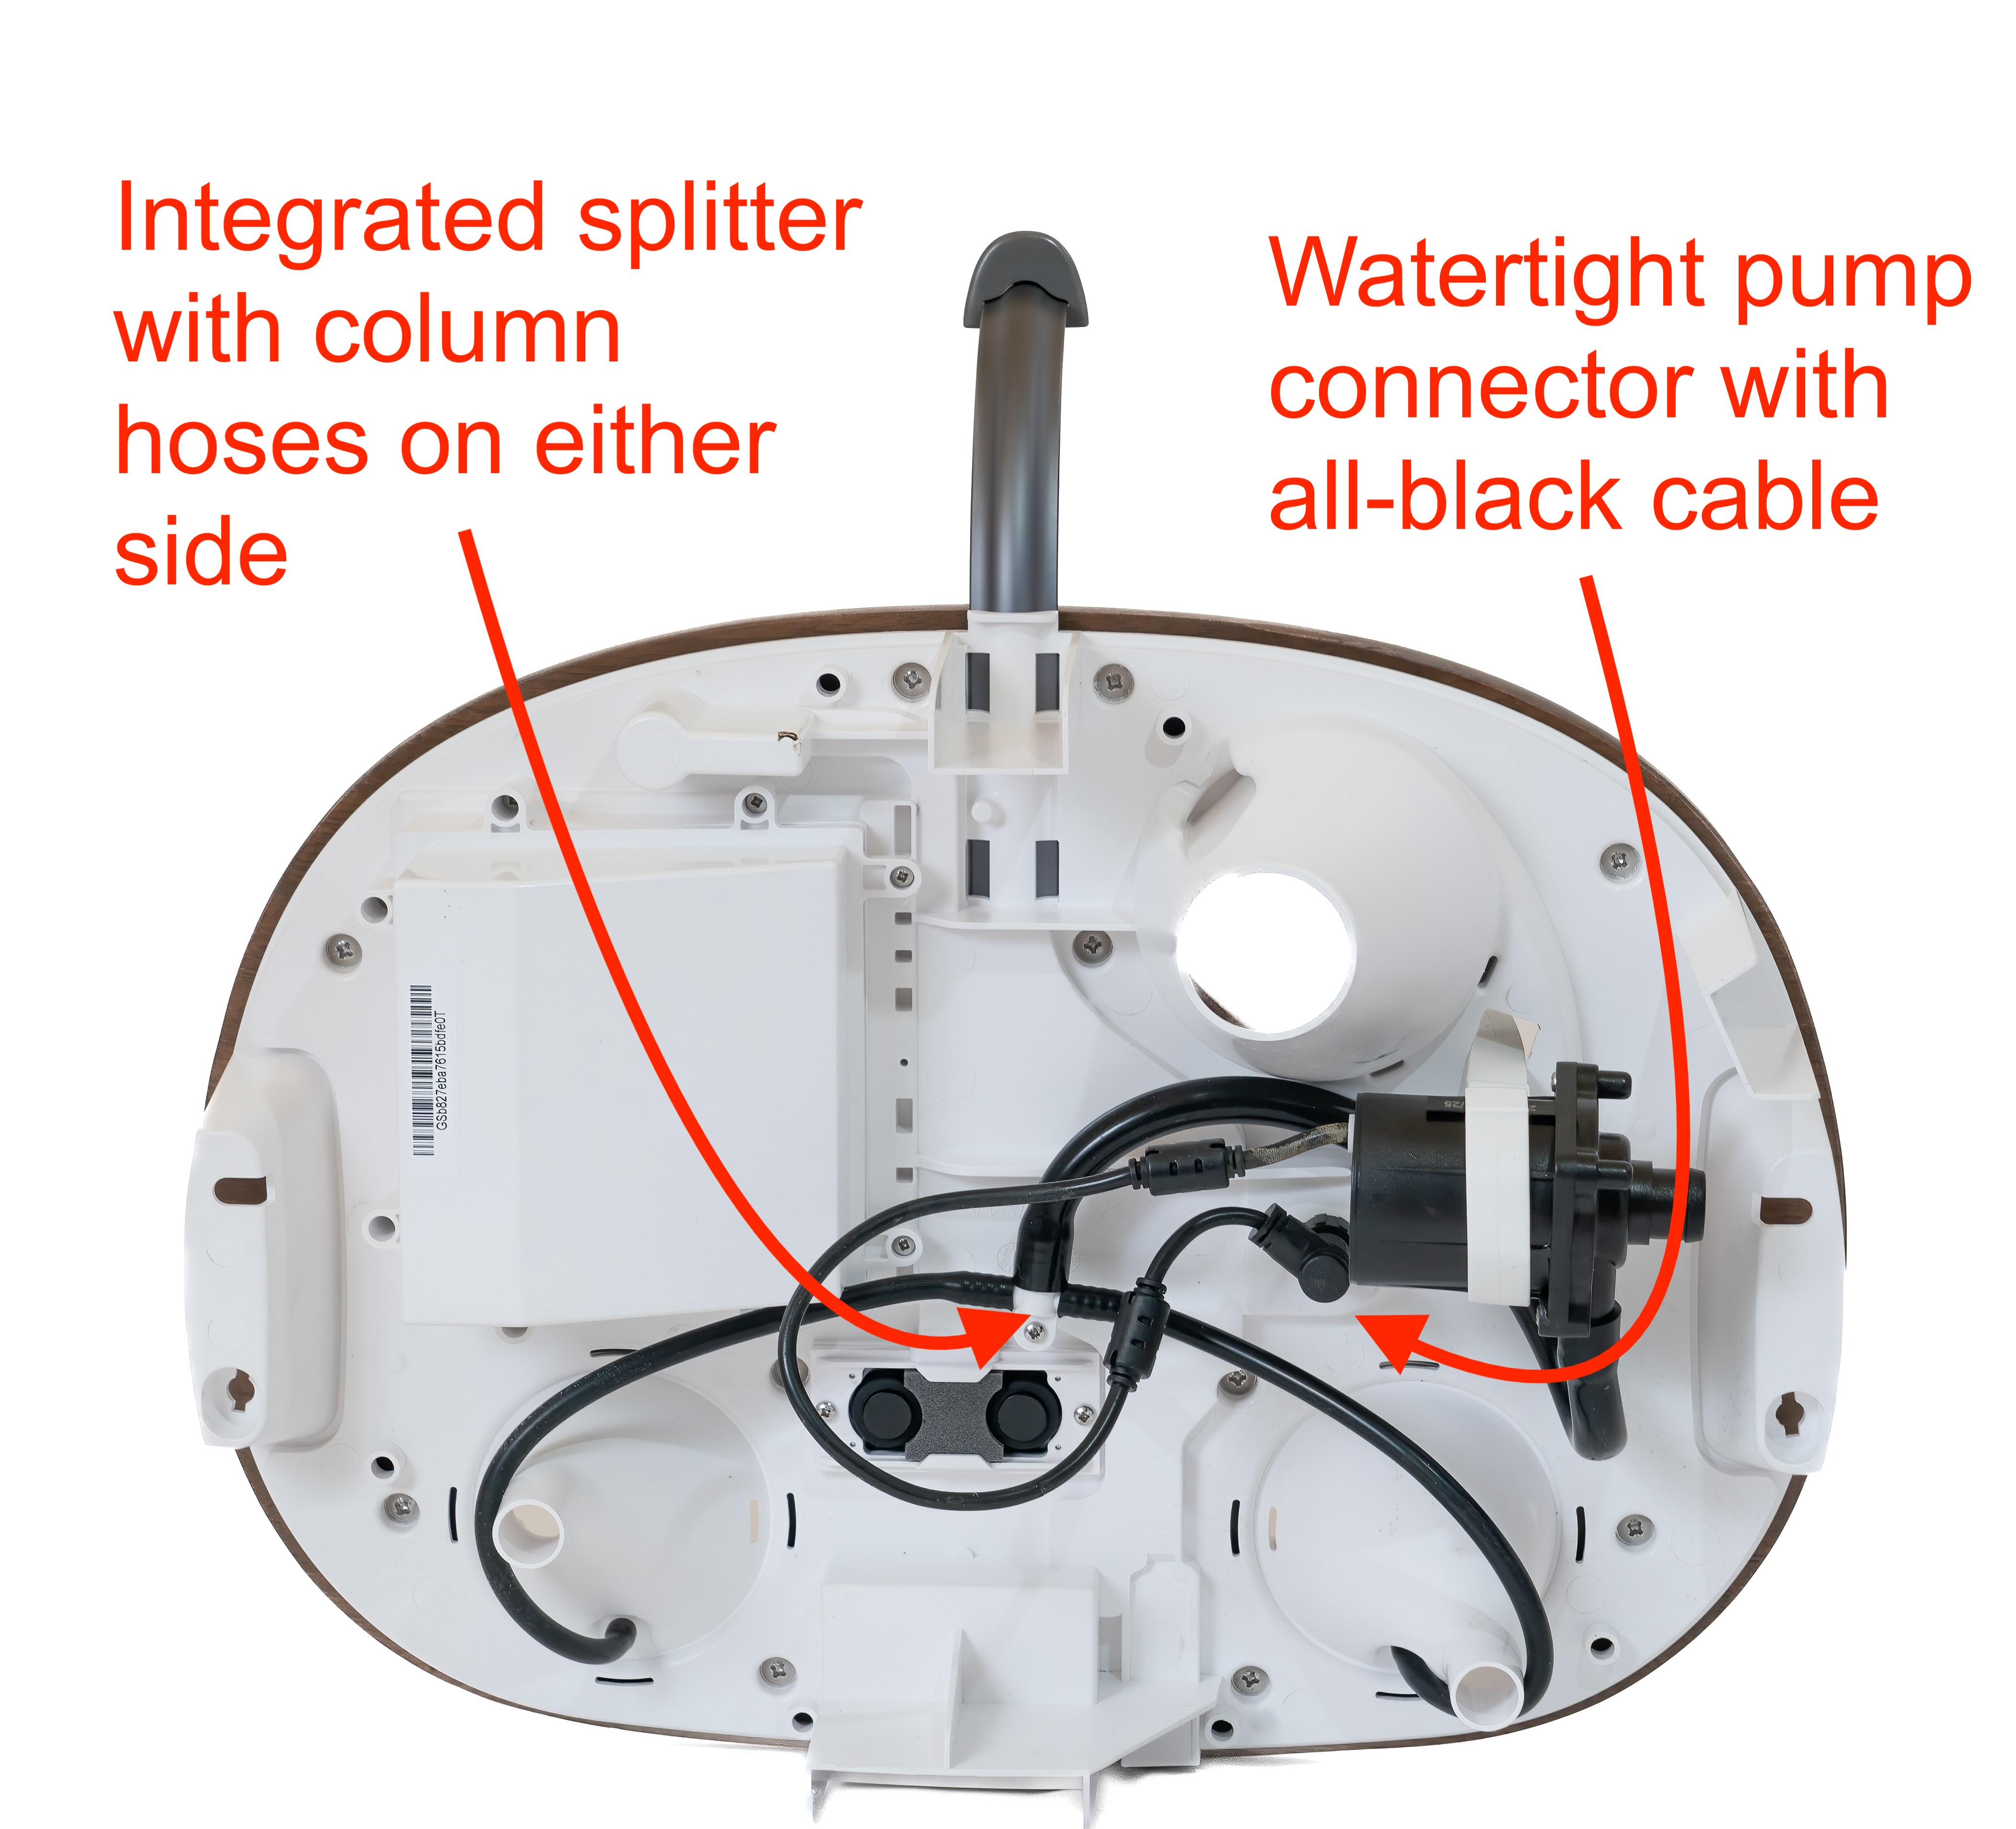
2. Gain Access to the Underside of Your Lid
3. Inspect the Irrigation Hoses Under the Lid
Once you've gained access to the underside of your lid, focus your inspection on:
all angles of each connection between the splitter and hoses
where hoses join directly with the lid's plastic
the pump's connection to the lid and hoses
There may be slight variations depending on the Gardyn type and model. The undersides of a Gardyn Home and a Gardyn Studio lid are provided as examples below.
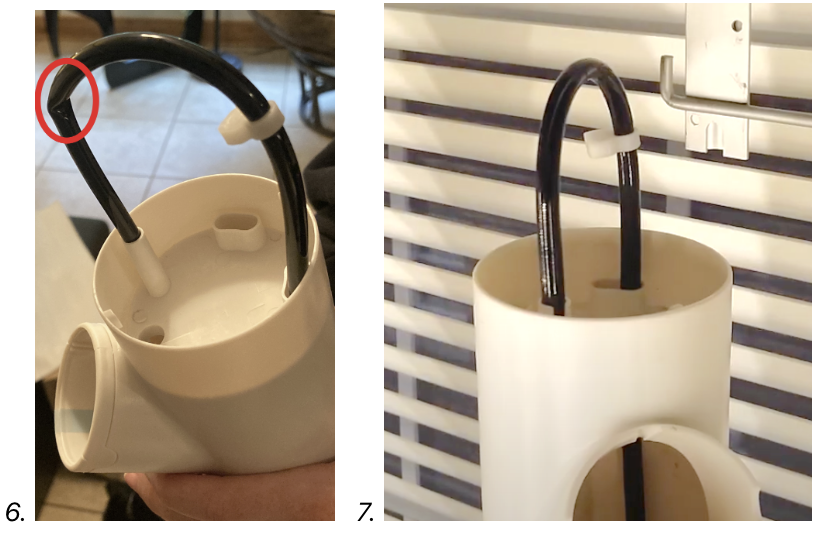
Ensure there are no kinks in any hose. If there are, and rearranging the hose does not resolve the issue, you can cut a minimal amount of the hose off one end to shorten it before reattaching it. Just be sure to be conservative so the host is not too short!
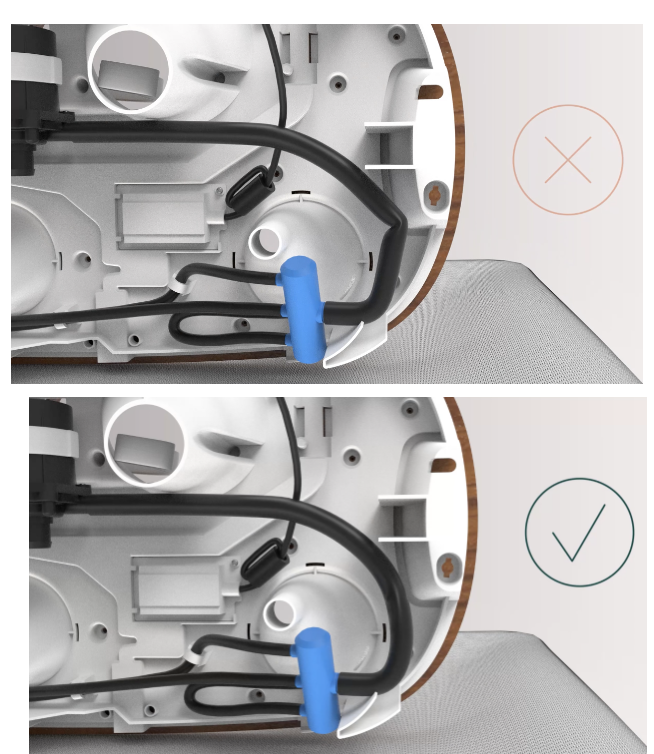
An example of a kink (top) and the kink resolved (bottom)
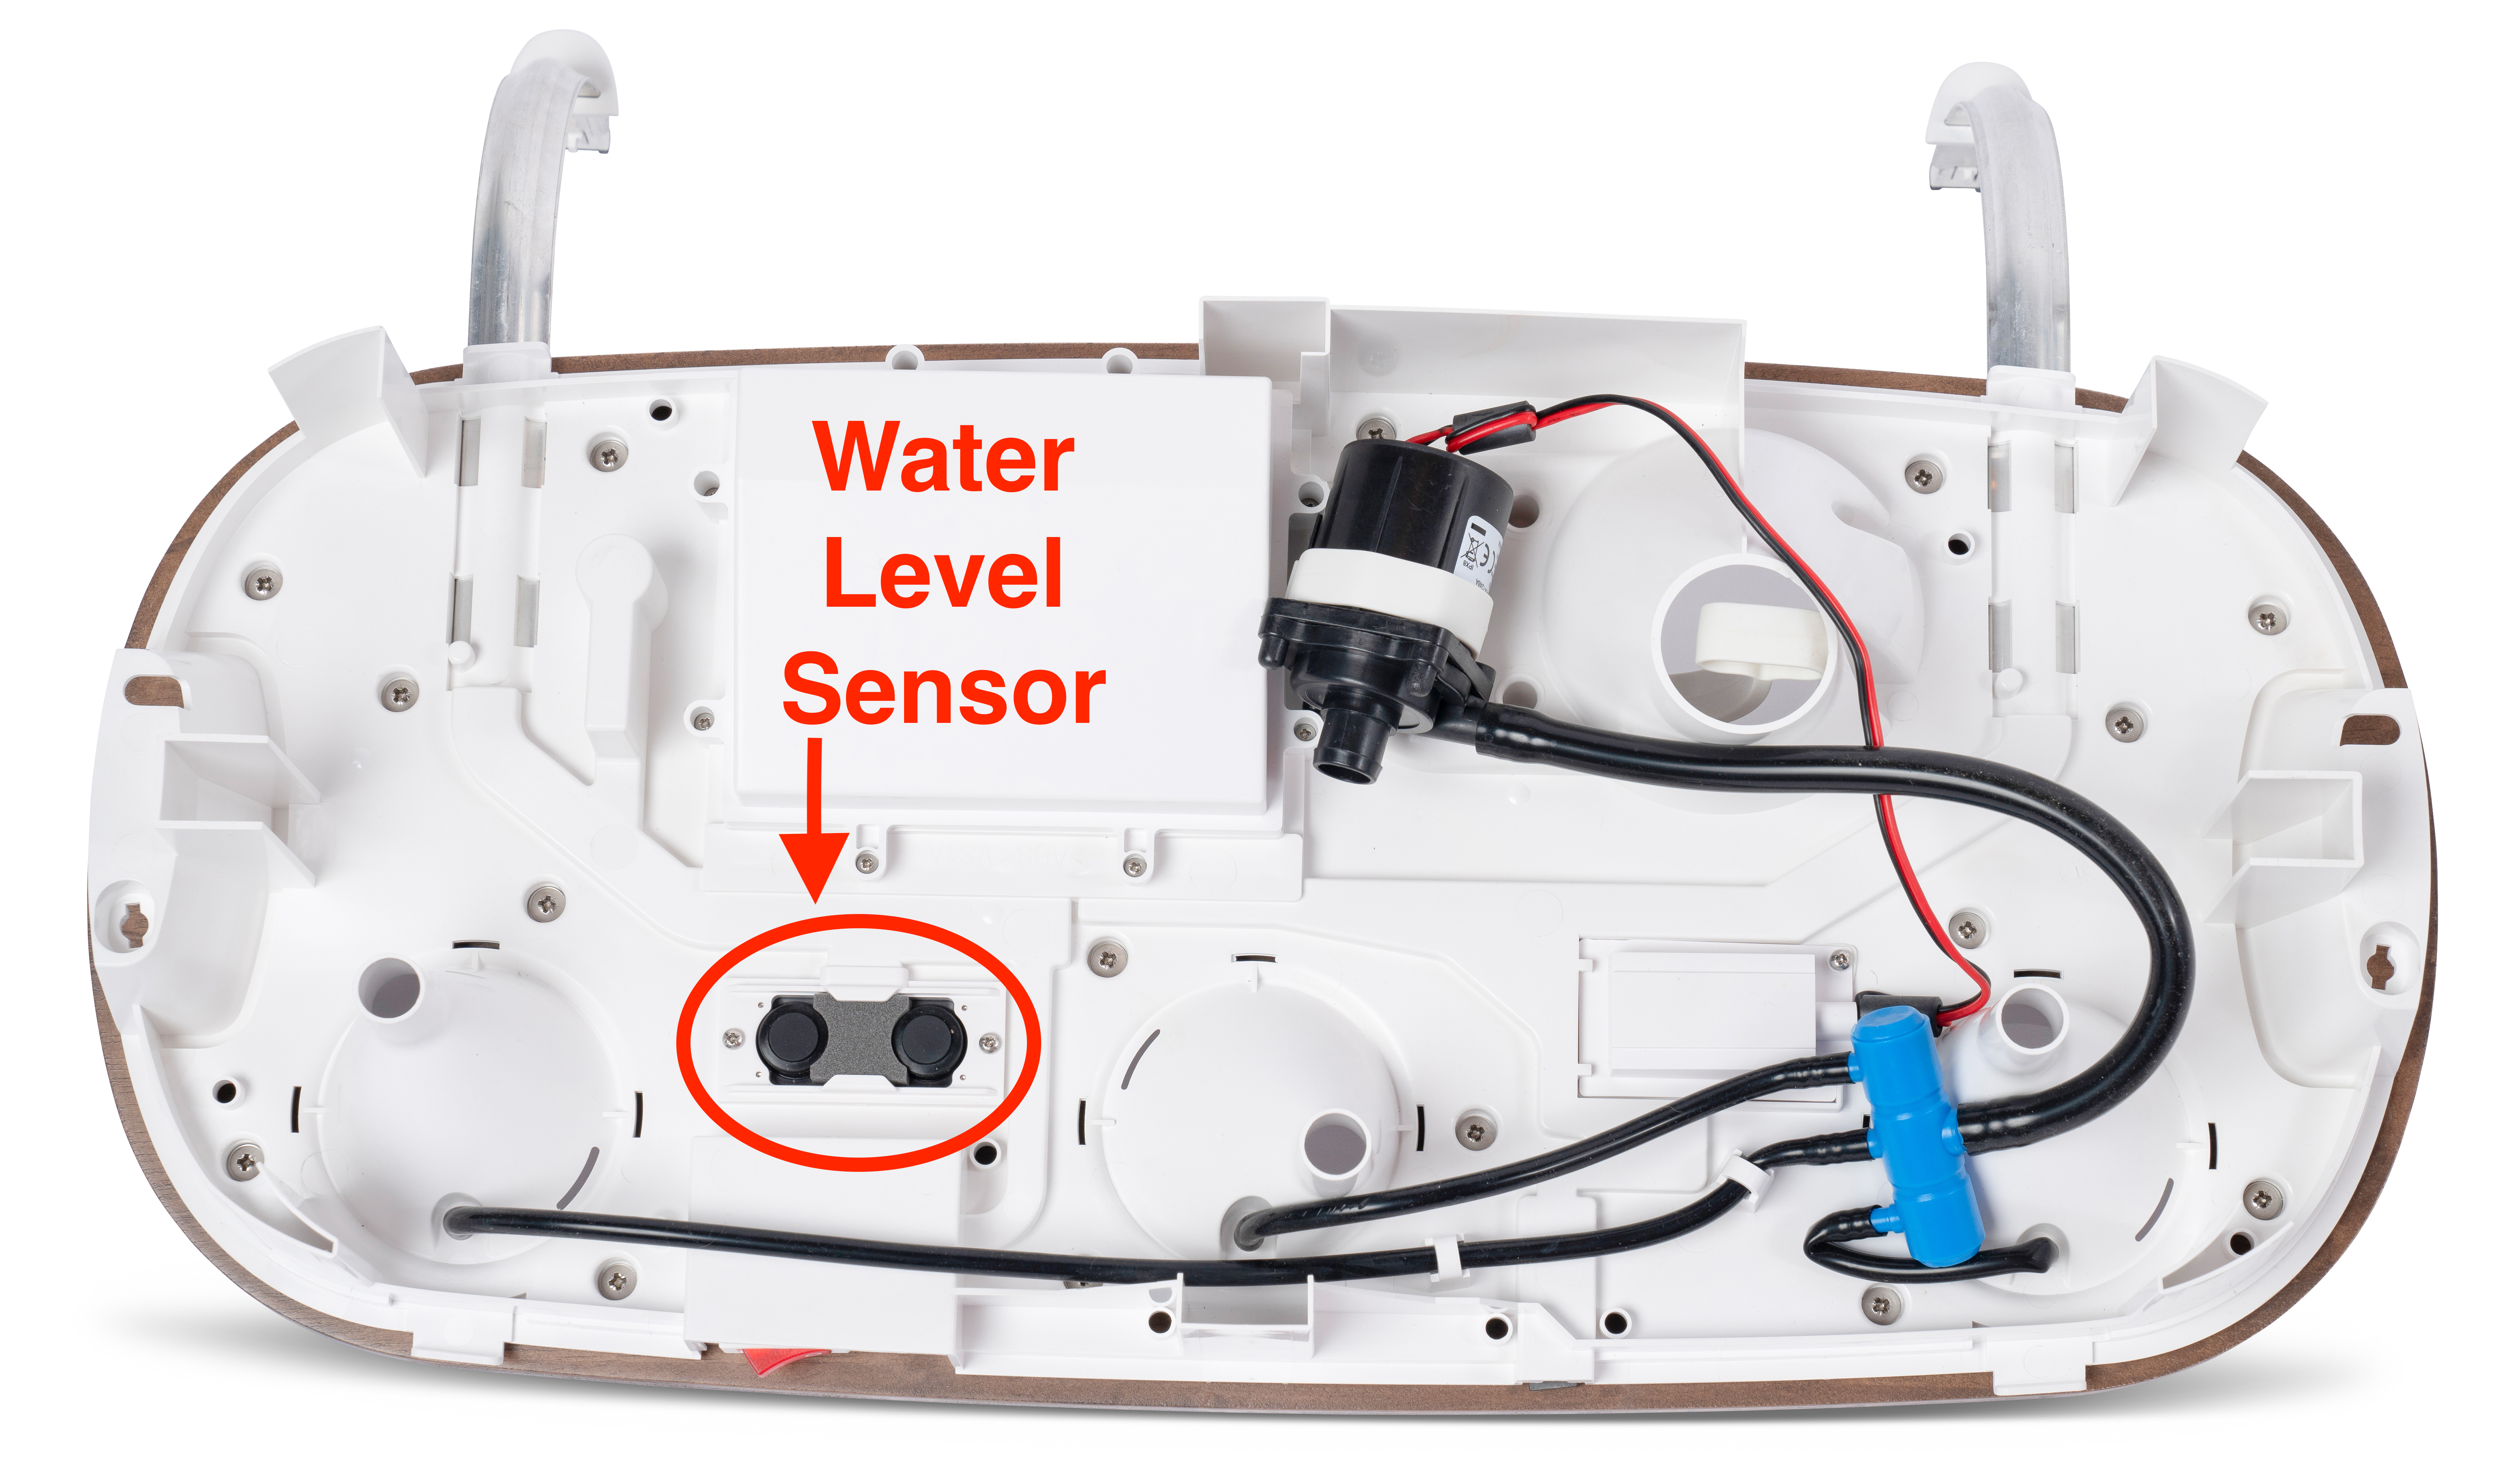
4. Clean the Lid's Top & Bottom
Gently wipe off the water level sensor (shown below on both a Gardyn Home and Gardyn Studio lid underside) with water only, then dry. The soft microfiber side of the Gardyn Cleaning Cloth is designed for this.
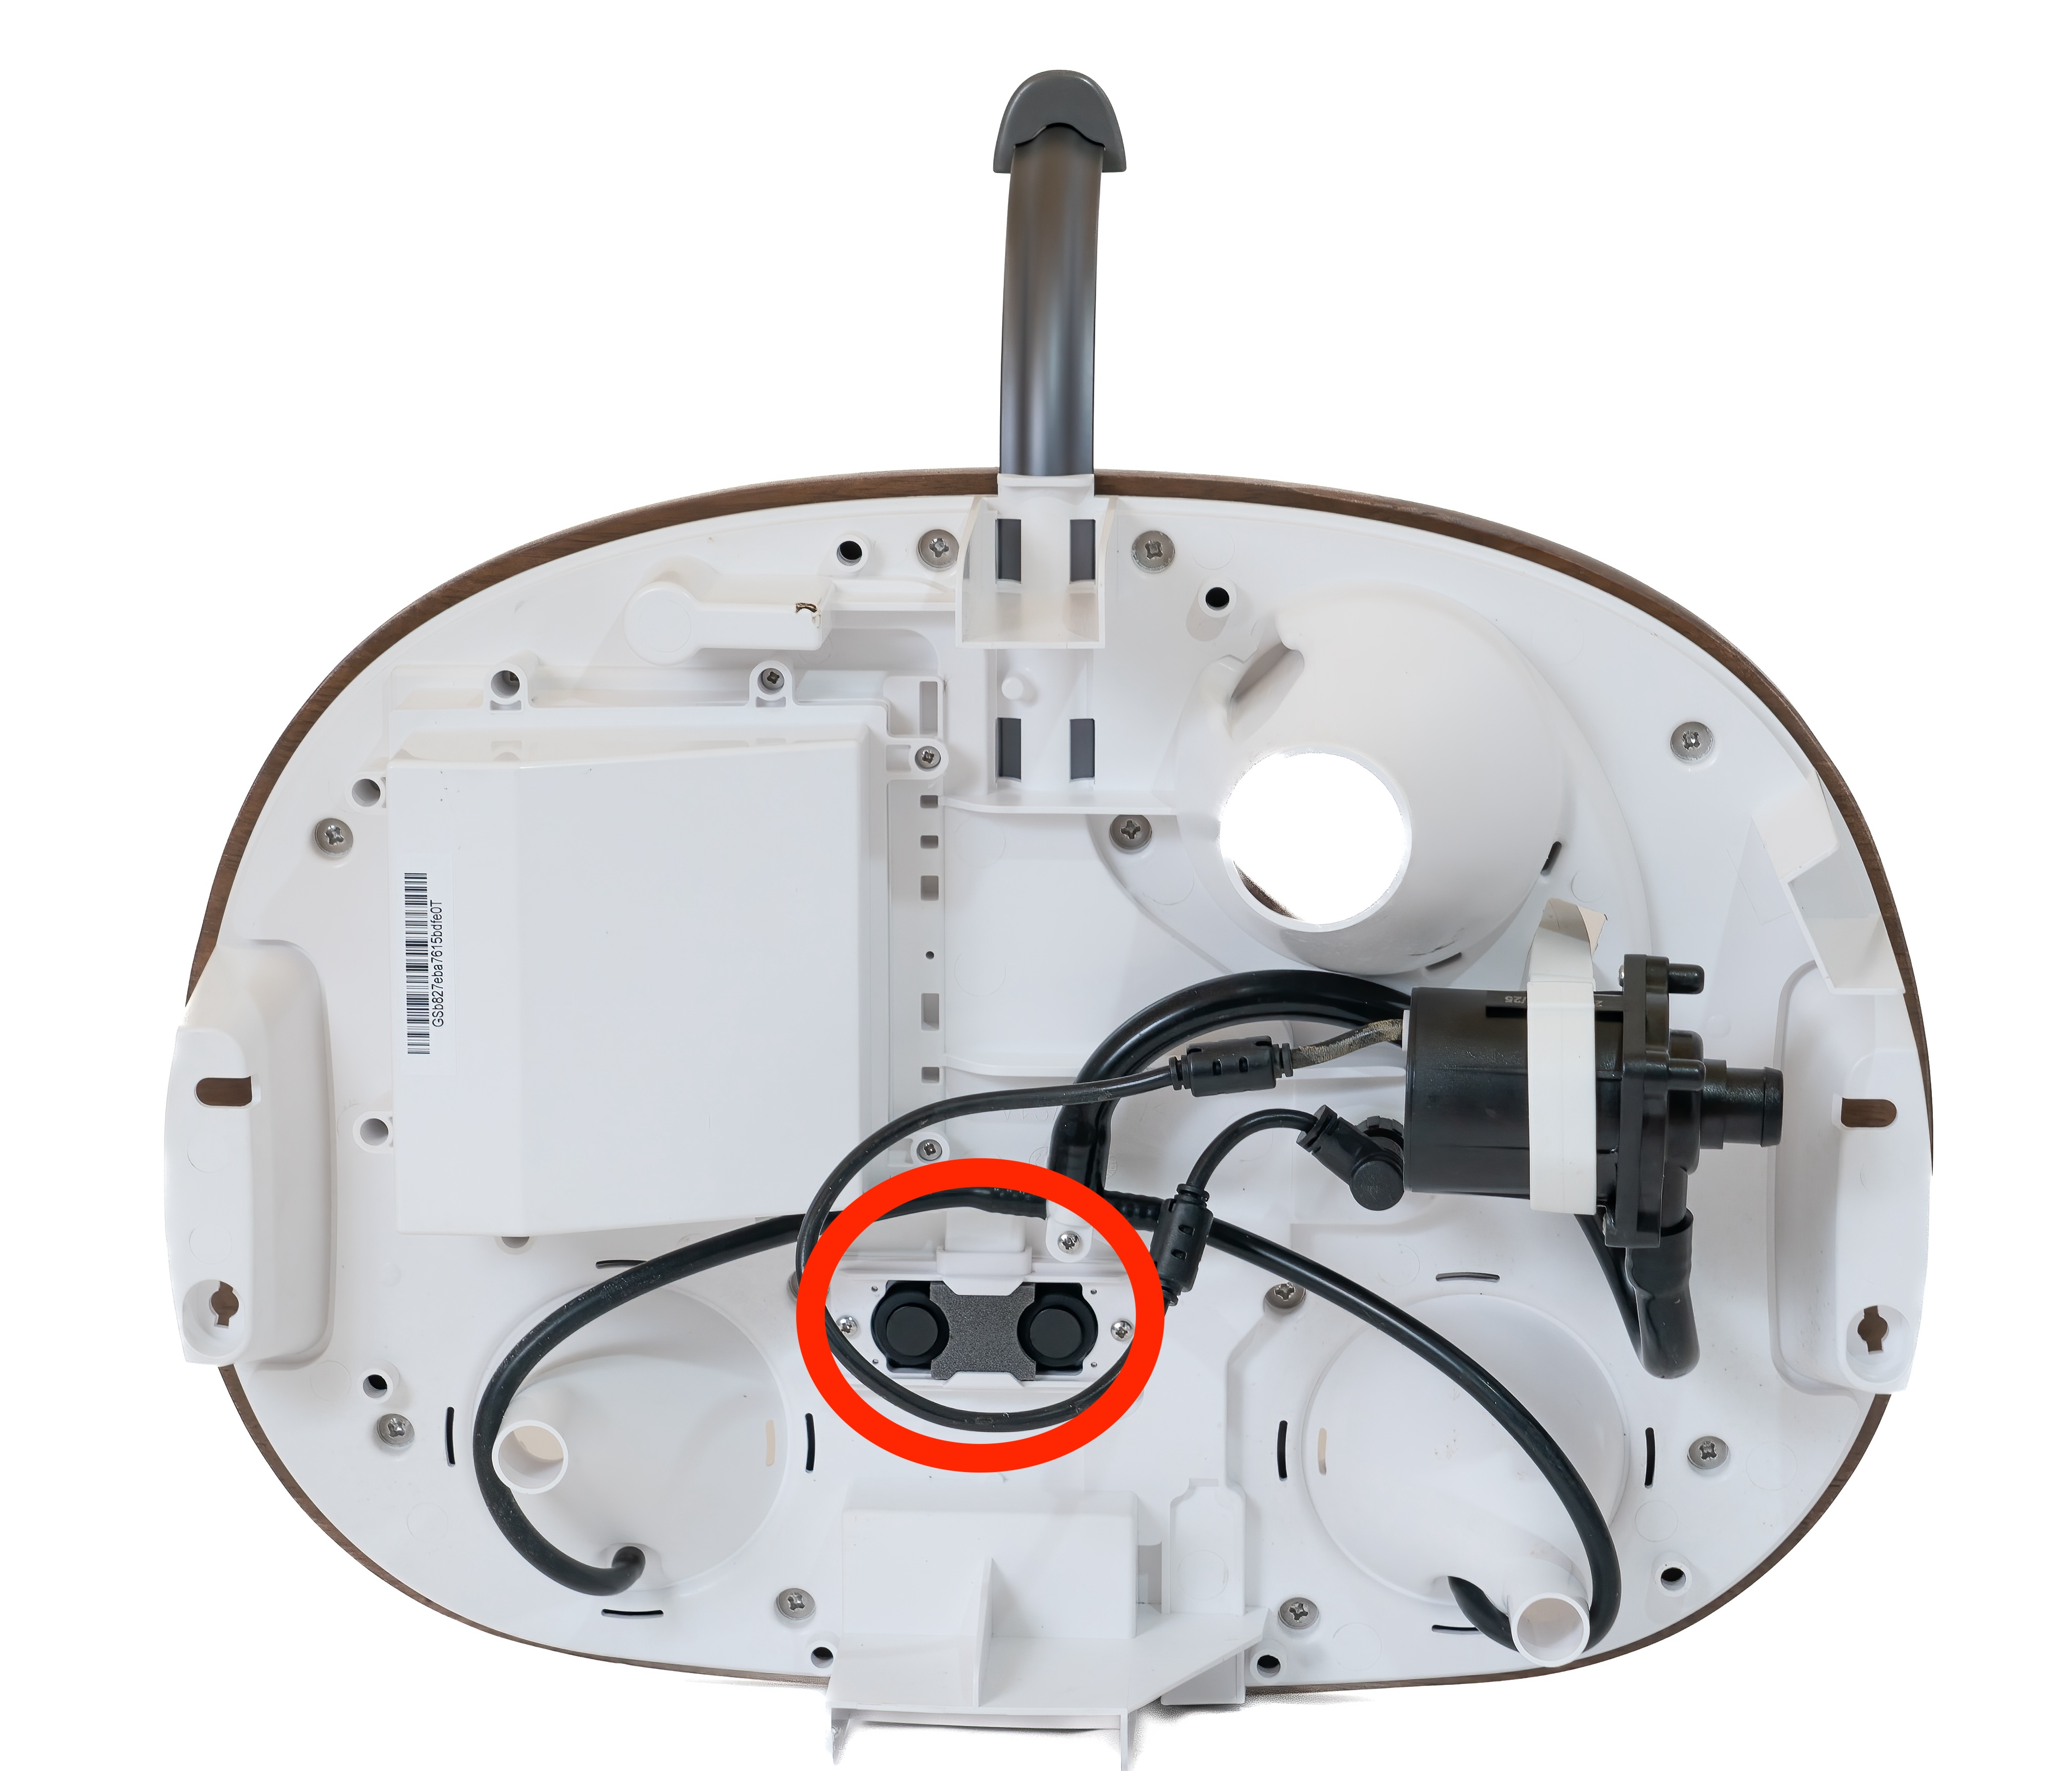
Lids vary slightly depending on Gardyn model.
Using a solution of 1 Tablespoon of citric acid in 2 cups of water, wipe down everything else underneath the lid, including the funnels, irrigation hoses & pump holder (no need to detach anything!), along with the lid's upper wood and all sides of the wood cap. Use the fish scale microfiber side of the Gardyn Cleaning Cloth to tackle tougher stains or debris. Dry all wood immediately when done.
⚠️ Safety Reminder:
When using citric acid to clean your Gardyn, always wear gloves to protect your skin. Citric acid is a natural but strong acid that can cause irritation with direct contact. Avoid contact with your eyes and skin, and wash your hands thoroughly after handling.
5. Reattach & Reboot Your Gardyn
Questions? Reach us at support@mygardyn.com, or chat with us! We're here to help.