
How to Pair a Lid Replacement
To pair your Gardyn's lid replacement, follow these steps so you can get back to growing in no time.
If you own multiple Gardyns, turn off all devices that do not relate to the lid replacement before you begin this process. This will help to prevent any errors when pairing the replacement lid.
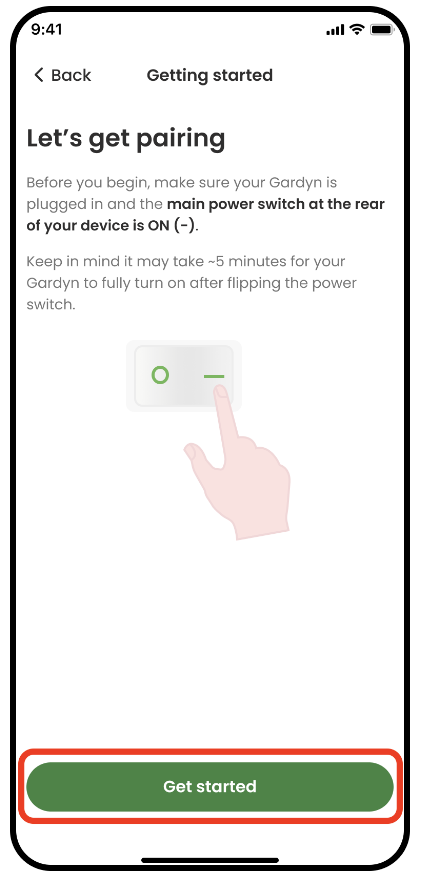
1. Make sure your Gardyn is powered on with the new, replacement lid. (Need help installing your new lid first? Follow our guide). Allow up to 5 minutes for your device to fully turn on after flipping the power switch to the on [-] position.
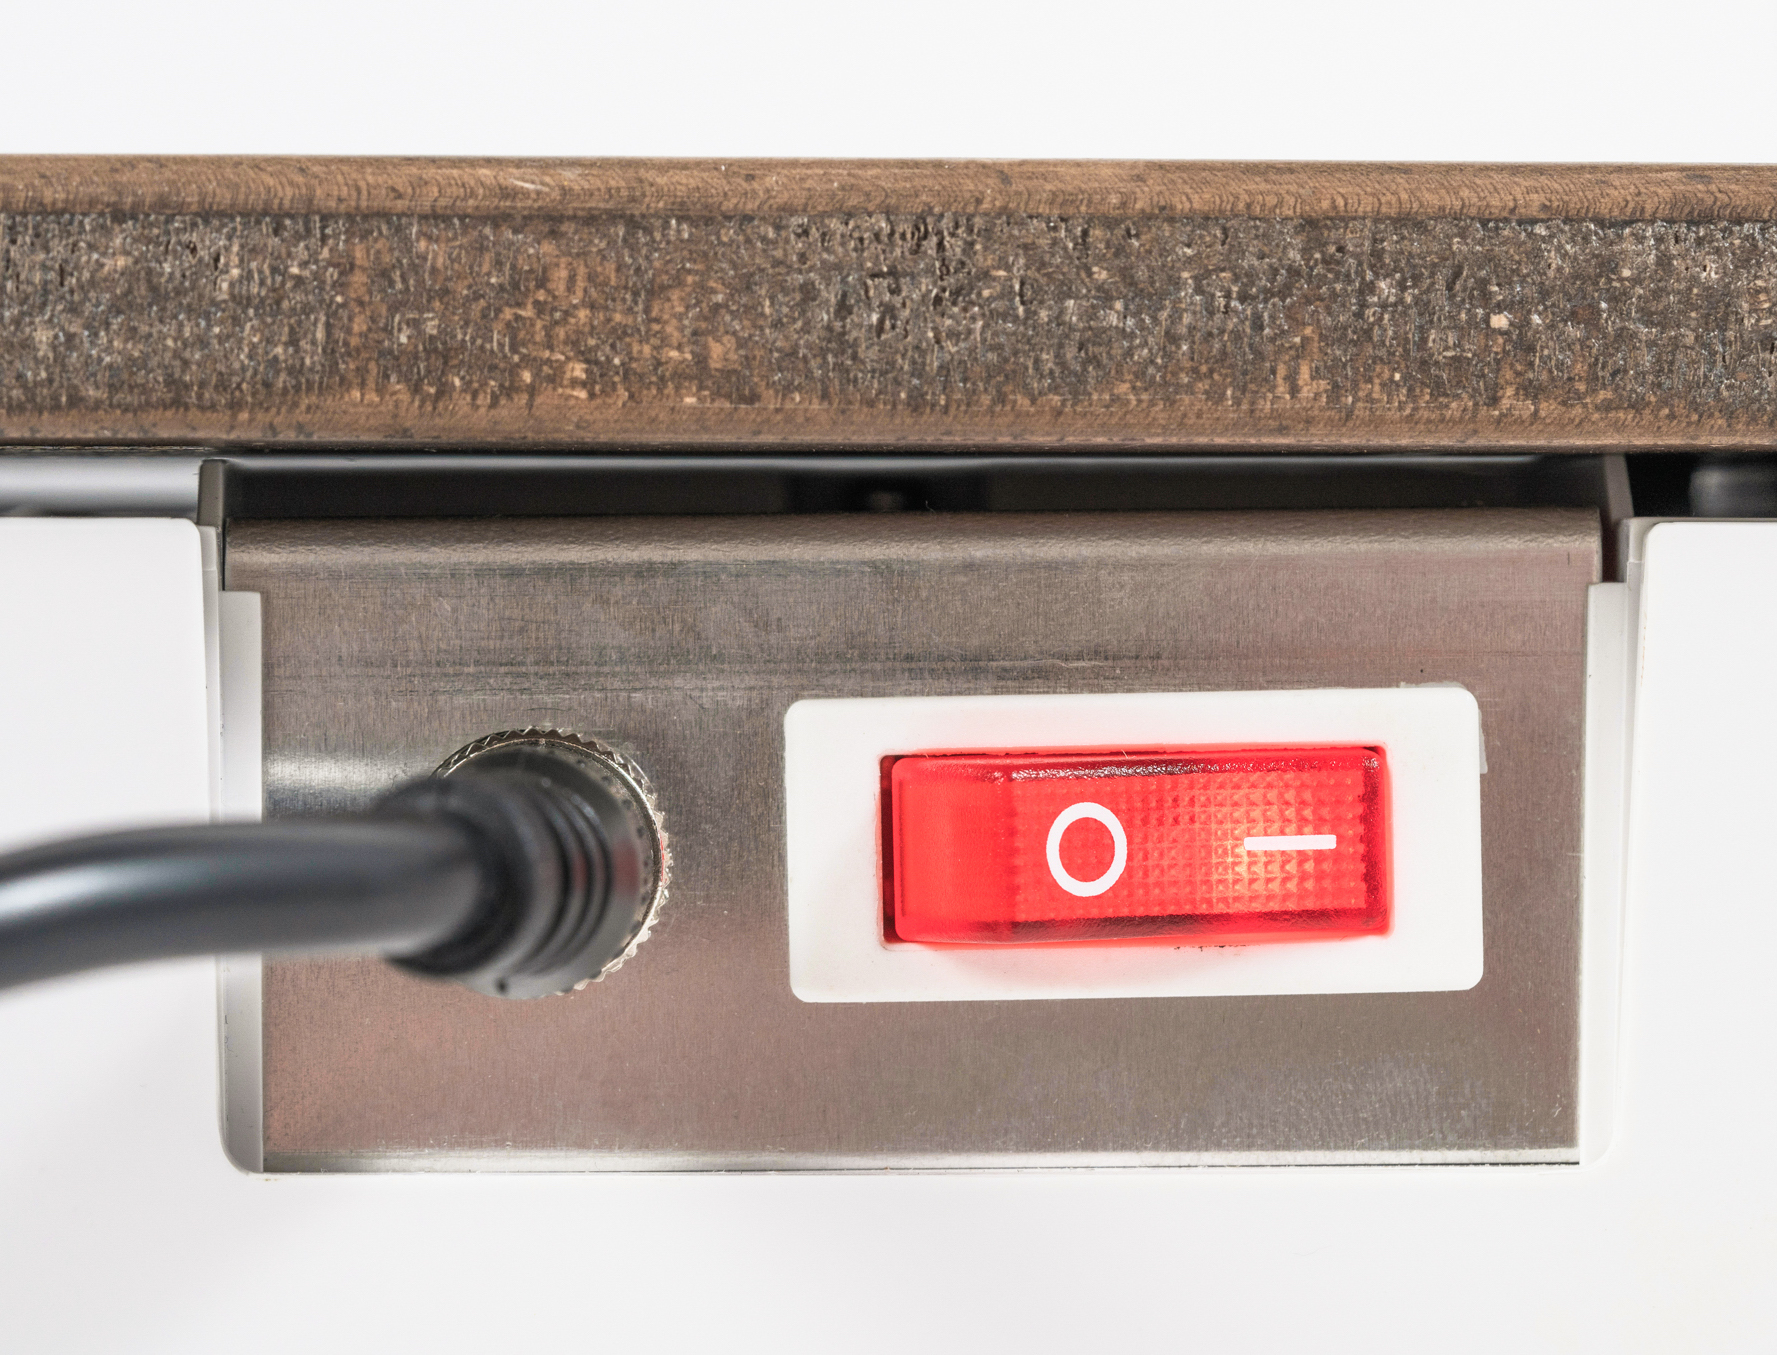
Power switch in the on [-] position
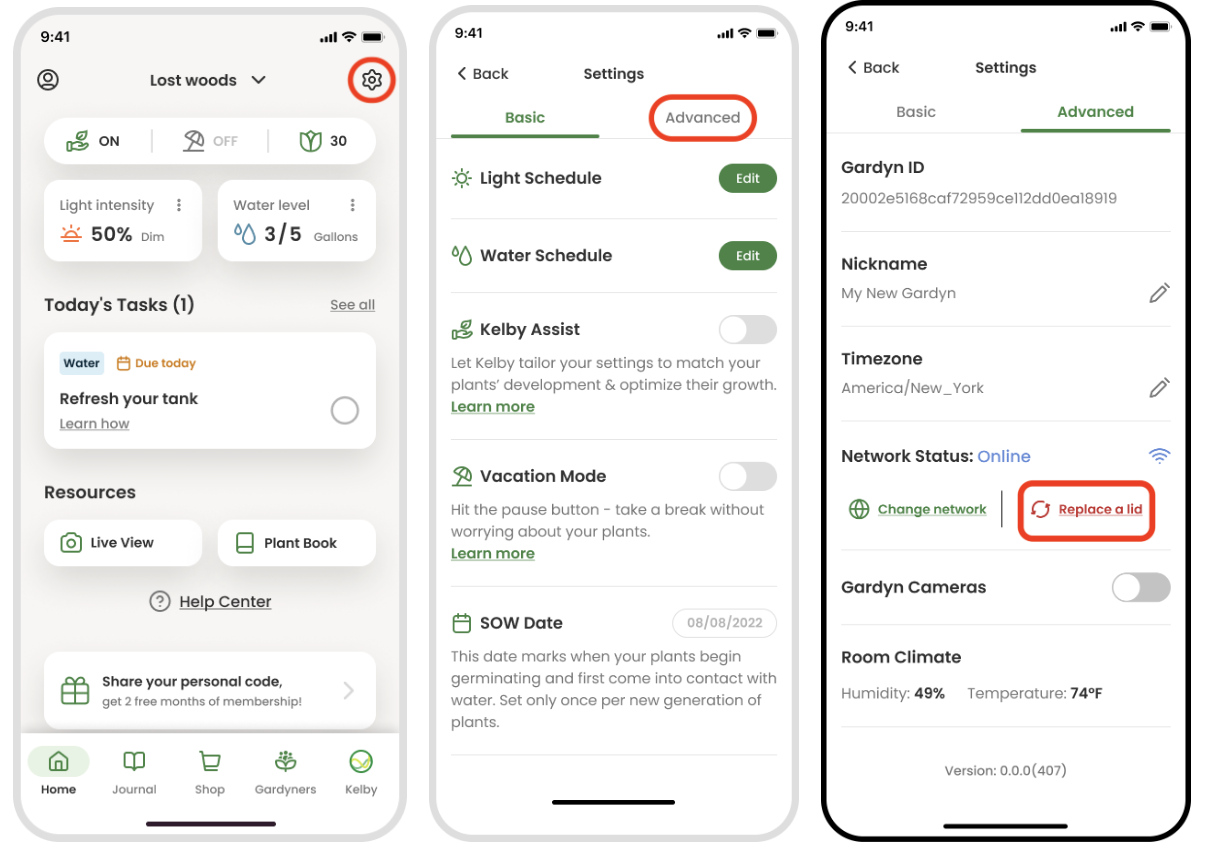
2. In the Gardyn app, tap the gear icon in the upper right corner of your app's home screen to go to your settings, then select the "Advanced" tab. Under "Network status," select "Replace a lid."
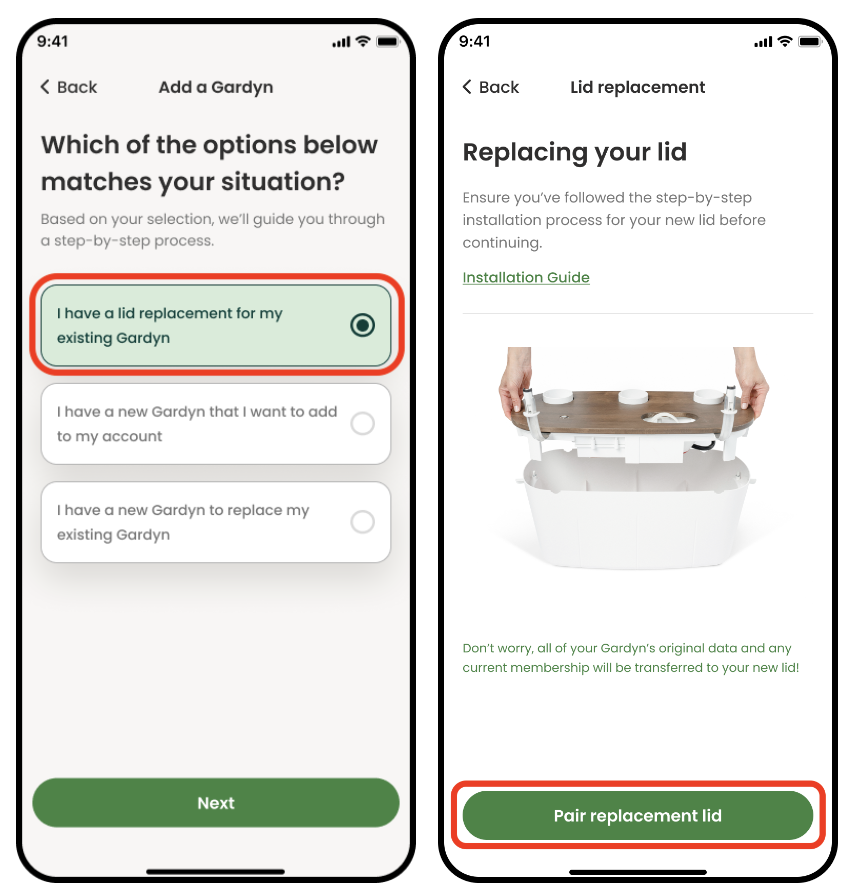
3. Select the lid replacement option on the next screen, then "Pair replacement lid" and "Get started."
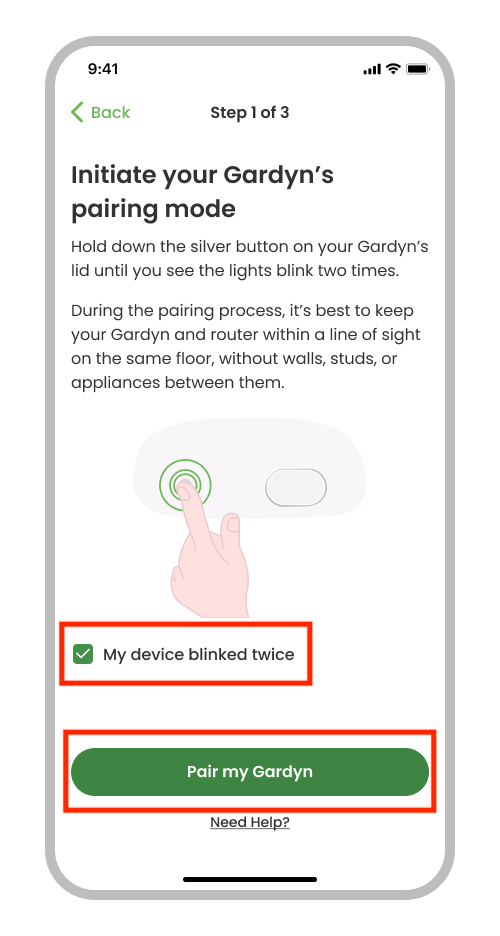
4. Follow the prompt to press and hold the silver button on your Gardyn's lid until the LED lights blink two times. When they do, tap the box to check it off, then tap the green "Pair my Gardyn" button.
5. Read this screen's instructions, then minimize the Gardyn app and navigate to your mobile device's WiFi settings.
Android users can click the green, underlined text of Step 1 on this screen to be taken to their WiFi settings automatically. Alternatively, for some Android users and all Apple users, from your mobile device's home screen, go to Settings, then WiFi.
Your mobile device will automatically search for available networks, so you need to look for the network named "GardynXXXX" within the list of available networks. Tap on it to connect.
If you're prompted with a pop-up like the one shown on the instruction screen while in your WiFi settings, select "Keep Trying WiFi."
Note that you may see a checkmark next to the Gardyn network's name once you're connected while also seeing a message such as "unsecured network" or "no internet connection." This is normal, and you can go ahead with the pairing process. If you need help at this stage, check out our troubleshooting tips.
Once you connect to the Gardyn network, return to your Gardyn app and tap the box to check it, confirming you're now connected to a Gardyn network. Then tap the green "Connect to a network" button to continue.
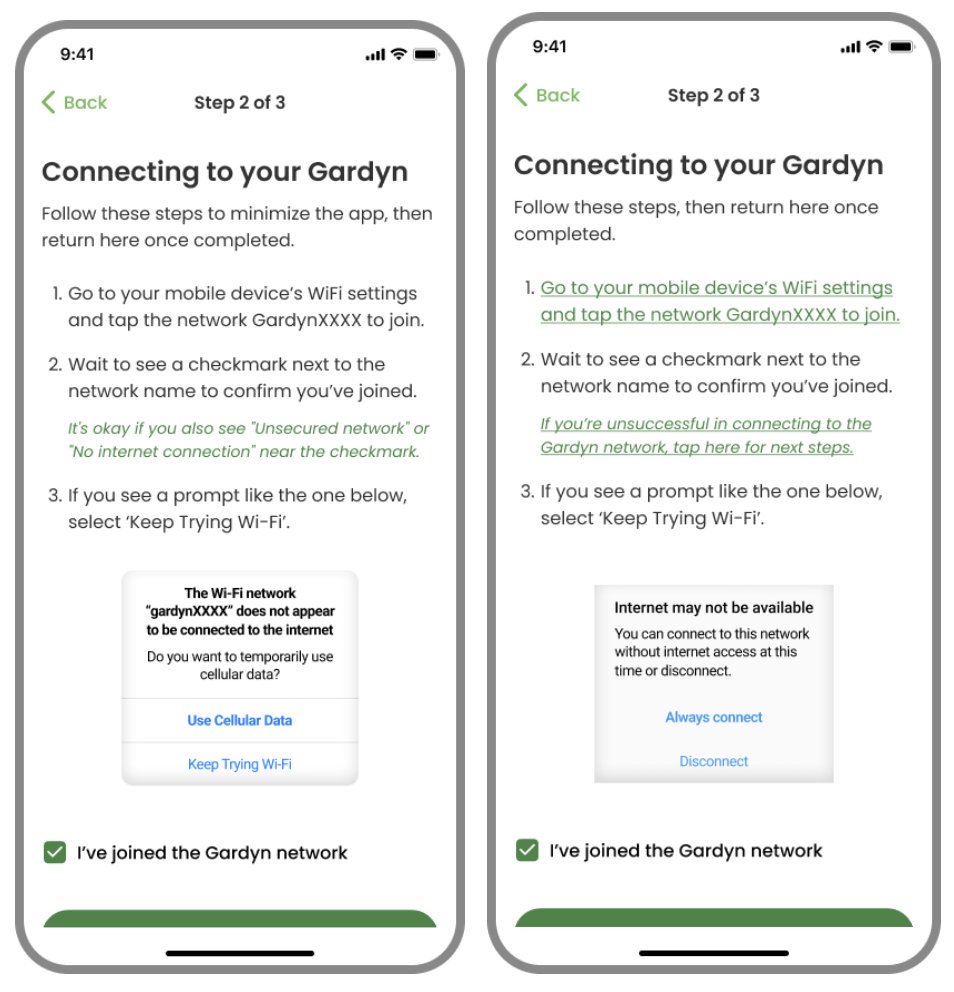
The direction screens for Apple (left) and Android (right) mobile devices
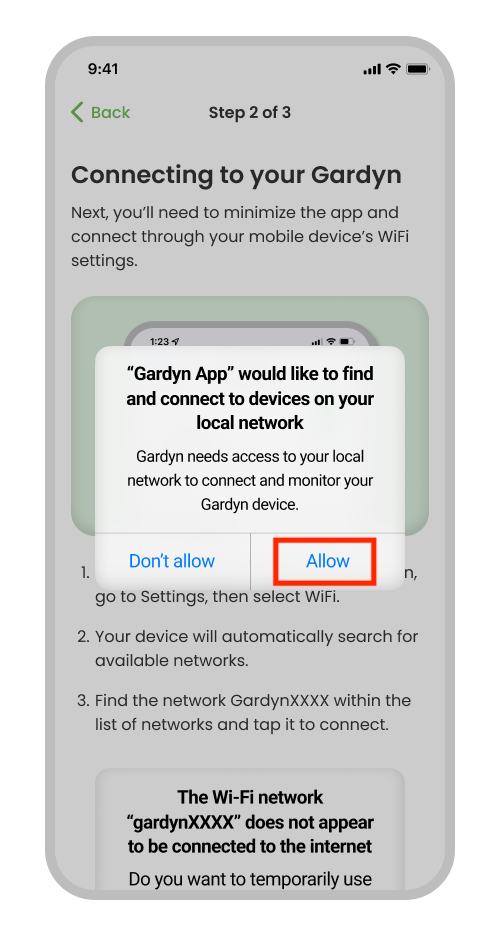
6. If you are presented with this pop-up, select "Allow." This is necessary to complete pairing. If you select "Don't allow," you must delete the Gardyn app, reinstall it, and then start this process from the beginning to let the same pop-up reappear so you can select "Allow." Not all users will see this screen.
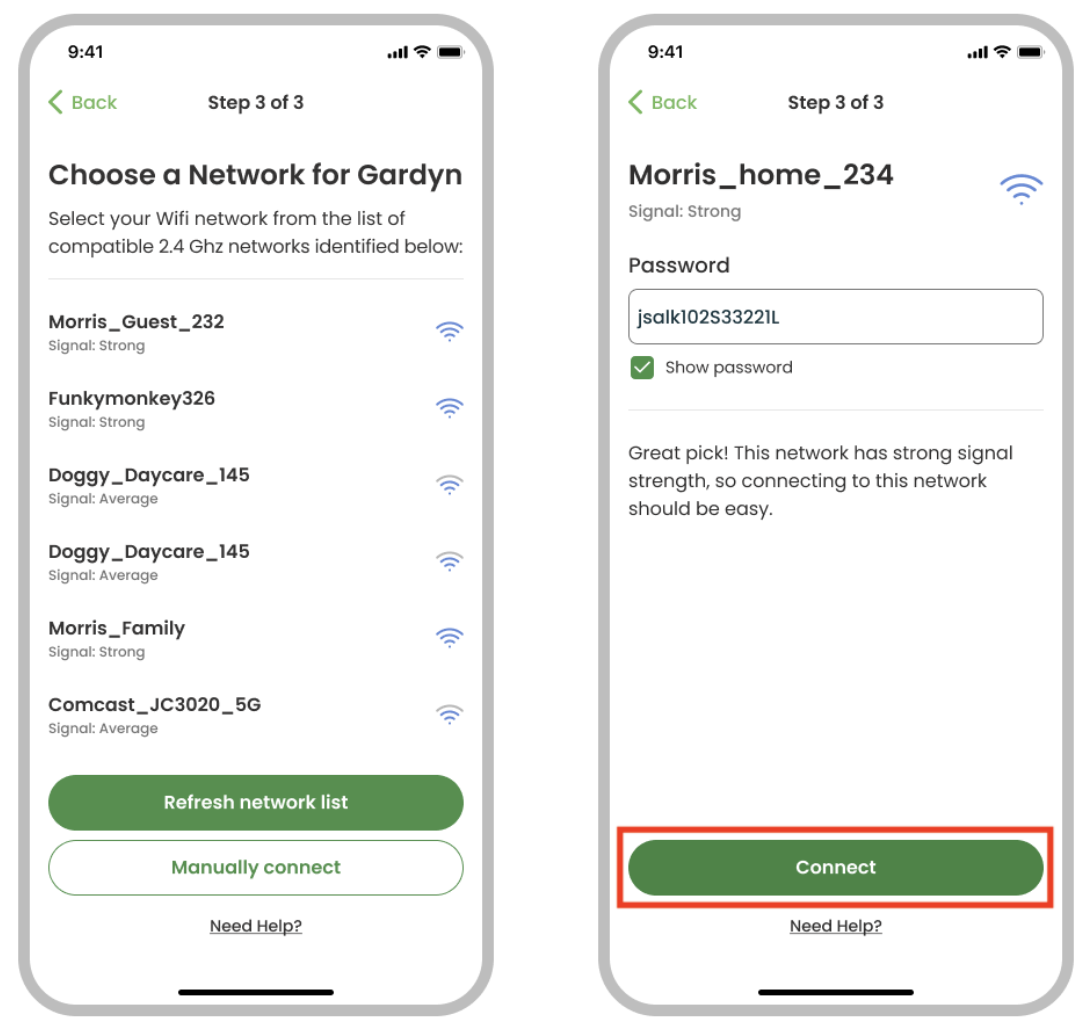
7. Select the 2.4G WiFi network from the list of available options, enter the password, then tap the green "Connect" button. Passwords (and network names if you are entering both manually) are case-sensitive!
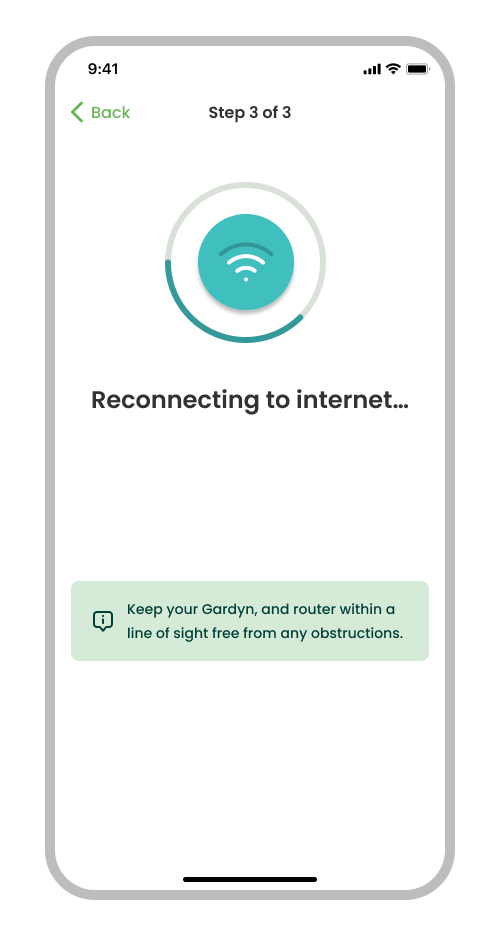
8. Your Gardyn will take a few seconds to around 2 minutes to completely reconnect to the internet, and this screen will show your progress.
9. Congrats! You have now connected your Gardyn to WiFi and will be prompted to select a nickname and timezone for your Gardyn. You can change these at any point by returning to your settings in the app.
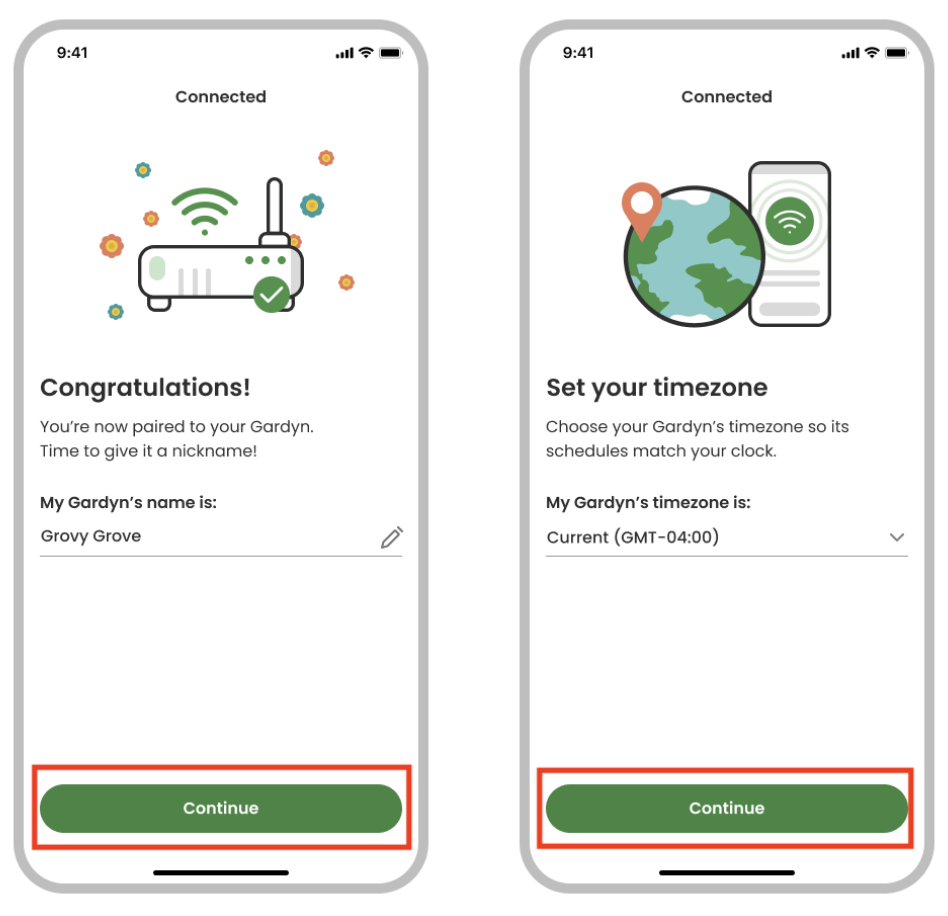
Type in your chosen nickname, tap the green "Continue" button, then select your timezone. Tap the green "Continue" button again; the pairing is complete!
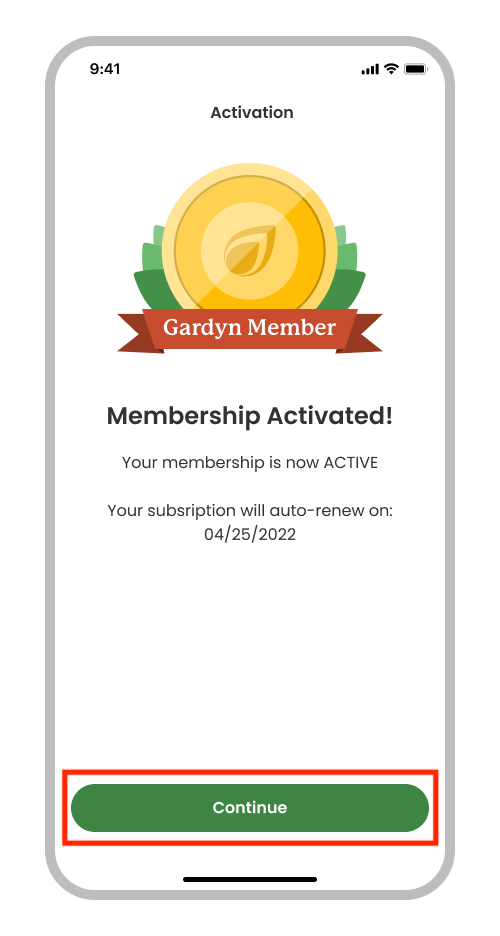
10. If you previously redeemed a membership, you will see this final screen, letting you know your membership is active now that your Gardyn is paired. Tap the green "Continue" button to finish.
Questions? Reach us at support@mygardyn.com, or chat with us. We're here to help!