
Replacing Your Water Level Sensor
If your Gardyn Home 3–4 or Gardyn Studio 1–2 water level sensor isn’t working properly and you’ve been advised to replace it, follow the steps below.
To get started, you’ll need a Phillips head screwdriver, a clean tray or countertop, and a towel to protect your workspace.
Step 1: Prepare Your Gardyn & Gain Access to Your Lid's Underside
Follow these steps to safely access the underside of your Gardyn lid:
Power Down Your Gardyn
Turn off your Gardyn and unplug the power supply from both the wall outlet and the lid.Remove Your Plants
Take out all your plants, keeping them in their yPods, and place them on a clean countertop or tray.Prepare the Area
Lay a towel on the floor beside your Gardyn. This will serve as a resting spot for the lid and columns once removed.Secure the Water Pump
Open the tank refill lid and lift your water pump into an upright position to keep it secure.Remove the Upper Half of the Gardyn
Unlock the lid locks.
Holding the Gardyn by the columns, lift off the upper half and place it carefully on the towel.
While still holding the columns, gently lean your Gardyn down so that the columns rest on the floor and the light bars are positioned above them.
You’ll now have clear access to the underside of the lid to replace the water level sensor.
Step 2: Locate & Replace the Water Level Sensor
Locate the Sensor
Look underneath your Gardyn lid to find the water level sensor.Remove the Screws
Use a Phillips head screwdriver to remove the two screws holding the sensor in place. Set the screws aside in a safe spot.Unplug the Sensor
Gently disconnect the sensor from the cable inside the lid.Attach the New Sensor
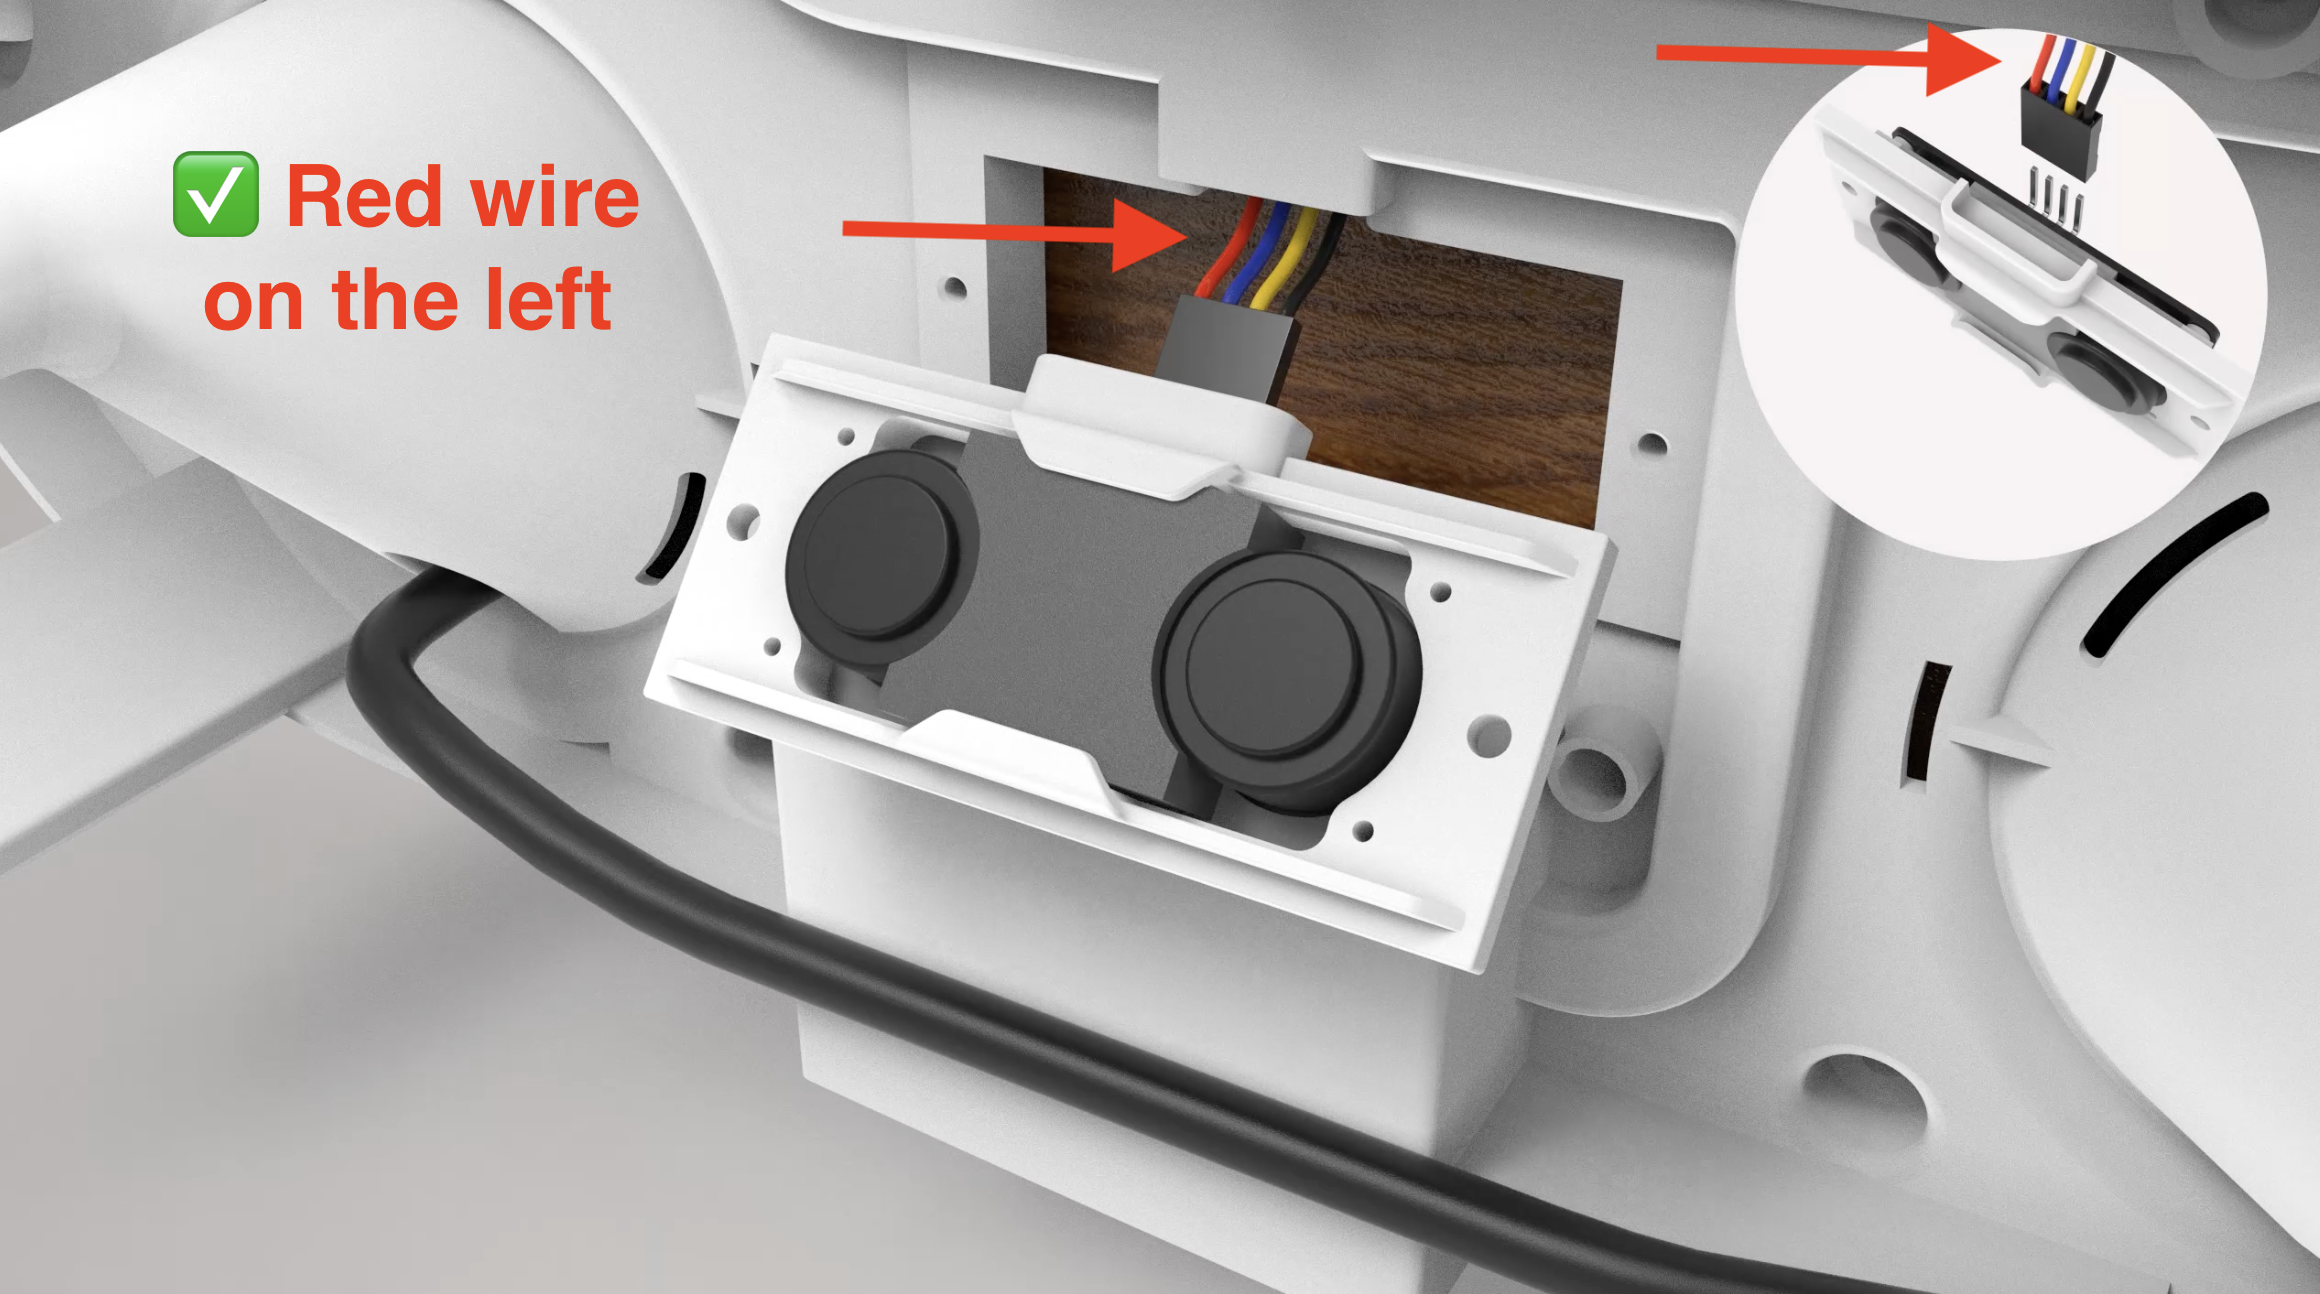
Hold the new sensor so the wires are pointing upward and make sure the red wire is on the left, as shown in the reference image.⚠️ Important: Attaching the sensor with the red wire on the right will permanently damage the component and require a full lid replacement. Double-check the orientation before proceeding.
Reconnect the Cable
Carefully plug the 4-prong connector from the new sensor into the cable connector coming from the lid, ensuring the red wire remains on the left.Secure the Sensor
Position the new sensor into the lid at a slight angle, then gently tighten the two screws to hold it in place.
Your new water level sensor is now successfully installed!
Step 3: Reassemble & Restart Your Gardyn
Reassemble Your Gardyn
Grasp the columns and carefully tilt the upper half of your Gardyn upright from the towel until it’s vertical. Then, lift and place it back onto the lid.Secure and Restore Components
Lower the water pump into position, close the lid locks, and return your plants (in their yPods) to the columns.Power On
Plug the power supply back into both your Gardyn’s lid and the outlet. Flip the main power switch to turn your Gardyn on. Allow up to 5 minutes for the device to fully reboot.Reconnect and Calibrate
Once your Gardyn reconnects to WiFi and the Gardyn app, give it about 1 hour for the new water level sensor to take its first readings and update the app.
Your Gardyn is now ready to get back to growing!
Questions? Reach us at support@mygardyn.com, or chat with us! We're here to help.