
How to Pair Your New (First) Gardyn
Before you begin:
Before starting this process, you must install the Gardyn App on your mobile device and successfully create your user account. Click here if you need help with this!
How to Pair Your New (First) Gardyn
1. Ensure your router has a 2.4 GHz frequency band.
Your Gardyn can only pair through a 2.4 GHz frequency band, but your router may have two frequency bands, 2.4 GHz and 5 GHz.
To determine this, open your WiFi network settings on your mobile device.
If you see only one network in your list of home WiFi networks, you may need to review your router settings and separate the 2.4 GHz band by creating a guest network with a dedicated name and password. This lets your Gardyn find and connect to the 2.4GHz band.
2. Ensure your 2.4 GHz network has a password
The Gardyn cannot connect to WiFi networks that do not have a password.
3. Check that your Gardyn is powered on by ensuring the main power switch on the back of the water tank is in the ON [-] position. Wait 5 minutes after turning your Gardyn on before continuing to the next step.

Power switch in the on [-] position
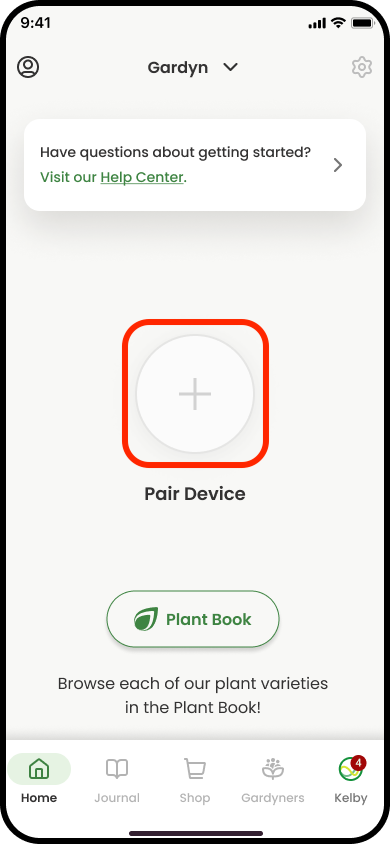
4. Initiate the connection process by opening your Gardyn app and clicking the plus (+) icon above "Pair Device".
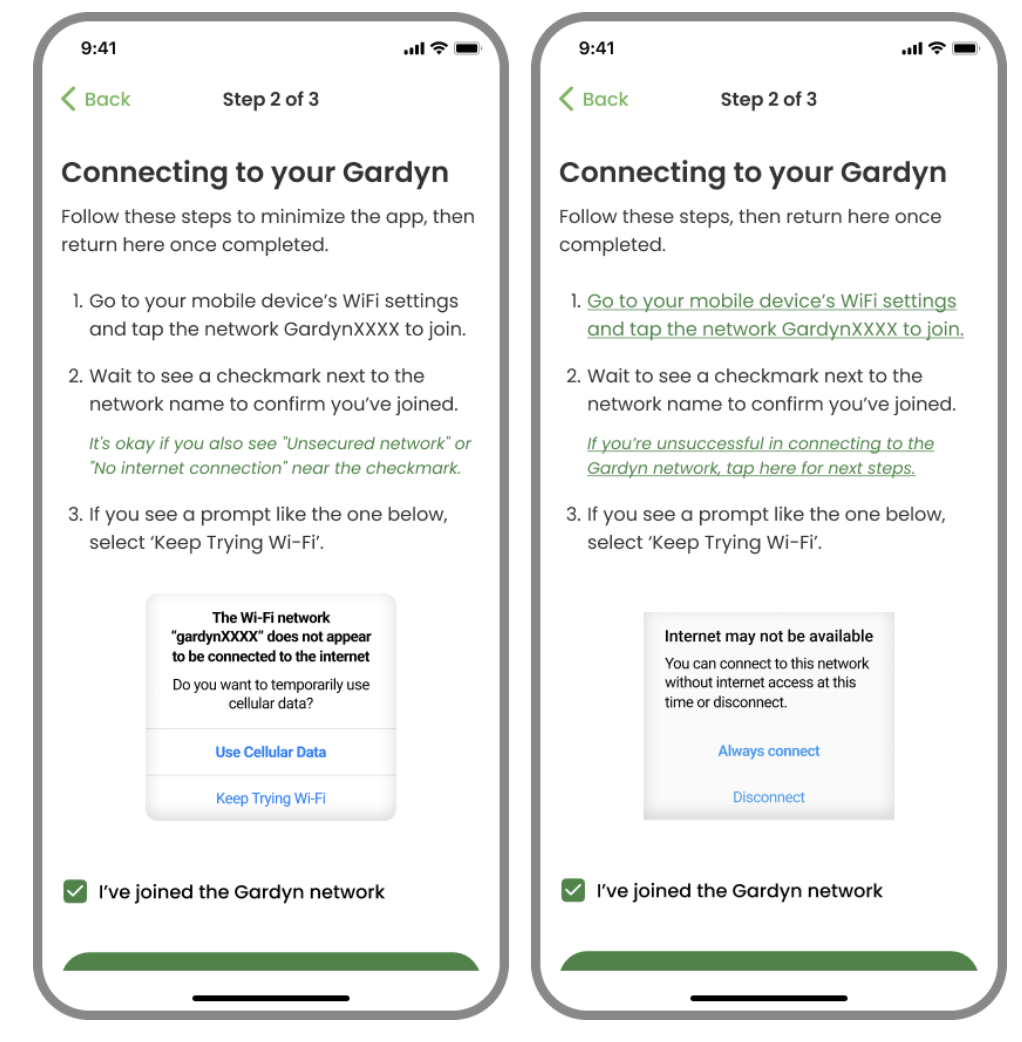
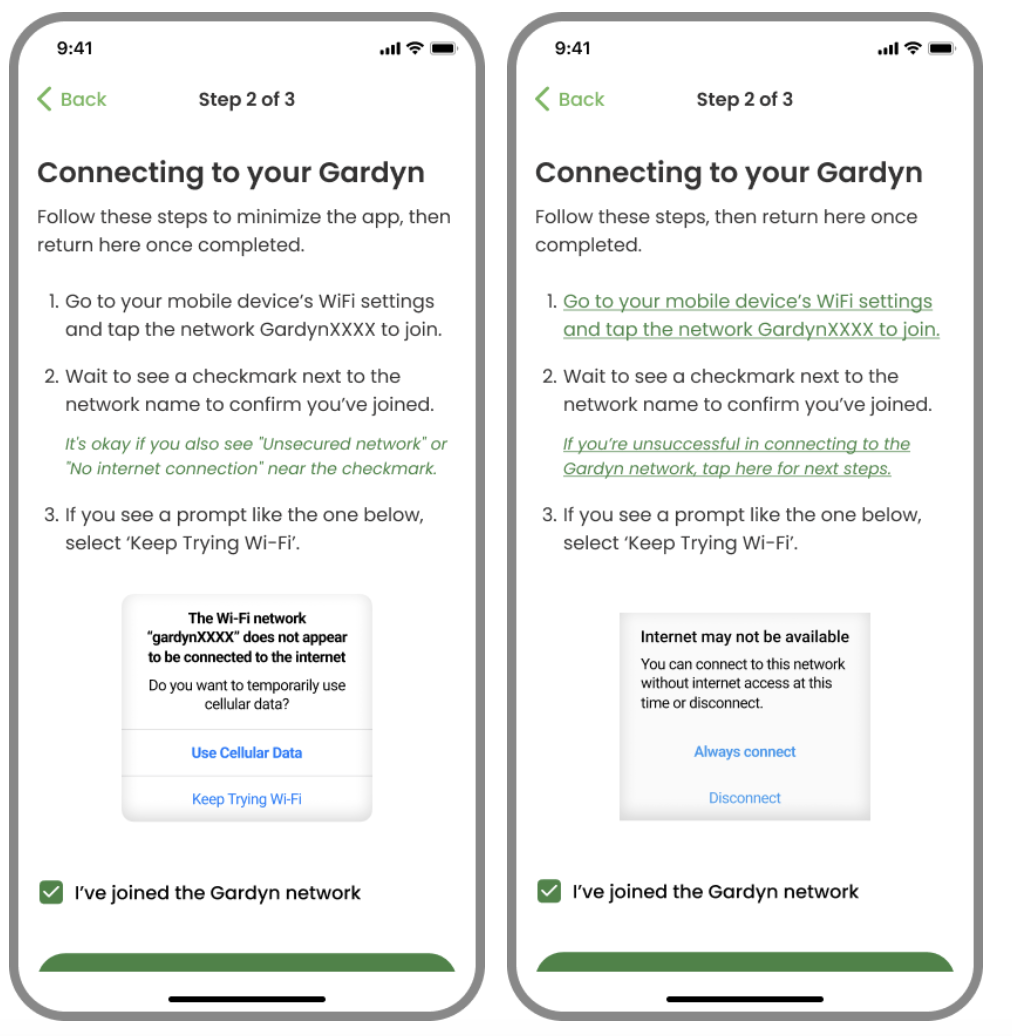
5. Press and hold the silver button on your Gardyn's lid until the lights blink. Next, minimize the Gardyn app and navigate to your mobile device's WiFi settings to connect to the Gardyn's access point.
Your Gardyn should be ready to pair and appear in your mobile device's network list, similar to the screen below.
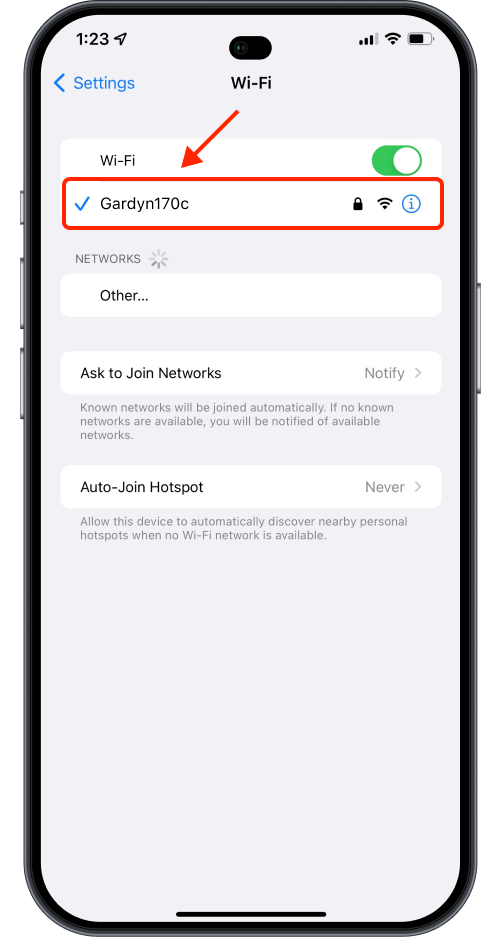
Android users can click the green, underlined text of Step 1 on this screen to be taken to their WiFi settings automatically. Alternatively, for Android users, and for all Apple users, from your mobile device's home screen go to Settings, then WiFi.
Your mobile device will automatically search for available networks, so you need to look for the network named "GardynXXXX" within the list of available networks. Tap on it to connect.
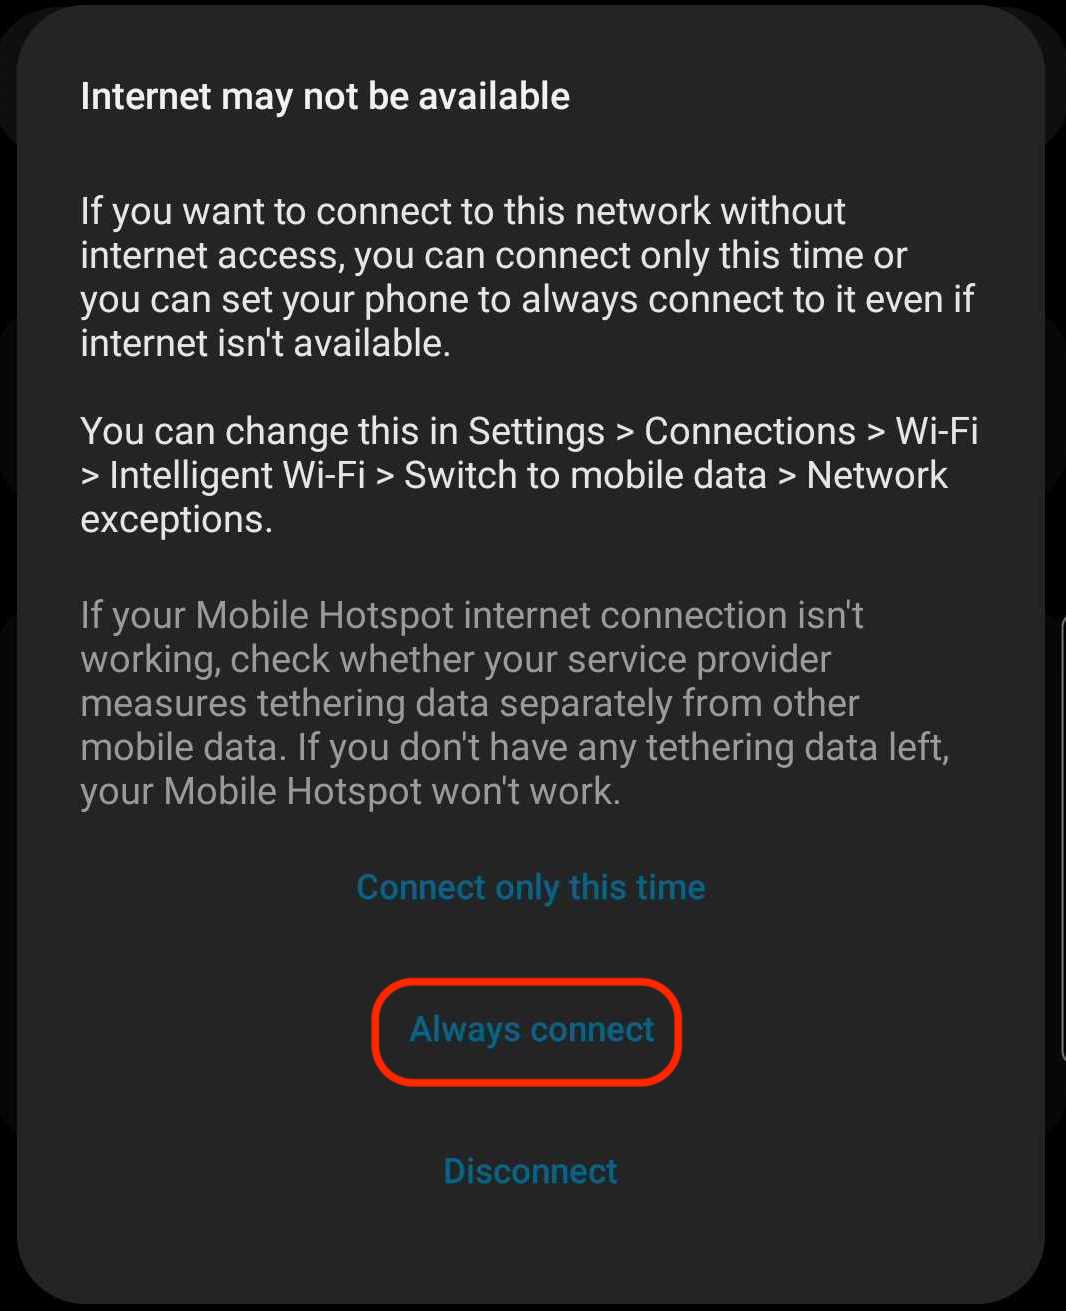
If you're prompted with a pop-up similar to the one shown on the instruction screen while you are in your WiFi settings, select "Keep Trying WiFi". Android users may see this pop-up, in which case you should select "Always connect":
Note that you may see a checkmark next to the Gardyn network's name once you're connected while also seeing a message such as "unsecured network" or "nointernet connection." This is normal, and you can proceed with pairing. If you're having trouble at this stage, check out our troubleshooting tips.
If the Gardyn access point (format: GardynXXXX) is not listed as an available network, your Gardyn is not yet ready to pair.
To fix this, hold the silver button on your Gardyn's lid again until the LED lights blink.
Your Gardyn should now be ready to pair and appear in your mobile device's network list, similar to the screen below.
If this does not work, press and hold the silver button again until the lights blink, and check your network list again.
If this still does not work, try rebooting your device by flipping the power switch on the back of your lid off, then on. Wait 5 minutes after turning your Gardyn on, then long-press the silver button again.
If the Gardyn access point still does not display in your network list after completing these steps, please contact us at support@mygardyn.com for further assistance.
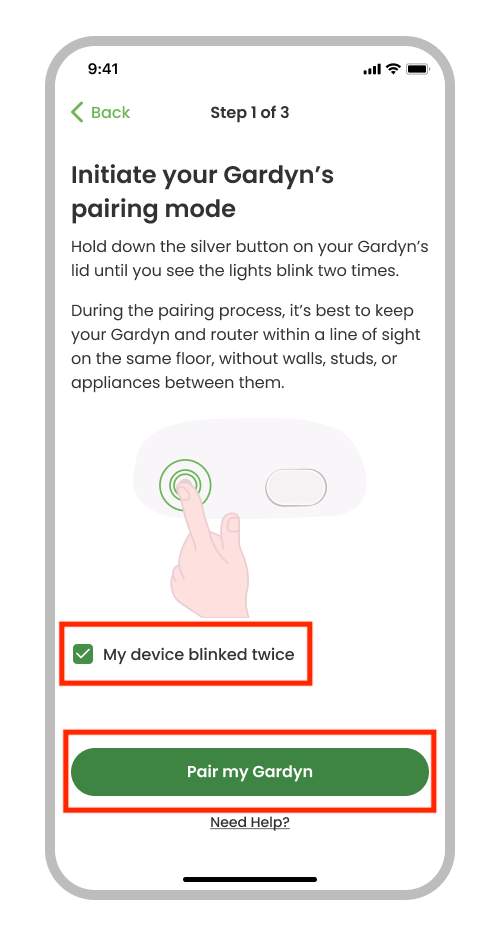
6. After you select the Gardyn network, return to your Gardyn app and tap the box next to "My device blinked twice" to check it, confirming you're now connected to a Gardyn network. Then tap "Pair My Gardyn."
7. To continue, tap the green "Connect to a network" button on the next screen.
The direction screens for Apple (left) and Android (right) mobile devices
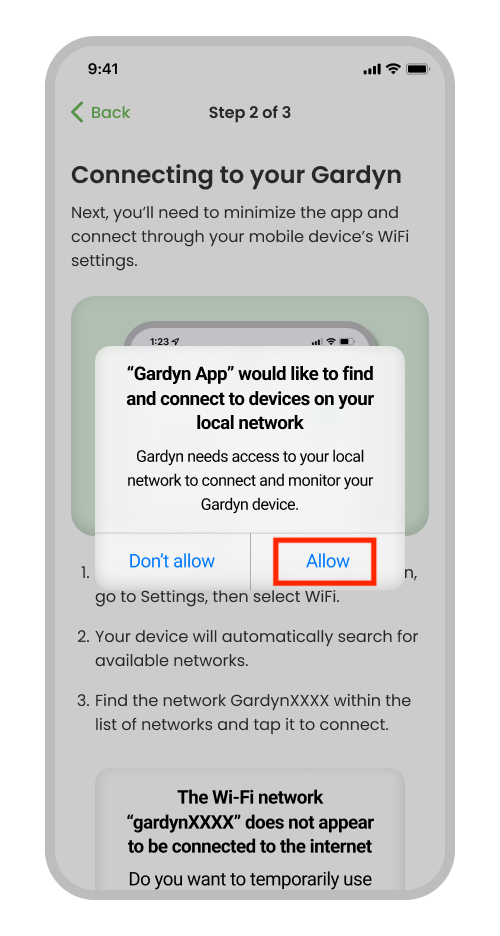
8. If you are presented with this pop-up, select "Allow." This is necessary to complete pairing. If you select "Don't allow," you must delete the Gardyn app, reinstall it, and then start this process from the beginning to let the same pop-up reappear so you can select "Allow." Not all users will see this screen.
9. Once you connect to the Gardyn access point in your mobile device's WiFi networks list, return to your Gardyn app and tap the box to check it, confirming you're now connected to a Gardyn network. Then tap the green "Connect to a network" button to continue.
The direction screens for Apple (left) and Android (right) mobile devices
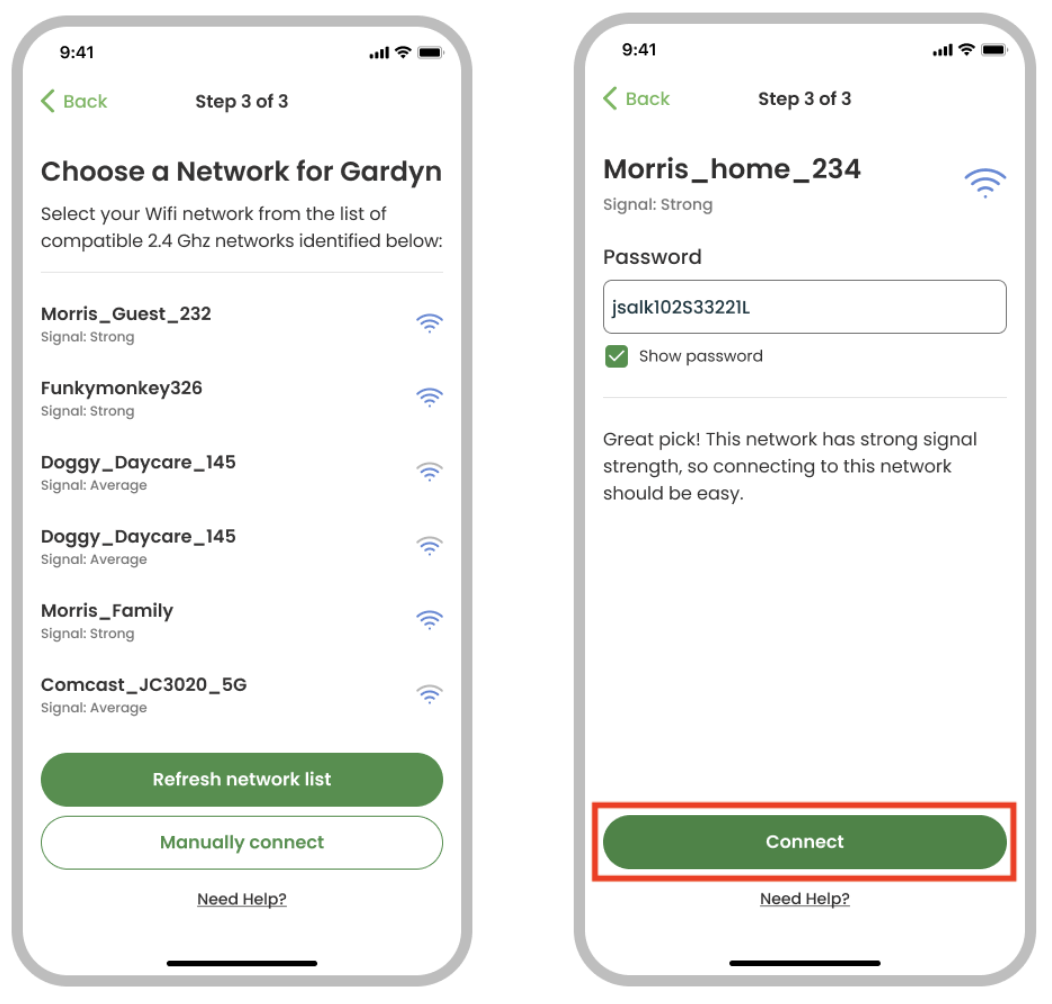
10. Select the 2.4G WiFi network you wish to connect with from the list of available options, enter the password, then tap the green "Connect" button. Passwords (and network names if you are entering both manually) are case-sensitive!
11. Your Gardyn will take a few seconds to around 2 minutes to completely connect to the Internet, and this screen will show your progress.
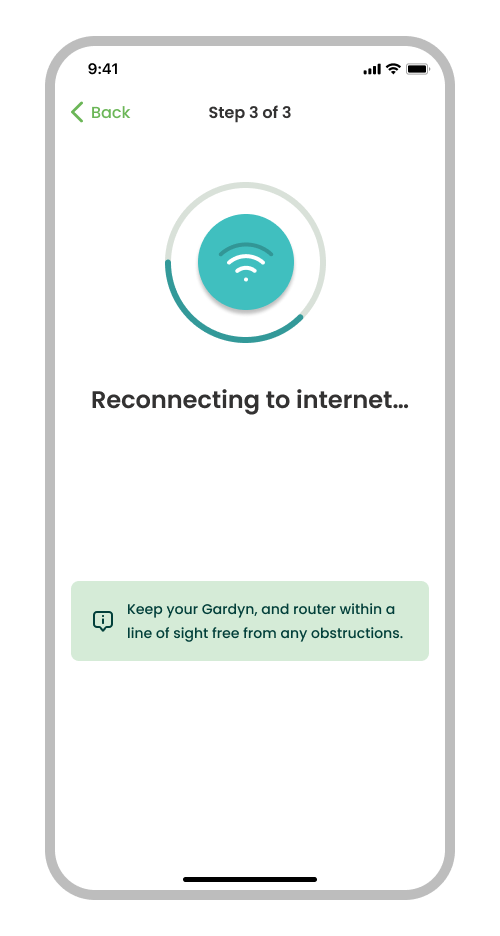
If you have any trouble, review our troubleshooting tips here!
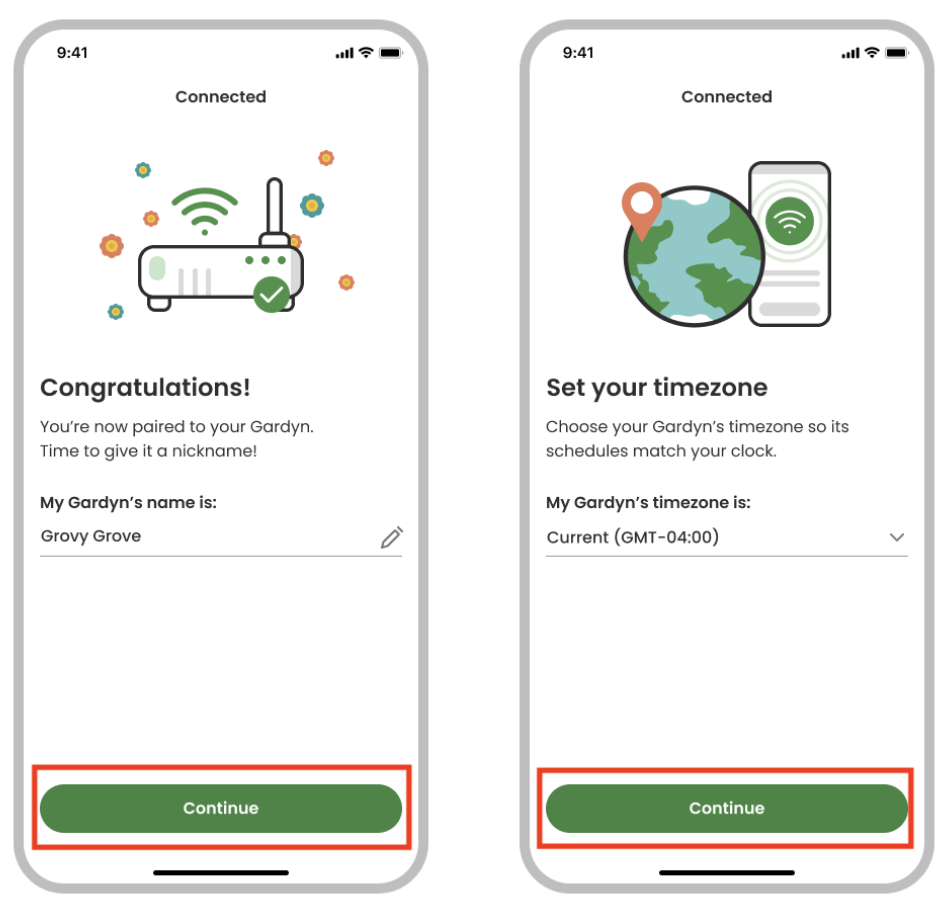
12. Congrats! You have now connected your Gardyn to WiFi and will be prompted to select a nickname and timezone for your Gardyn. You can change these at any point by returning to your settings in the app.
Type in your chosen nickname, tap the green "Continue" button, then select your timezone. Tap the green "Continue" button again, and pairing is now complete!
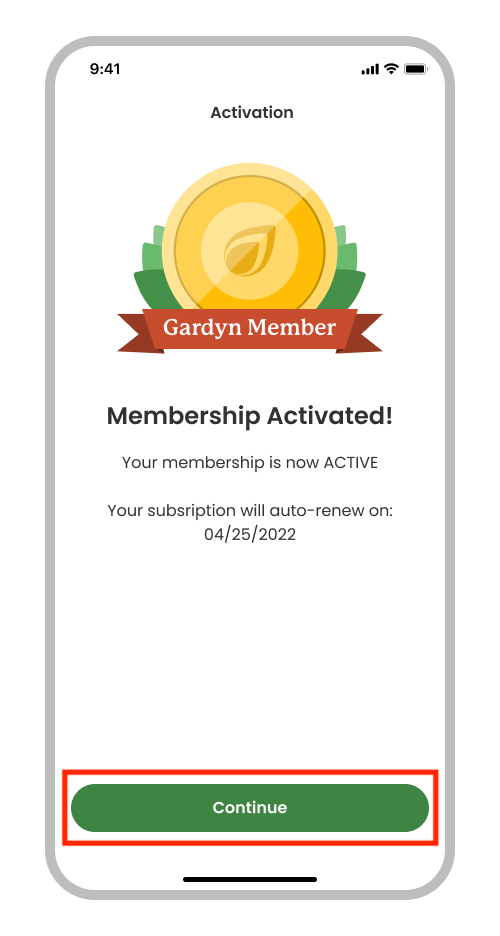
13. If you previously redeemed a membership, you will see this final screen, letting you know your membership is active now that your Gardyn is paired. Tap the green "Continue" button to finish.
If you have any trouble, review our pairing troubleshooting tips here!
Questions? Reach us at support@mygardyn.com, or chat with us! We're here to help.