
Replacing Your Temperature & Humidity Sensor
If your Gardyn has been having challenges with the temperature and humidity sensor not working properly and you've been instructed to replace it, follow these steps.
How to Replace Your Temperature & Humidity Sensor
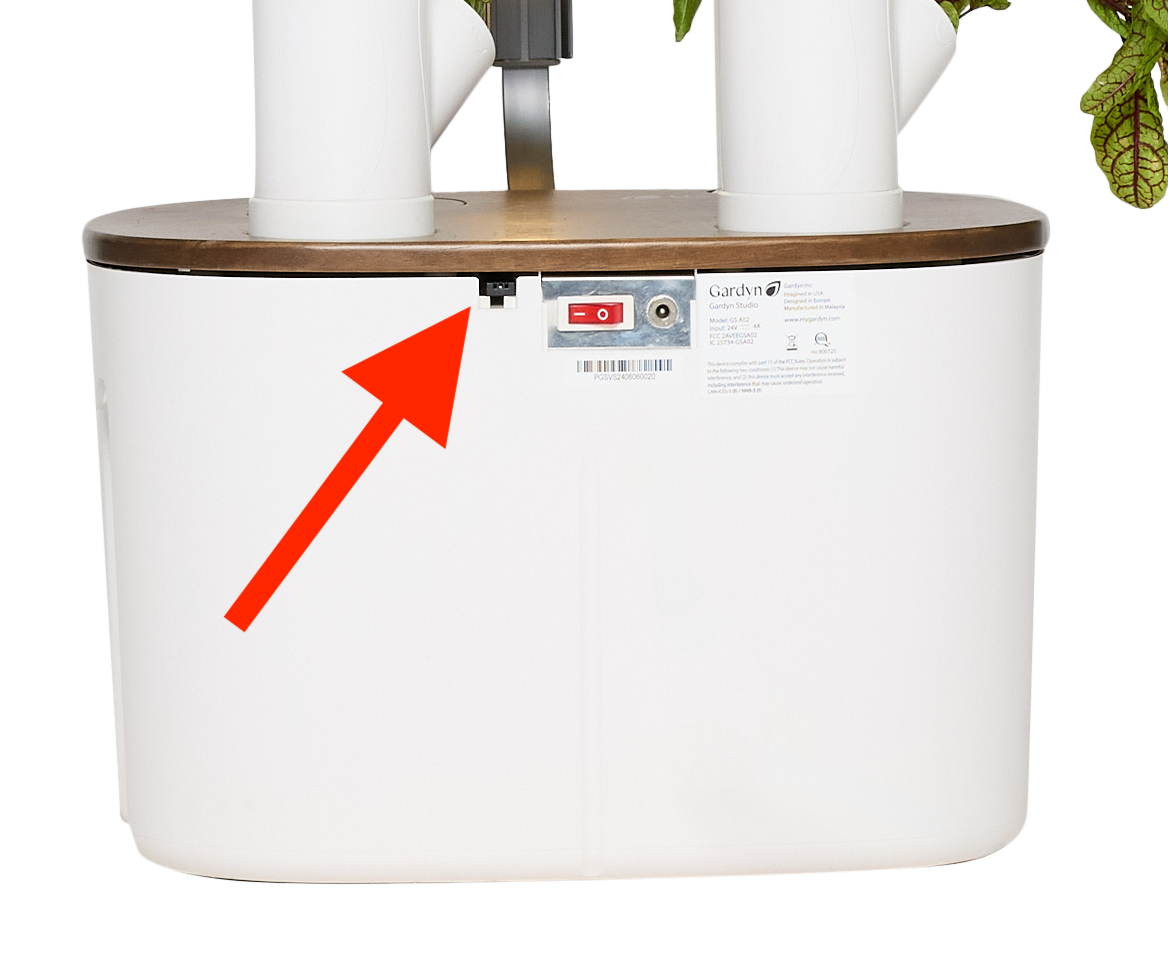
1. Turn off your Gardyn using the main power switch, unplug the power supply, and locate the temperature and humidity sensor on the back of your water tank. The shape of the sensor's access area varies slightly across Gardyn Home models and the Gardyn Studio, but all are located in the same spot.
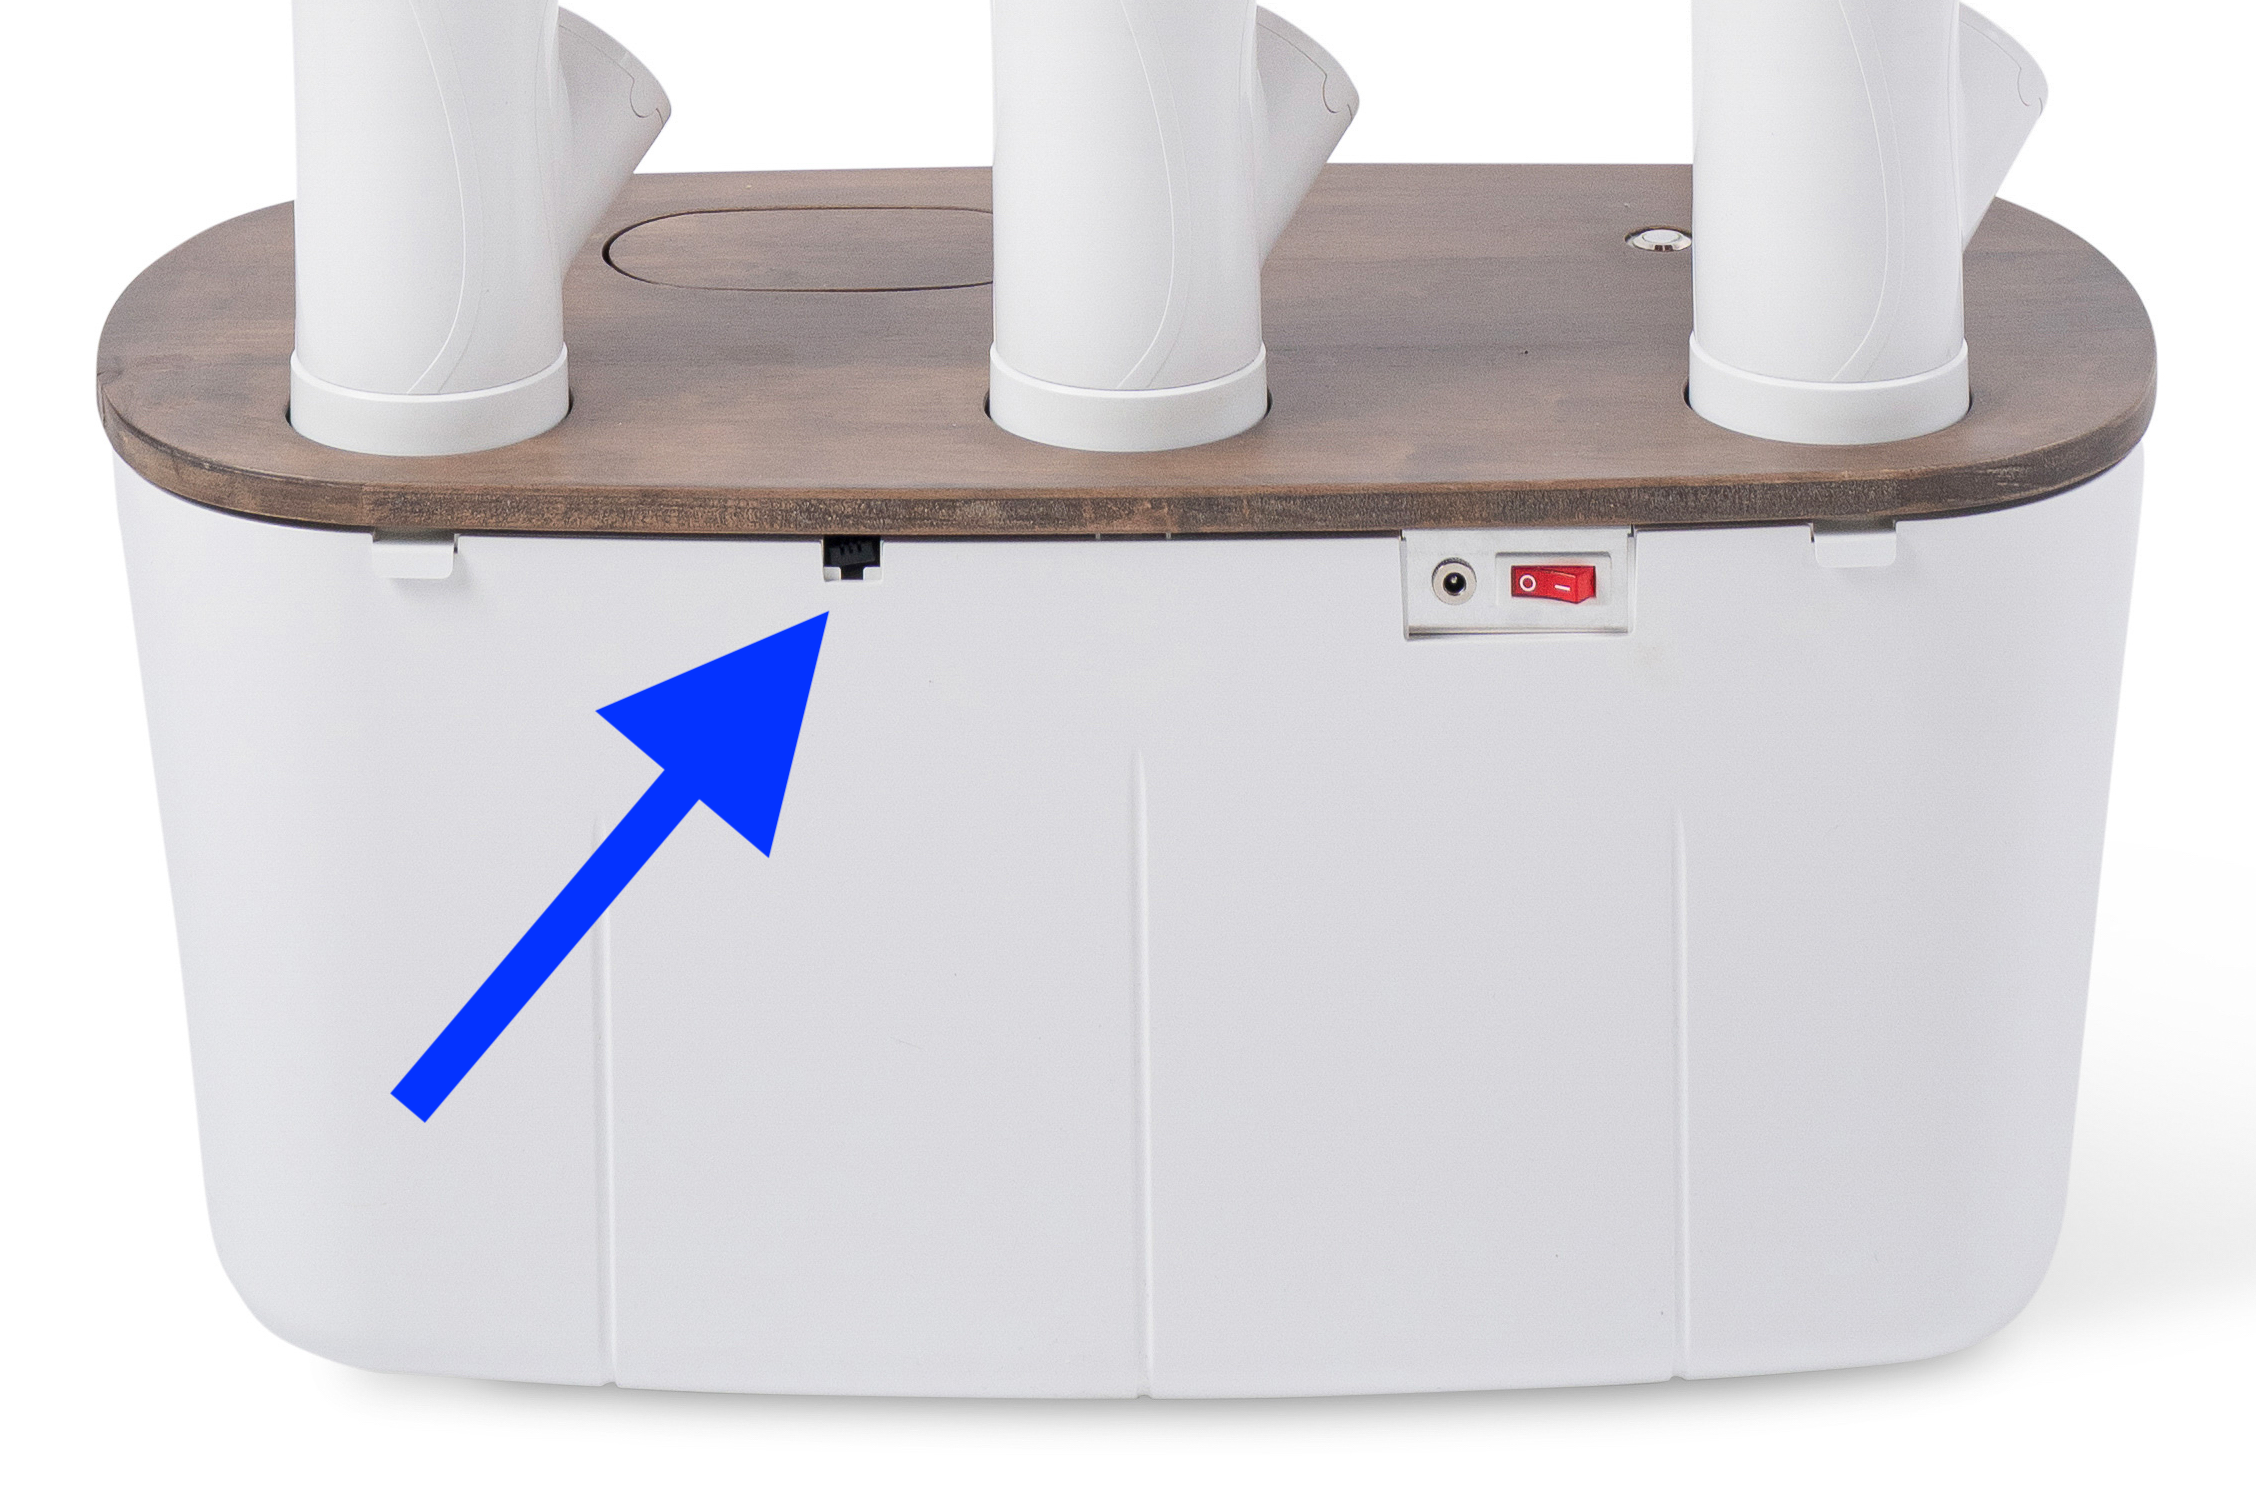
Pointing to the temperature/humidity sensor on the rear of a Gardyn Home (above) and Gardyn Studio (below)
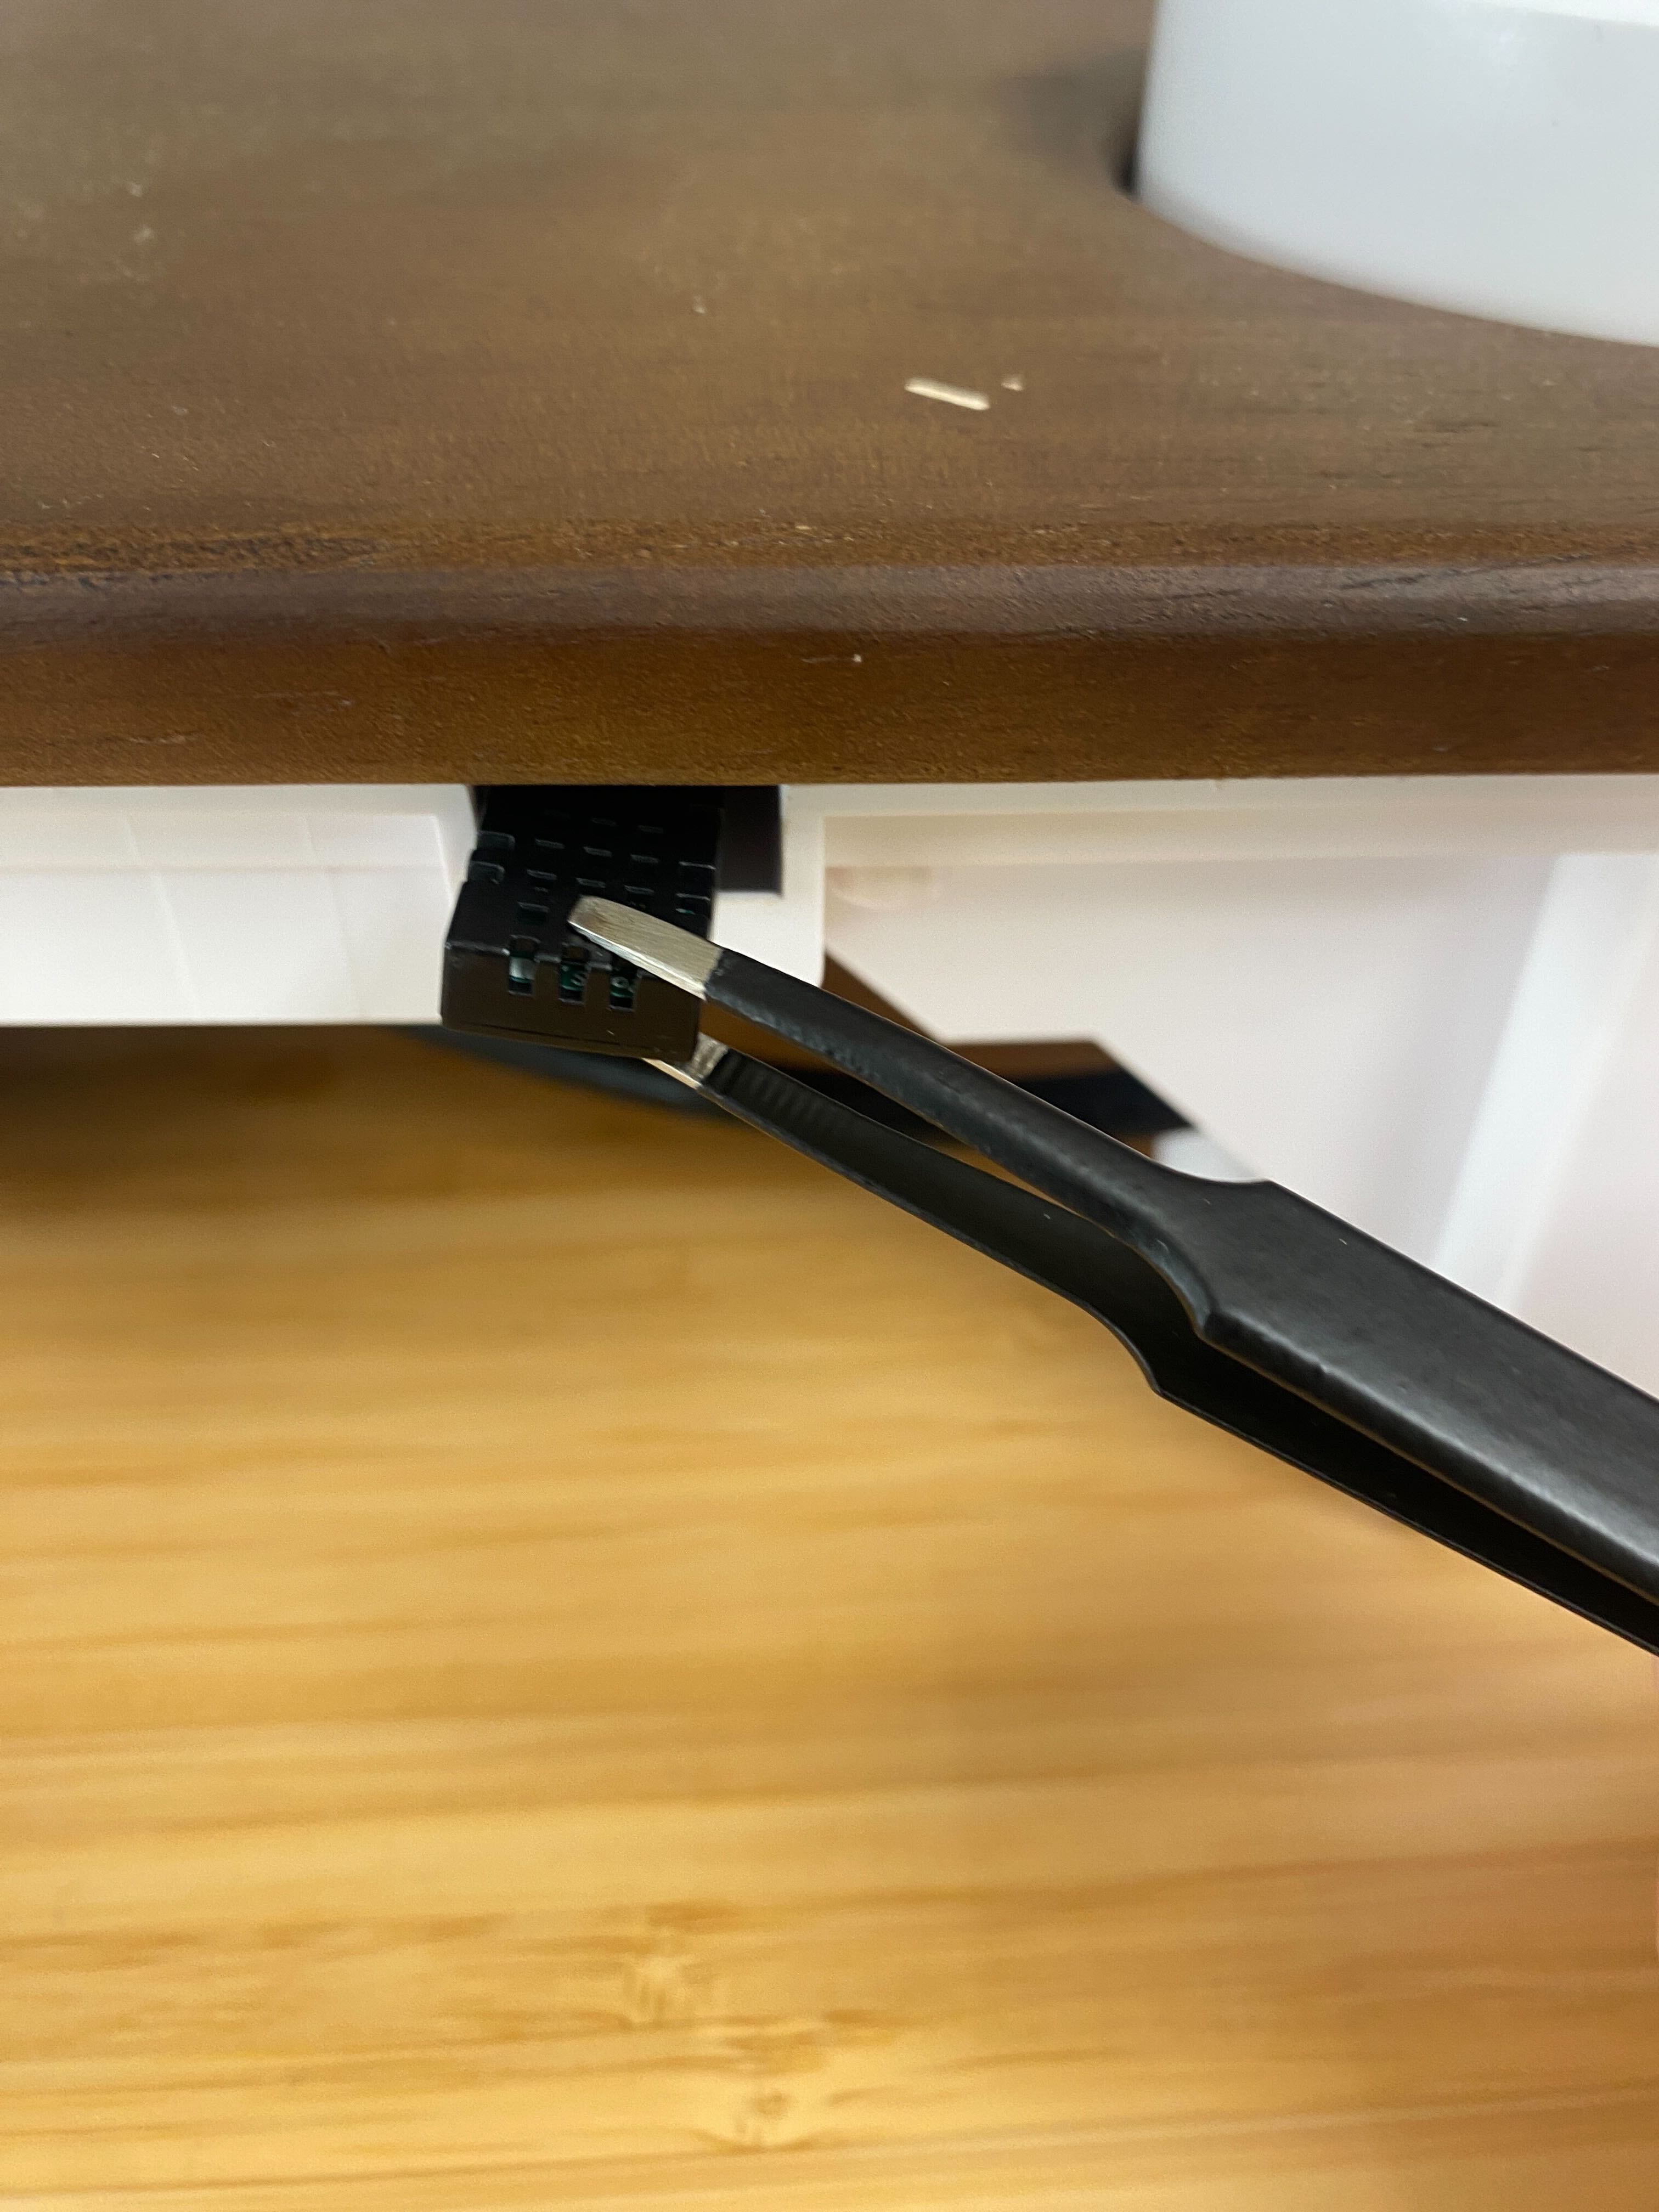
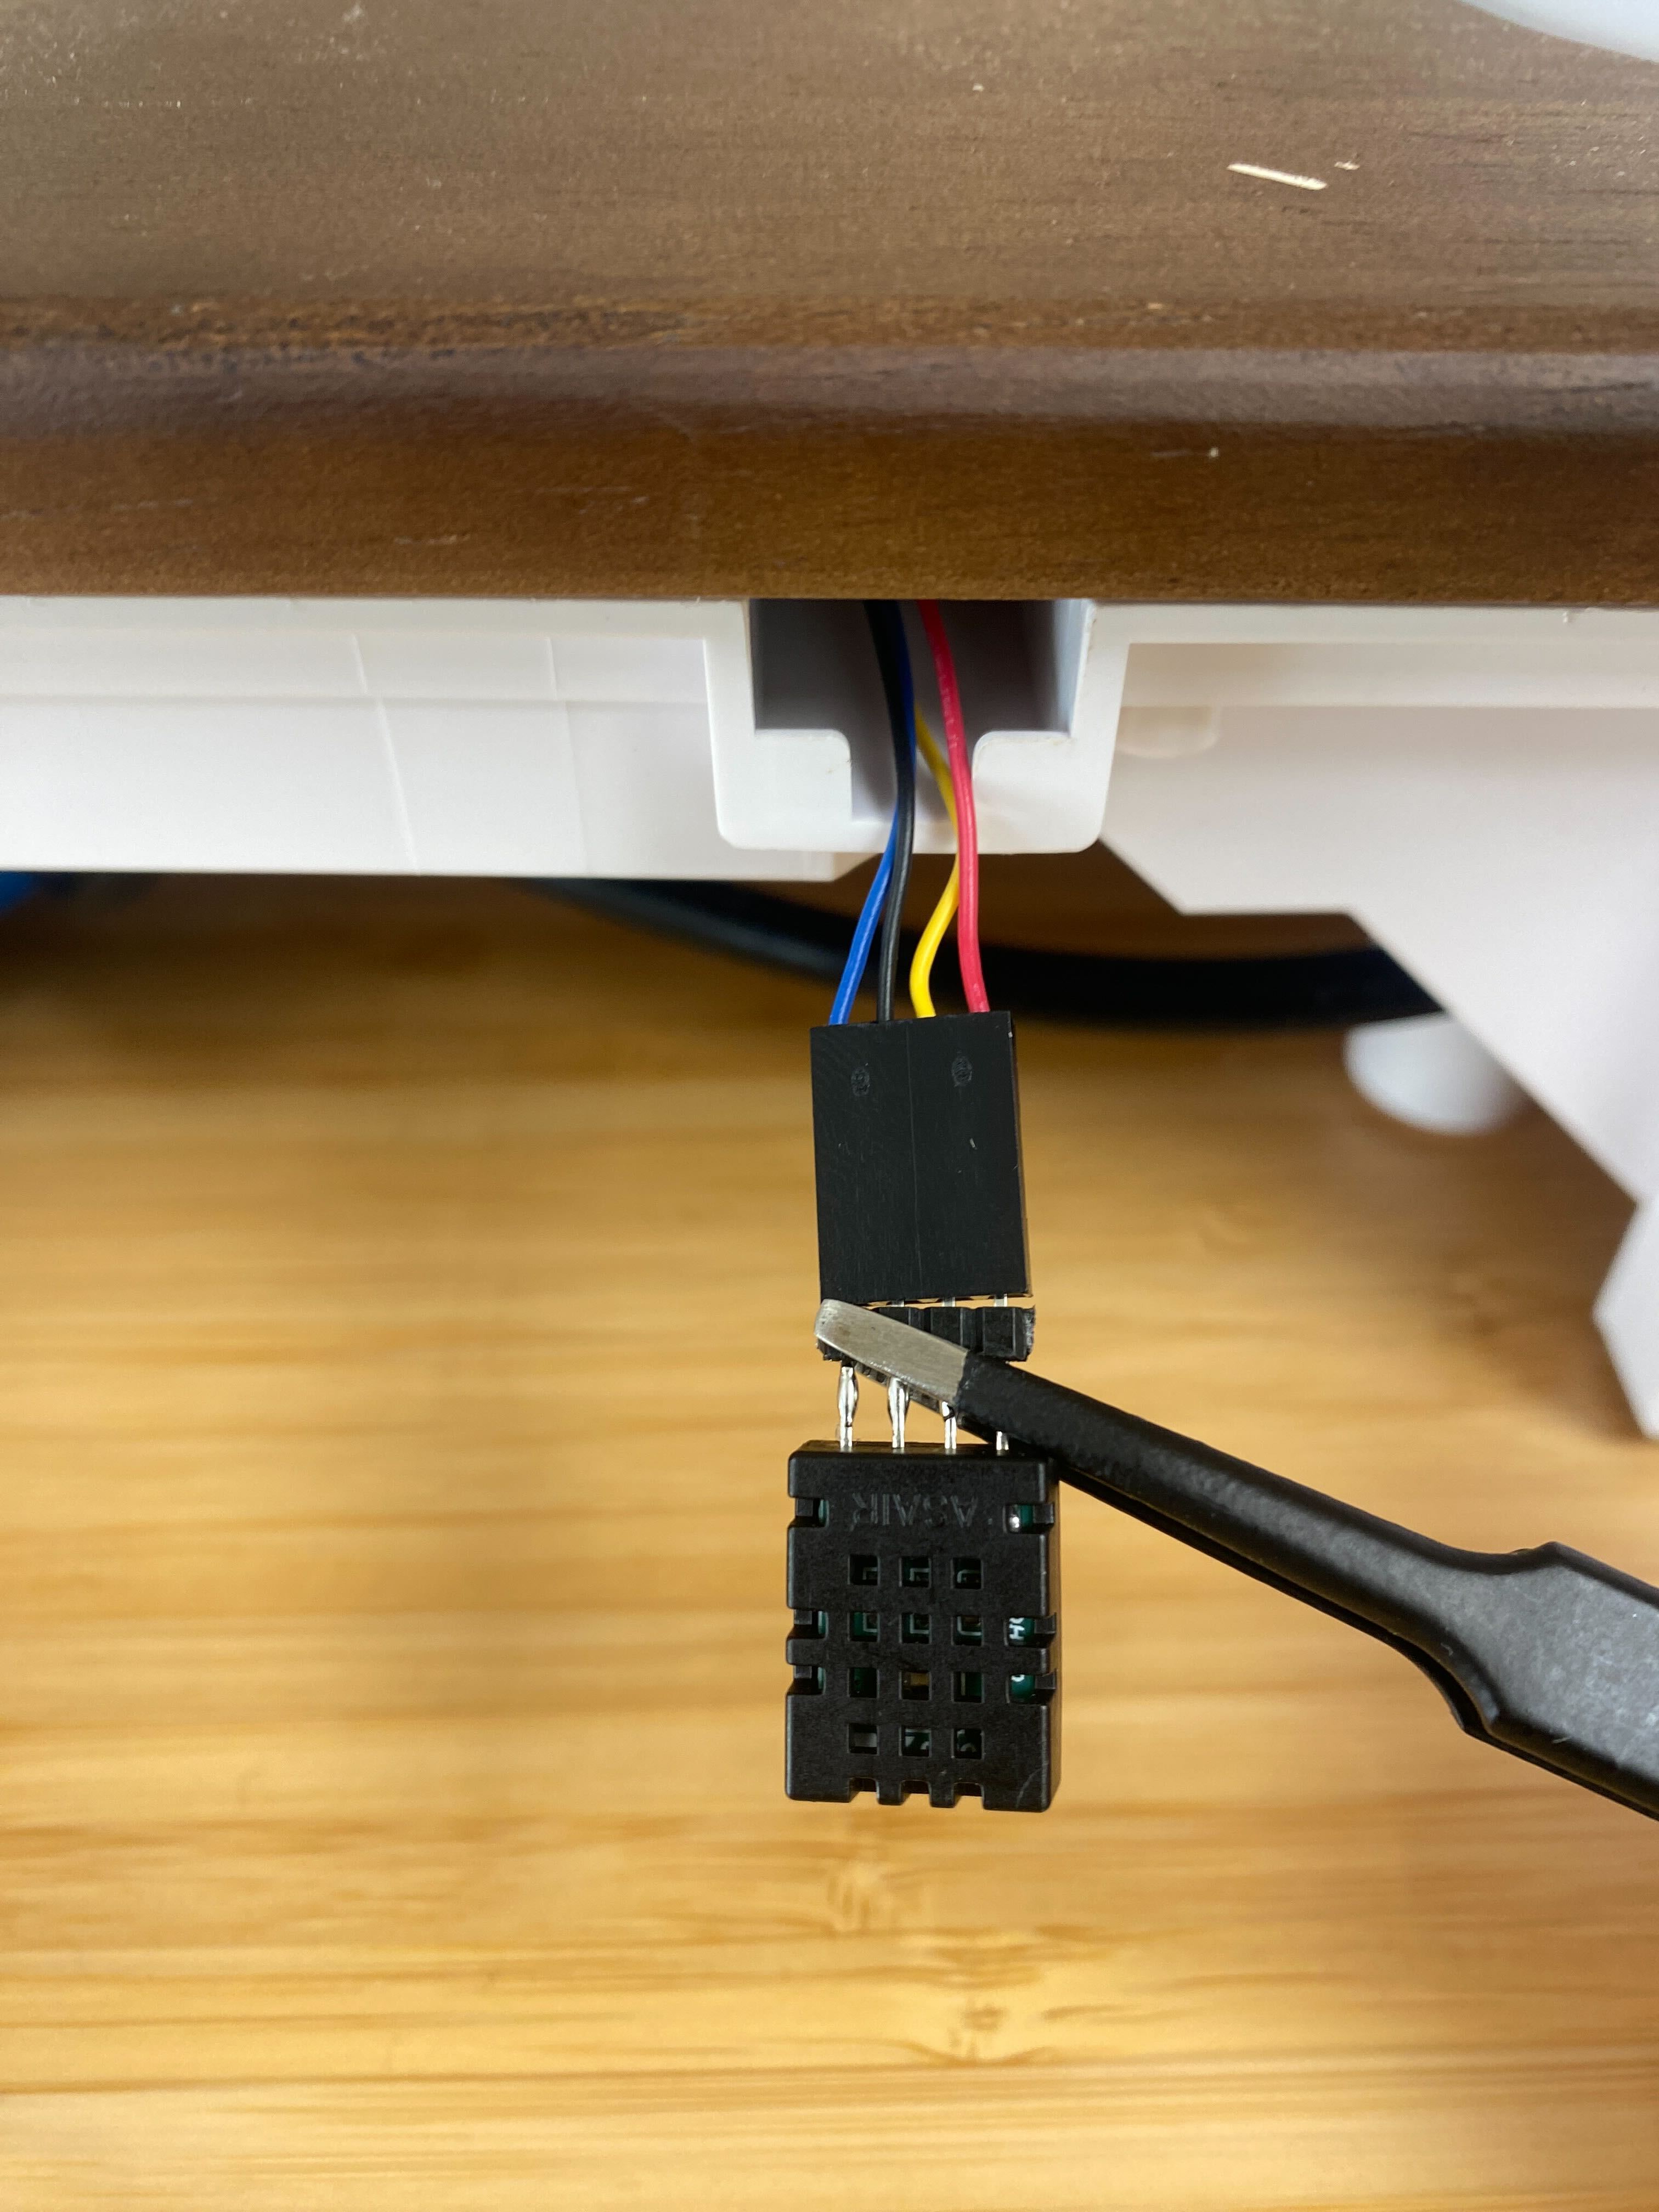
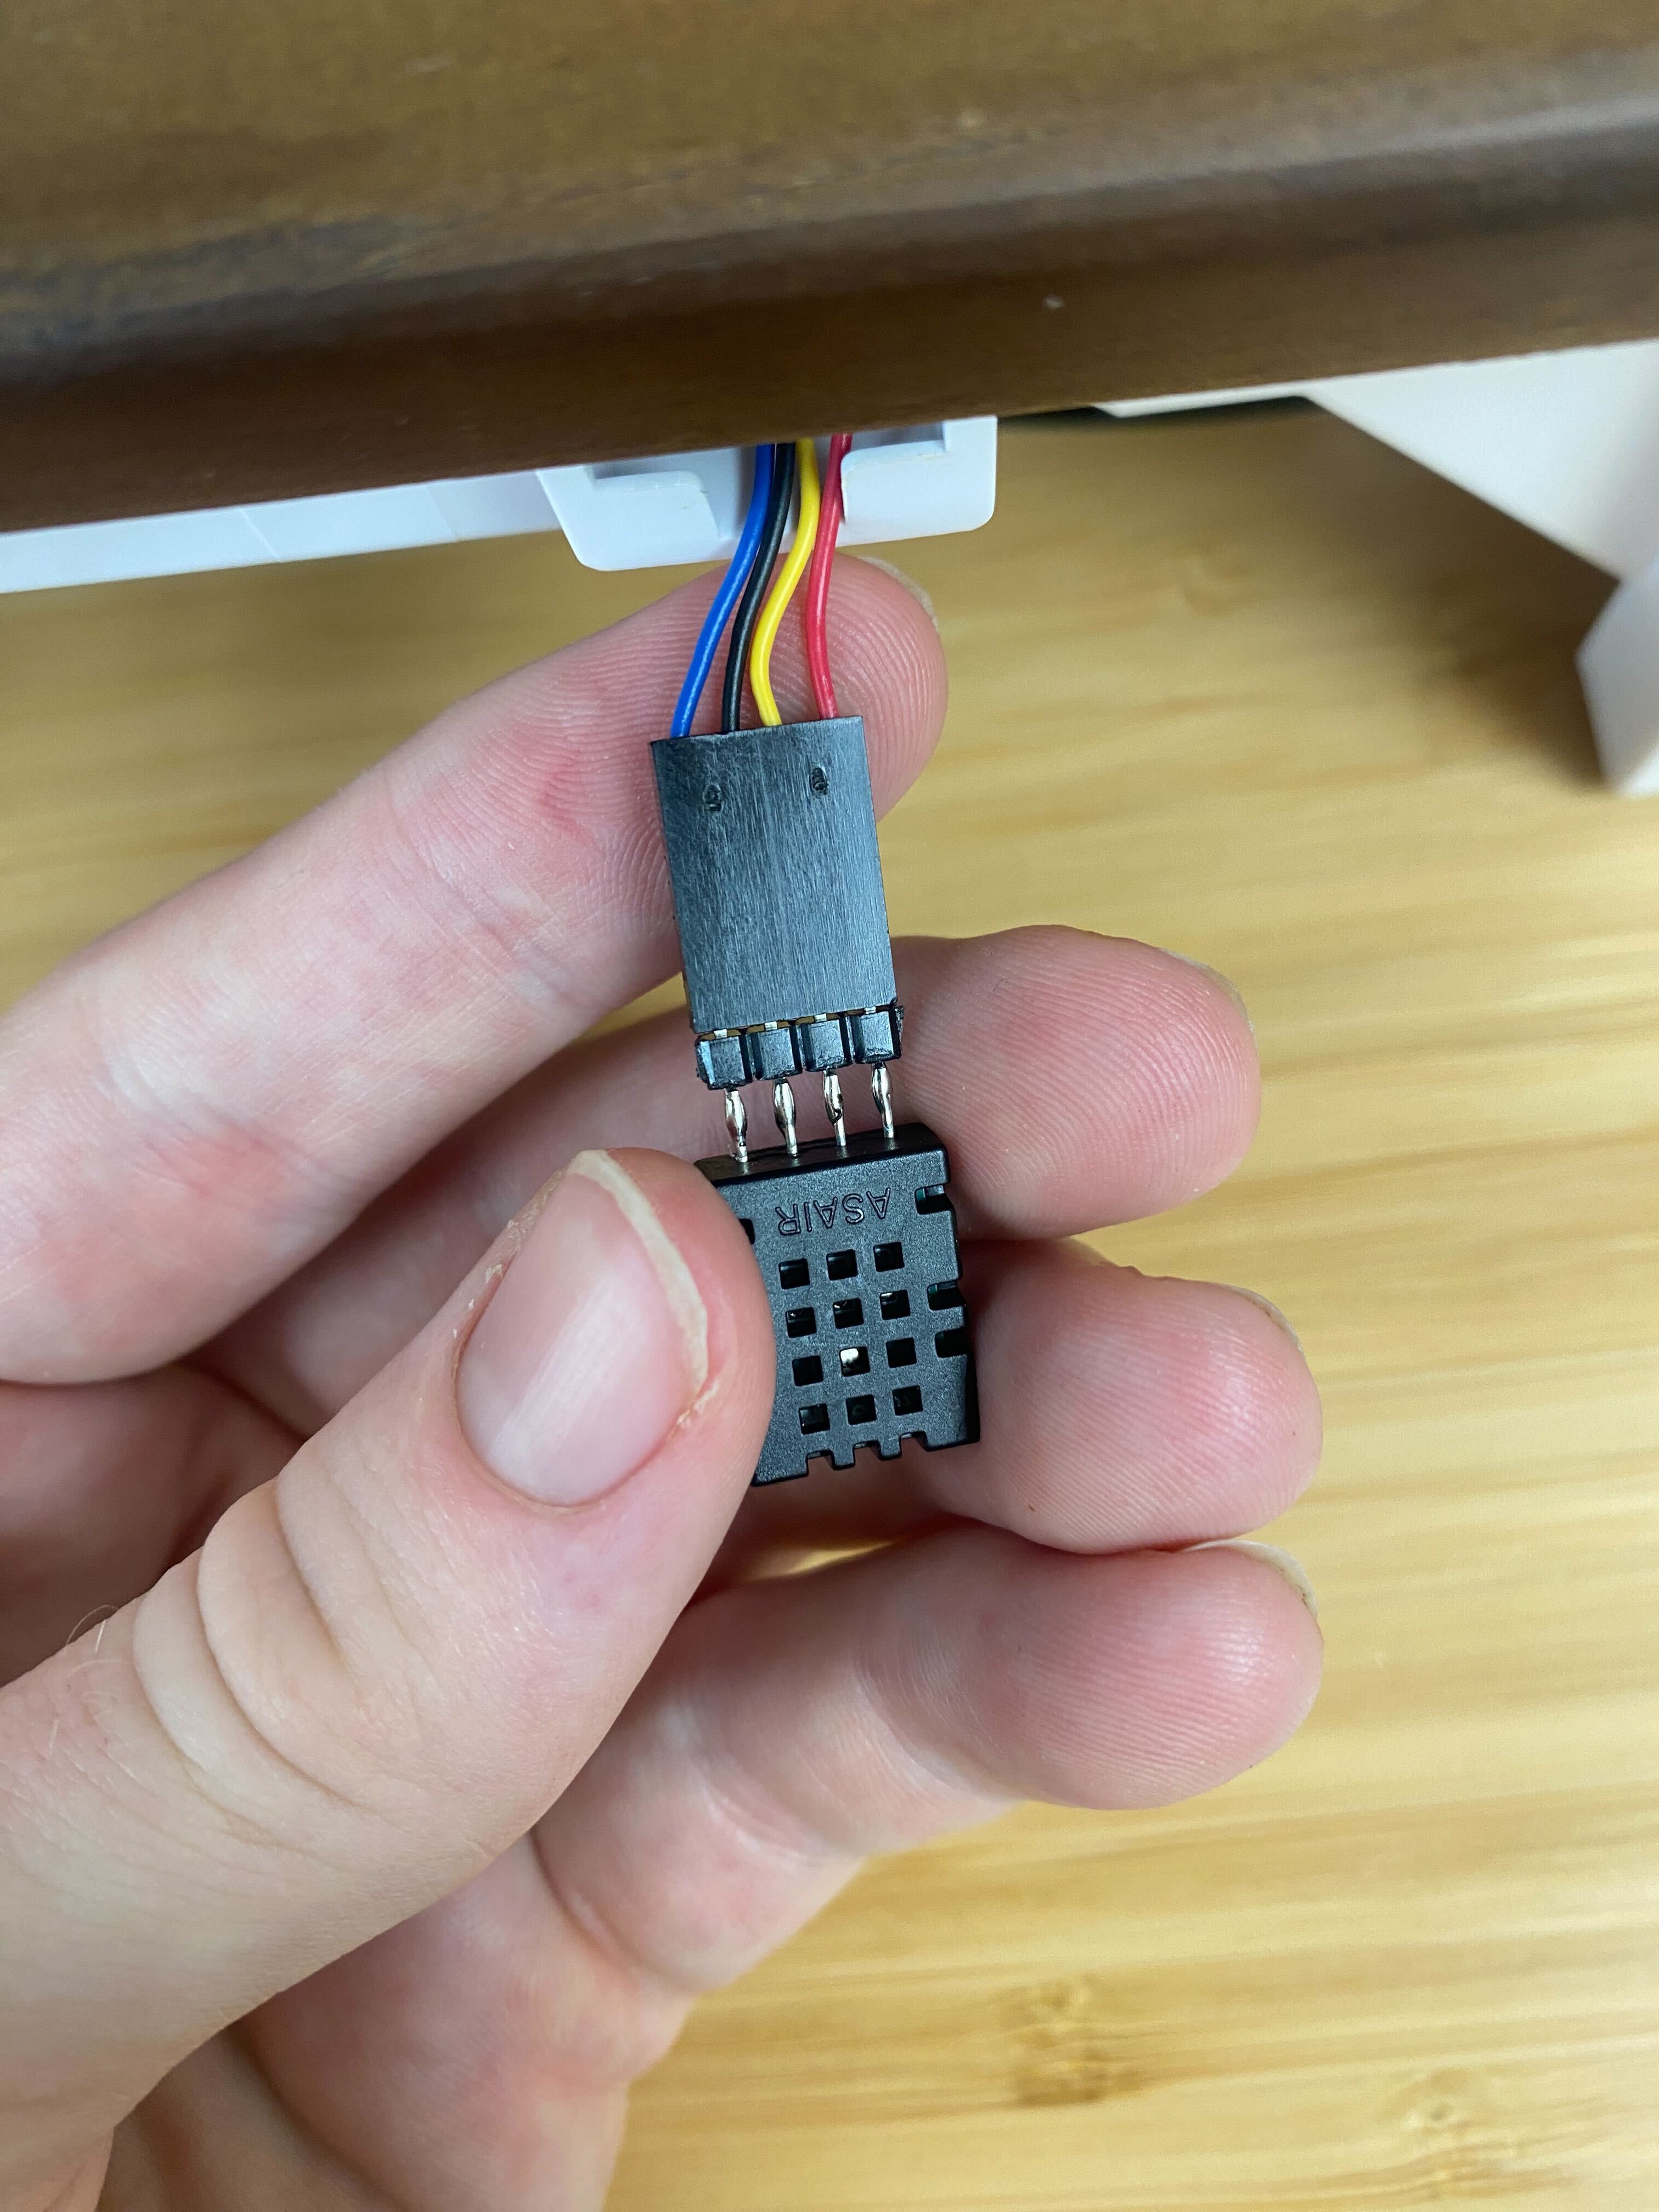
2. Carefully pull the sensor out using tweezers and replace the old sensor with your new one. When plugging in the new sensor, ensure you match the orientation as shown below with the side of the sensor with the holes facing you and the red wire on the right. Otherwise, you risk damaging your Gardyn!
3. Carefully place the new sensor back into its compartment in the lid, plug the power supply back in, and switch your Gardyn on. Allow your Gardyn ~5 minutes to fully power up and reconnect to WiFi.
4. Finally, in your Gardyn app, allow up to 1 hour for your new sensor's readings to register in the app.
If you're still experiencing issues with your temperature and humidity sensor after following all of these steps, please reach out to us at support@mygardyn.com so we can help solve the issue as soon as possible. We're here to help!